English | 23
Preparing the spray material
u When diluting, make sure that the spray material and
the diluting agent are compatible. When using a faulty
diluting agent, lumps can develop that can lead to clog-
ging of the spray gun.
u When diluting the spray material, make sure that the
flash point of the mixture is above 55°C again after di-
luting. Diluting substances such as solvent-based lac-
quers lowers the flash point.
u Note the specifications of the paint manufacturer re-
lating to sprayability, e.g. in the technical information
sheet or data sheet. Make sure that you do not spray
any paints that are not suitable according to the man-
ufacturer's specifications.
– Stir the spray material thoroughly.
Using spray material at room temperature will yield a bet-
ter spray pattern.
– Dilute the spray material if necessary.
If the spray test does not produce a good spray pattern,
dilute in 5% increments until an optimal spray pattern is
achieved.
Spray material Recommended
dilution
Wood preservatives, oils, glazes, impreg-
nations, water
0%
Solvent-dilutable or water-dilutable (re-
commended) lacquers, primers, anti-rust
primers, radiator lacquers, thick-coat
glazes
0–5%
Emulsion paints and latex paints (wall
paints)
At least 5%
Dilution table
Spray mater-
ial
[ml]
Diluting agent [ml] for dilution
5% 10% 15%
300 15 30 45
400 20 40 60
500 25 50 75
600 30 60 90
700 35 70 105
800 40 80 120
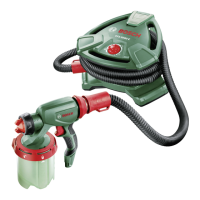
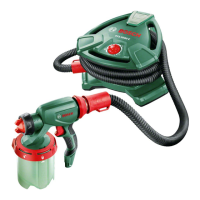
Filling the spray material (seefiguresC1–C2)
Note: Remove the air hose(20) before pouring in spray ma-
terial (quarter turn of the bayonet lock(21) anticlockwise;
pull the bayonet lock (21) out of the port(9)).
– When using large buckets, pour the spray material into a
smaller transfer bucket(14) if necessary (e.g. 10l wall
paint into an empty 2.5 or 5.0l bucket).
– Hold the spray gun in place with one hand and
use the other hand to turn the container(7)
towards the open symbol.
– Pull the spray gun off the container(7).
– If you are using already opened spray material, place the
thoroughly cleaned filling sieve(13) on the container(7)
to hold back any lumps of paint when pouring in.
– Pour the spray material into the container(7) up to no
more than the 1000 mark.
– Put the spray gun on the container(7). Turn
the container(7) towards the close symbol
until you hear the lock ring(6) engage.
– Carry out a test-spray run on a test surface.
If the spray pattern is optimal, you can begin spraying.
or
If the spraying results are unsatisfactory or no paint is emit-
ted: (see "Troubleshooting", page26)
Starting Operation
u Pay attention to the mains voltage. The voltage of the
power source must match the voltage specified on the
rating plate of the power tool.
u Make sure that the base unit cannot draw in dust or
other contamination during operation.
u Make sure never to spray on the base unit.
u Stop spraying if fluid escapes from places other than
the intended nozzle during spraying, and restore the
spray gun to its proper condition. There is a risk of elec-
tric shock.
u Do not direct the fine-spray system against yourself,
other persons or animals.
Switching on (see figureD)
– Check whether the correct nozzle cap is fitted. (see
"Changing the nozzle cap (see figuresB1–B2)", page22)
– Plug the mains plug into a plug socket.
– Grasp the spray gun by the handle and point it at the tar-
get area.
– Switch on by pressing the on/off button(25).
– Set the on/off button(25) to the required application to
regulate the air flow (see "Setting the air flow (see
figureD)", page24).
– Pull the trigger switch(5) on the spray gun.
Note: Air always flows out at the air cap(2) when the base
unit is switched on.
Switching off
– Let go of the trigger switch(5) and switch off by pressing
the on/off button(25).
– Pull the mains plug from the plug socket.
Working Advice
Spraying (see figuresE–H)
Note: Pay attention to the wind direction when you are using
the power tool outdoors.
– Firstly, carry out a spray test and adjust the spray pattern
and the spray material quantity according to the spray
material.
For adjustments, see the following sections.
Bosch Power Tools 1 609 92A 686 | (17.06.2021)