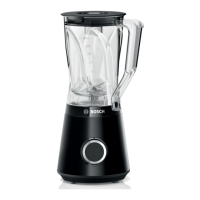
en Basic operation
34
8. Add the food to the blender jug.
→Fig.
5
Observe the minimum and max-
imum processing quantities.
→"Overview of recipes", Page37
9. Insert the measuring jug in the lid
and place the lid on the blender
jug.
→Fig.
6
The and markings must
match up.
10.Turn the lid in the direction until
it clicks into place.
→Fig.
7
The lid must be completely closed.
a The colour of the lock indicator for
the lid changes from red to green.
11.Insert the mains plug.
12.Set the rotary switch to .
→Fig.
8
a The status display (LED) on the
rotary switch lights up.
13.Set the rotary switch to the recom-
mended speed.
→Fig.
9
14.Process the ingredients until you
achieve the required result.
15.To end the operation, set the rotary
switch to .
Using instantaneous switch-
ing
1. Set the rotary switch to and
hold it there.
→Fig.
10
a The ingredients are processed at
maximum speed.
2. Release the rotary switch.
a The rotary switch jumps to .
a Processing stops.
Using programmes
Requirements
¡ The blade insert is installed.
¡ The blender jug has been attached
and locked.
¡ The blender jug is filled with the
food or ice cubes.
¡ The lid is attached and locked.
¡ The rotary switch is set to .
1. Set the rotary switch to .
→Fig.
8
a The status display (LED) on the
rotary switch lights up.
2. Press the or
programme button.
→Fig.
11
a While the programme is running,
the LED for the selected pro-
gramme lights up and the status
display (LED) goes out.
3. Wait until the appliance stops.
4. Set the rotary switch to .
→Fig.
12
Tip:To prematurely stop the pro-
gramme, set the rotary switch to .
5. "Empty the blender jug."
→Page35
Pushing down food for pro-
cessing
1. Remove the measuring jug and in-
sert the pusher into the filling
opening.
→Fig.
13
2. Push down the food from the sides
of the blender jug.
→Fig.
13
Adding more ingredients
1. During processing, remove the
measuring jug and add the ingredi-
ents through the opening in the lid.
→Fig.
14
 Loading...