2
|
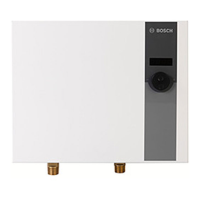
WH17, WH27, WH36 AE115, AE125, (FD108 and higher)
Data subject to change without notice | Printed in the USA | BTC 722002309 B | 05.2014
Bosch Thermotechnology Corp.
Example:
Water collected (gallons)
X 60 = gallons per minute
Time to fi ll (seconds)
2. Document your fi ndings in the Building and Installation
questionnaire.
Flow rates below 0.6 gpm on 17kW/36kW units and 0.8 gpm
on 27kW units, will not activate the water heater.
Flow rates above 2.5 gpm on 17kW units may cause
insuffi ciently warm water.
If flow rates were below 0.6 gpm on 17kW/36kW units and 0.8
gpm on 27kW units, check the inlet water screen:
1. Shut the water supply off to the water heater and open a
hot water faucet to relieve the pressure.
2. Remove the cold water supply line from the bottom of the
water heater.
3. Remove the inlet water screen from the cold water
connection, inspect, and clean it as required.
Heater bottomHeater
ottom
Figure 2
4. Install the inlet screen and attach the water line in
accordance with standard plumbing practices. Take care to
not get any pipe sealant inside the unit.
5. Document your fi ndings in the Building and Installation
questionnaire.
Checking for plumbing crossovers:
1. Keep water supply off to the water heater, isolating the hot
water side of the system.
Do not turn off the water supply to the whole house; only
to the water heater. If you do not have an isolation valve on
the water heater, you cannot perform this test.
2. Open ALL hot water taps and set all fi xtures to hot only.
3. Allow some time (approx. 5 minutes) for water to stop
running and pipes to drain. If pipes are drained you should
be able to place hand over end of faucet and feel no
pressure.
4. If any water continues to fl ow, you have found a crossover
and one of the following conditions could exist and must
be corrected:
― The most likely cause of this condition is that a mixing
valve has an internal leak allowing cold water to mix with
the hot. While this may not be causing the symptoms
at your water heater, it will certainly affect the ability
of the water heater to reach its maximum stated output
and can cause activation issues and temperature
fl uctuations.
― While unlikely, a cold water pipe could be connected to
a hot water pipe. If you have had some plumbing work
done recently and the symptoms coincide with the work
done, you may want to contact the person that did the
work.
5. Close all fi xtures and reopen water supply to the water
heater.
6. Document your fi ndings in the Building and Installation
questionnaire.
Step 3 – Visual inspection
Visual Inspection
1. Thoroughly inspect the water heater’s internal
components. Note the following:
― Burn or scorch marks on the PCB control on the
lower right side
― Burn or scorch marks on the triac boards on top of each
module. 27/36kW units have 2 traic boards on each
module
― Any signs of melted or damaged wires
― Cracks in plastic components
― Alignment of components
― Screw tightness
2. Document your fi ndings in the Water Heater questionnaire.
Check the flow transducer (Fig. 3):
1. With the water running at least 1 gpm (gallon/minute),
make sure the fl ow transducer is turning.
Tip: Use a fl ashlight to illuminate the fl ow transducer and
have someone turn the water on and off. Because the fl ow
transducer spins so fast, it is more likely you will see the
movement as it fi rst begins to spin and as it stops spinning.
2. Document your fi ndings in the Water Heater questionnaire.

 Loading...
