7. Plug-in your Smart Plug into a receptacle within range of your
WiFi router. The plug should power on within 20s. Once
powered, your Smart Plug will broadcast a WiFi signal and can
be found like any WiFi network.
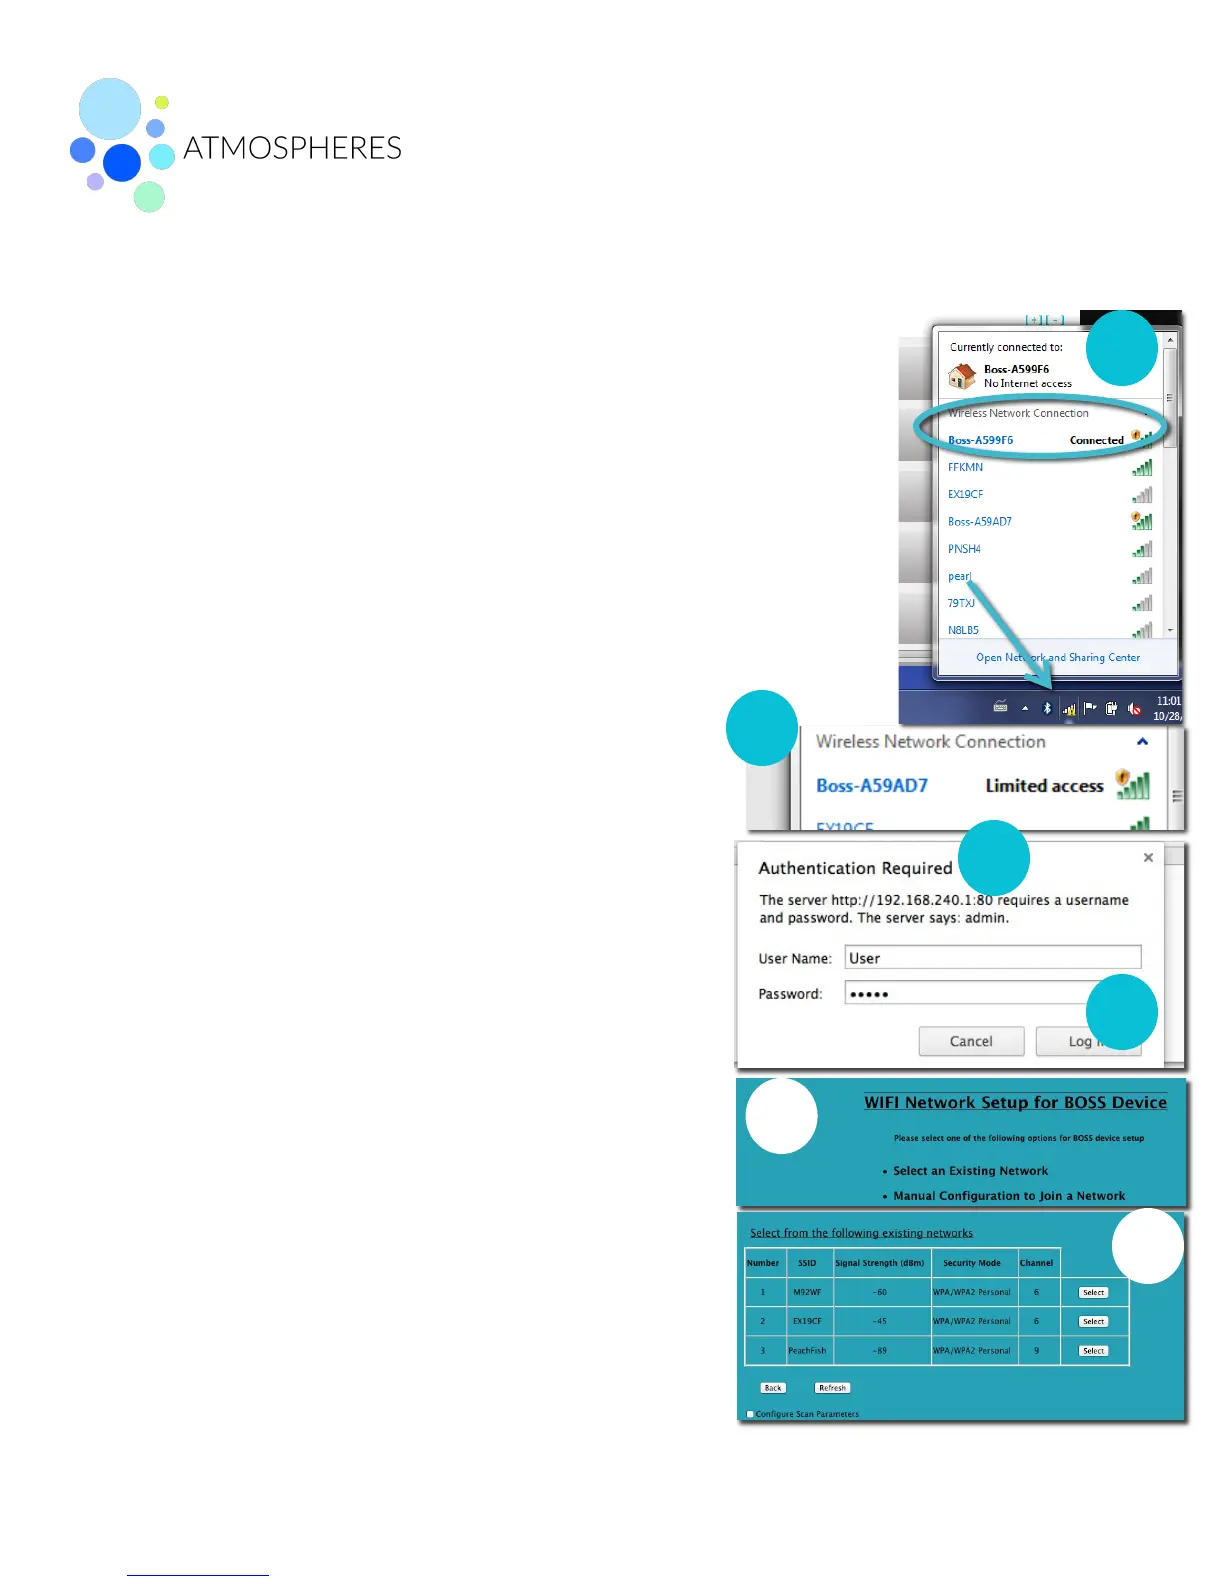
8. From your computer, select the BOSS - XXXXXX network from
your Available Wireless networks in the lower right corner of
your desktop. The XXXXXX matches the middle 6 characters of
your Smart Plug serial number. If you do not see the BOSS -
XXXXXX network in your network list, set your Smart Plug back
to Factory Default Mode (see above).
9. If you receive the message “Limited access” you
are not connected to the BOSS network. Repeat
step #8.
10. If Set Network Location pop up window appears,
select Public Network and click close. Do not
Select Remember My Credentials.
11. Once the BOSS - XXXXXX network is connected,
open your web browser.
12. Type http://192.168.240.1/bossprov.html into the
address bar. A pop-up window will appear
requiring authentication.
13. For user name, type in: user. For password, type
in the last 5 characters of the Smart Plug serial
number. Click OK.
14. If successful, you will land on a WiFi Network
Setup page. Click Select for the the desired
existing network.
15. From WiFi Network Setup Page, select your
network from the list of available networks.
 Loading...