Do you have a question about the Boss MR1950 and is the answer not in the manual?
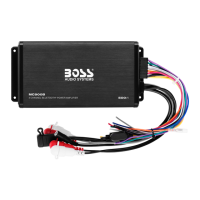
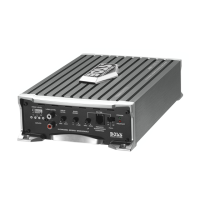
Provides an overview of the BOSS Marine MOSFET amplifier series and its features for marine audio.
Lists all items included in the package with the new amplifier for installation and use.
Details the key features and capabilities of the BOSS Marine amplifier for marine audio applications.
Explains the amplifier's ability to operate efficiently at 2 Ohm loads and the implications for power output.
Provides essential safety guidelines and handling instructions for using the amplifier.
Describes the amplifier's internal protection systems and how to address issues indicated by the PROTECT LED.
Outlines essential safety measures and considerations before installing the amplifier.
Explains the role of power fuses in protecting the amplifier and boat's electrical system.
Guides on selecting a suitable location and securely mounting the amplifier in a marine environment.
Provides instructions on how to make power, input, and speaker connections for the amplifier.
Details the preferred method for connecting audio sources using RCA cables for optimal performance.
Offers solutions for common operational and performance issues encountered with the amplifier.
Lists the technical specifications, performance metrics, and dimensions of the MR1950 amplifier.
Provides troubleshooting steps for when the amplifier fails to turn on.
Addresses issues where the protection LED indicates a fault condition upon powering up.
Steps to diagnose and resolve problems where the amplifier produces no sound.
Troubleshooting for situations where the amplifier's audio output level is too low.
Resolves issues where audio is only present in one speaker channel.
Diagnoses and fixes excessive noise or hiss emanating from the speakers.
Troubleshooting steps for when the audio output is distorted or unclear.
Addresses the cause of the amplifier getting excessively hot and potential solutions.
Troubleshooting for static-type noise interference originating from the engine.
Resolves alternator whine noise interference that affects the audio system.
Describes the amplifier's Class A-B audio amplification technology.
Explains the capability to bridge amplifier channels for increased power output.
Highlights the amplifier's ability to operate in stereo mode.
Details the use of MOSFET PWM technology for the power supply.
Explains the amplifier's stable operation at 2 Ohms, resulting in increased output power.
Describes built-in protection against overheating and speaker short circuits.
Details the soft turn-on feature to prevent power-up thumps.
Explains the functionality of the remote turn-on and turn-off circuit.
Describes the function of the variable input gain control for adjusting sensitivity.
Explains the use of variable low and fixed high pass crossovers for audio tuning.
Details the adjustable bass boost feature for enhancing low frequencies.
Highlights the exclusive coating on the PCB to prevent humidity damage.
Describes the function of the LED power and protection indicators.
Mentions the silver heatsink for thermal management.
Explains the feature for remotely adjusting the subwoofer volume level.
Illustrates the wiring diagram for the amplifier in five-channel mode.
Shows the wiring configuration for operating the amplifier in bridged mode.
Warns against self-repair due to dangerous voltages and refers to qualified technicians.
Advises to keep the unit dry and unplug immediately if it gets wet to avoid shock or damage.
Instructs to unplug and seek service if smoke or unusual odor is detected during operation.
Emphasizes the danger of high internal voltages and the absence of user-serviceable parts.
Lists conditions like input overload, short circuit, or high temperatures that activate protection.
Explains that the PROTECT LED indicates the amplifier has entered self-preservation mode.
Guides on checking system conditions and resetting the amplifier when the PROTECT LED is on.
Advises careful investigation of the vessel's layout before drilling or cutting, especially near fuel or wiring.
Stresses the importance of securely mounting all audio components to prevent damage.
Warns against unprotected, pinched, or metal-contacting wire connections.
Instructs to disconnect the battery and turn off equipment before making power connections.
Specifies using only identical fuses for replacement to avoid damage or voiding warranty.
Explains that power fuses protect the amplifier and boat's electrical system from fault conditions.
Emphasizes using the exact same type and rating of fuse for replacement to prevent fire or damage.
Recommends low-level RCA input wiring for best audio performance, using high-quality cables.
Diagram showing RCA connections for the amplifier with a 5-channel audio input source.
Diagram illustrating RCA connections for the amplifier with a 4-channel audio input source.
Instructions for connecting the ground terminal to the closest chassis point using 8 gauge wire.
Guidance on connecting the remote terminal to the head unit's remote output using 16 gauge wire.
Steps for connecting the 8 gauge cable from the battery's inline fuse holder to the amplifier.
Options for wiring multiple amplifiers, either with individual fuses or a distribution block.
Clarifies that the input level control matches audio source to amplifier input, not volume.
Advises not to adjust input level to maximum unless necessary to prevent overload or distortion.
Warns that ignoring instructions can lead to input overload, distortion, or protection circuit engagement.
Finding a suitable location with sufficient air circulation for mounting the amplifier.
Techniques for marking screw locations, including for carpeted surfaces.
Instructions for drilling pilot holes before securing the amplifier with screws.