Maintenance 6322, 6324, 6326
3Bradley Corporation 8/31/06
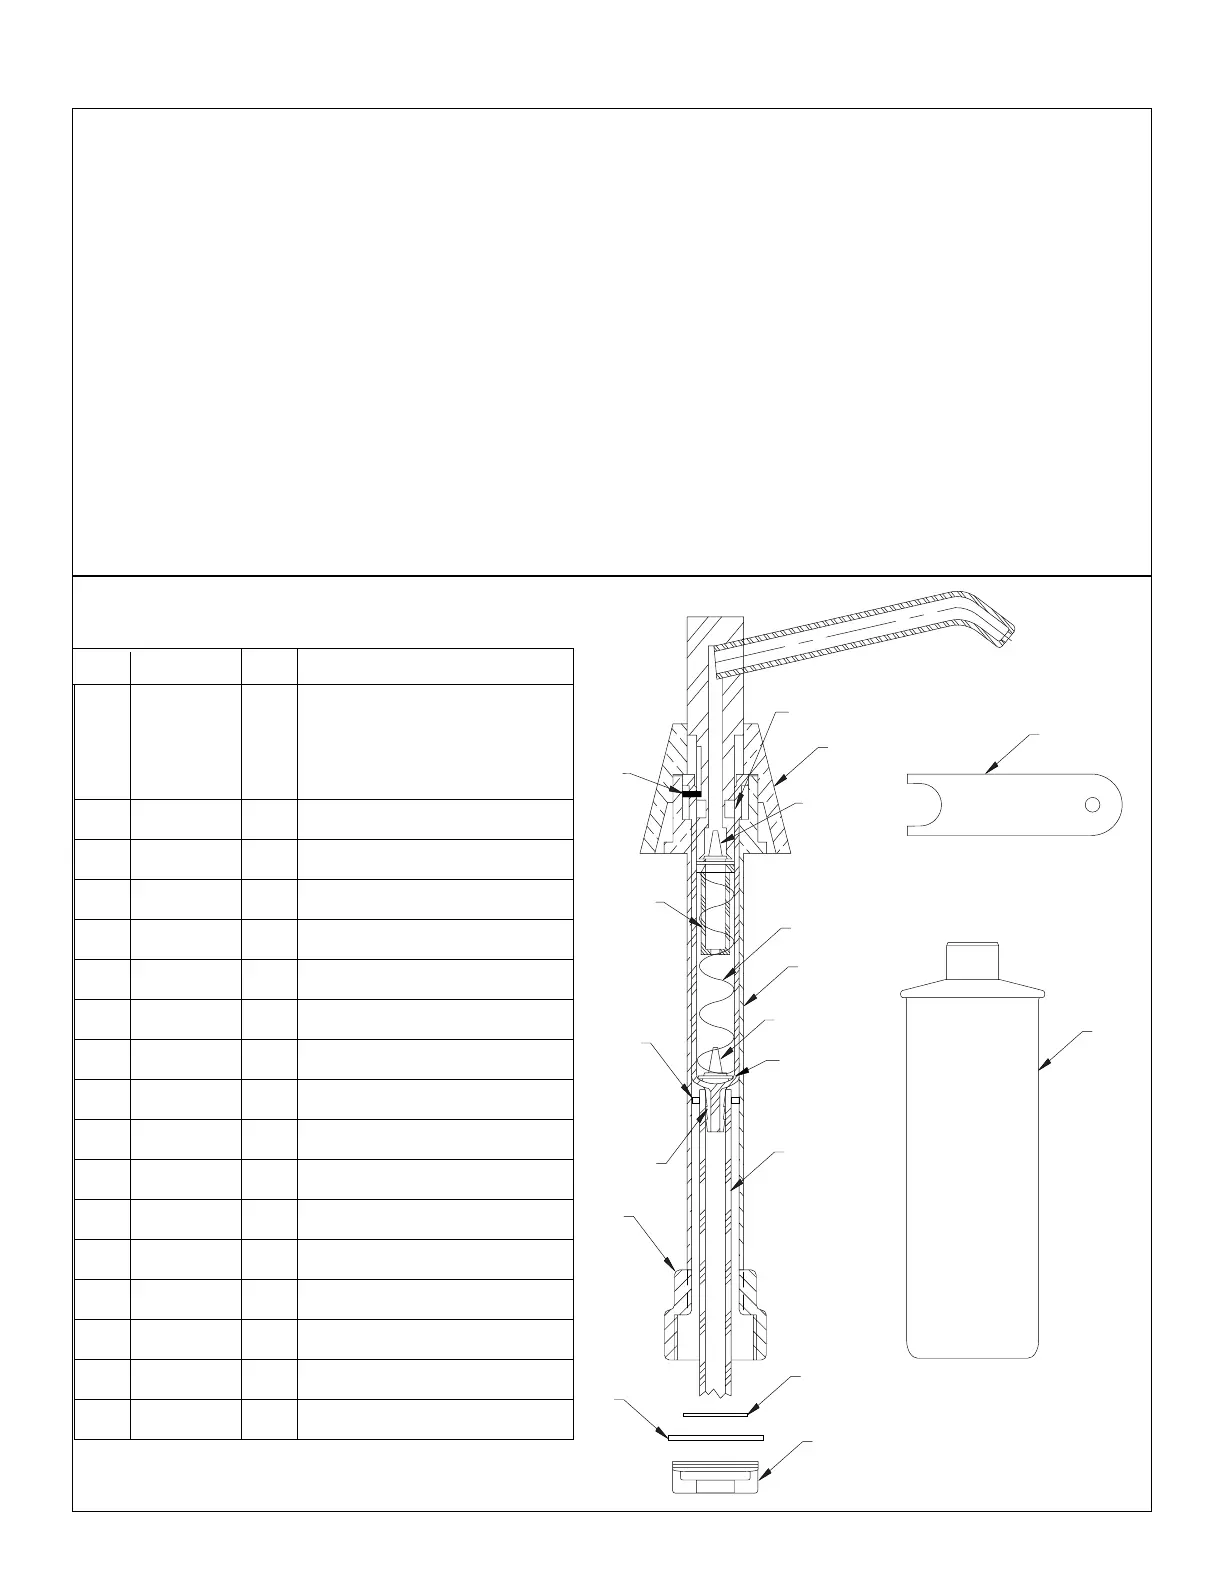
Service Repair Parts
Soap Valve Maintenance and Repair
Because many of the problems with soap dispensers are caused by a build-up of soap residue on the
internal components, it is recommended that an inoperative soap valve be disassembled, cleaned and
lubricated.
1. To disassemble the soap valve, first remove the escutcheon with the wrench provided, and then
remove the spout and plunger assembly from the shank.
2. Loosen the screw located in the metal ring on the cylinder.
3. After the screw is loosened, clean the internal parts of the soap dispenser using hot water and a
soft bristle brush.
4. Before reassembling the soap dispenser, apply a generous amount of silicone lubricant (such as
"Dow Molycote III") to the o-ring seal.
5. Finally, reassemble soap valve and replace the escutcheon.
1 P19-151 1 Metal Soap Container 16 oz.
P10-287 1 Plastic Soap Container 16 oz.
P19-119 1 Plastic Soap Container 32 oz.
2 P19-117 1 Adapter
3 P19-121 1 Wing Nut
4 P19-116 1 Shank
5 P19-110 1 Escutcheon
6 1 Washer, Steel
7 1 Cable Tie
8 1 Wrench
9 1 Washer, Neoprene
10 1 Supply Tube
11 1 Cylinder
12 1 Screw
13 1 Plunger Spacer
14 1 Compression Spring
15 1 O-Ring
16 2 Duckbill Check
17 1 Washer
Item Part No. Qty Description
NOTE: Items 6–17 are available
in Repair Kit P19-187.