12
ASSEMBLY INSTRUCTIONS (CONTINUE)
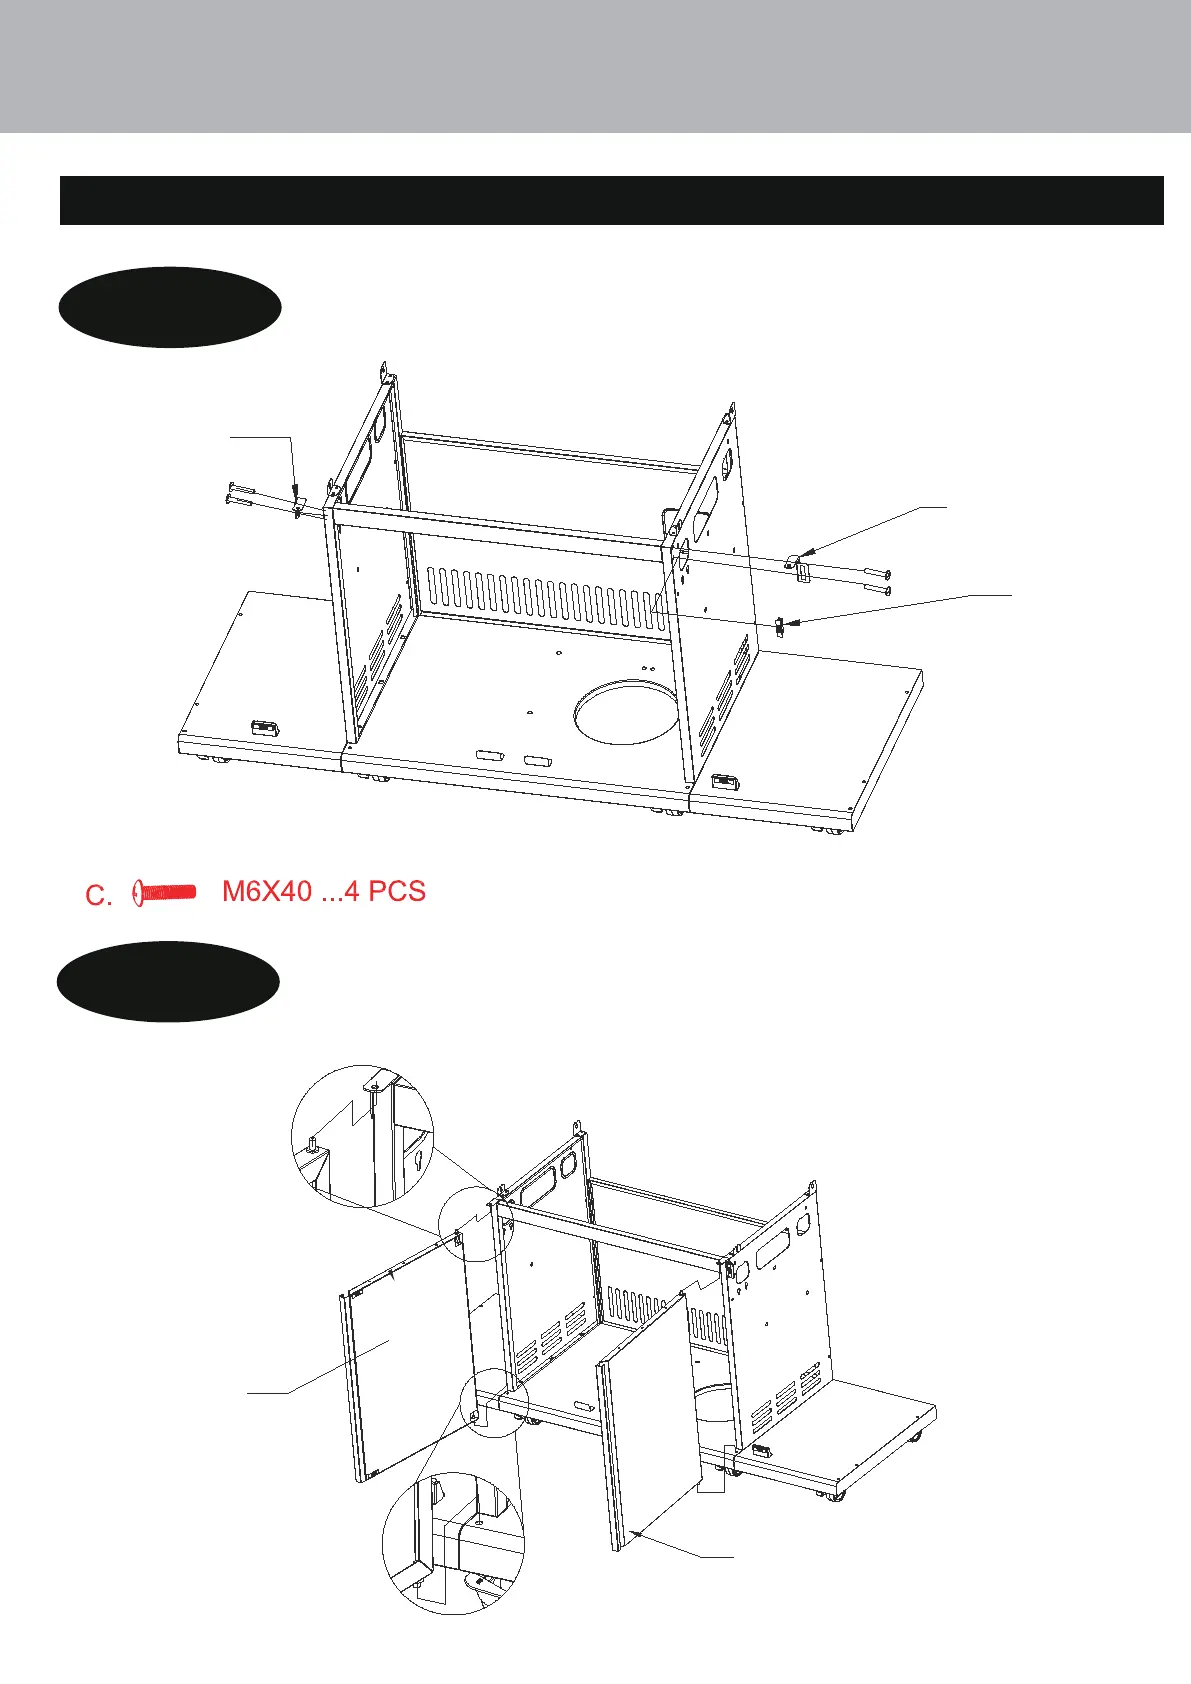
Step 7
a) Insert two screws (C) through Cart Frame Left Fixture (23) and Cart Left Side
Panel (19) into Cart Front Upper Beam (22) and tighten screws.
b) Repeat STEP a) for right side as shown in the diagram.
Step 8
pre-drilled hole found in Cart Bottom Panel (14).
a) Attach the Cart Left Door (26) by inserting the bottom xed door pin into
b) Next press the top spring door pin and slide into the Cart Frame Left Fixture (23).
c) Repeat STEP 8 a-b) for Cart Right Door (27) as shown in the diagram.
Figure 1
Figure 2
24
23
8
27
26