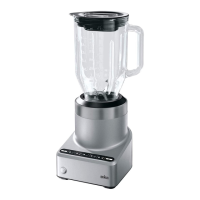
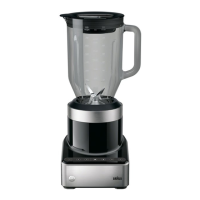
This document describes the Braun Jug Blender, model 4145 JB7192, a multi-functional blender designed for household use. The appliance is engineered to meet high standards of quality, functionality, and design, and is intended for processing normal household quantities of food.
Function Description
The Braun Jug Blender is a versatile kitchen appliance primarily used for blending, pureeing, and crushing ice. It features a motor body, a main jug, and a Smoothie2Go attachment, each with its own blade assembly. The blender operates with various speed settings and pre-programmed modes, including a pulse mode for controlled chopping and a crush ice mode for automatic ice crushing at staggered intervals.
Important Technical Specifications
The main jug has measurement markings in US cups, ml, and fl oz, with a maximum capacity of 1600 ml (7.0 US cups / 56 fl oz). The Smoothie2Go attachment includes a cup with a maximum capacity of 300 ml (10 oz). The appliance operates only when the jug or Smoothie2Go attachment is correctly assembled on the power base and the lid is securely in place. The motor body features an On/Off button, a pulse button, speed selection buttons (1-5, from low to high speed), and a crush ice button. It also has a cord storage compartment at the bottom.
Usage Features
General Operation:
Before first use, all parts should be cleaned as per the "Care and Cleaning" section. The required length of the power cord can be uncoiled from the storage compartment (11) at the bottom of the motor body. The blender will only operate after the On/Off button (7) is pressed, followed by selecting the desired speed or mode. The appliance automatically stops blending after 2 minutes of processing time, indicated by flashing lights (8, 9, 10). To restart, a speed button must be pressed again.
Blending with the Jug (A):
- Assembly: Ensure the blade gasket (5a) is positioned on the inside rim of the blade group (5b). Carefully place the blade group into the locking ring (5c). Screw the blade assembly (5) to the jug (4) clockwise until it is secure.
- Operation: Turn off the appliance. Position the line on the locking ring (5c) in front of you and push the jug down until it is securely locked, with the handle on the right or left side of the motor body. Add liquid ingredients first, followed by solid ingredients, to ensure uniform blending and prevent motor stress. Firmly place the complete lid (1, 2, 3) on top. Plug in the power cord. Turn on the appliance by pressing the On/Off button (7); indicator lights (8, 9, 10) will flash. Select a pre-programmed speed to start.
- Adding Ingredients: Stop the blender when adding more ingredients, ensuring the lid and measuring cap are replaced. Liquids can be added through the drip hole in the measuring cap during operation.
- Finishing: Press the pre-programmed speed button when finished. To switch off, press the On/Off button and unplug the blender before removing the jug.
Blending with the Smoothie2Go Attachment (B):
Note: This attachment (12) is specifically for preparing drinks and smoothies and must only be used with its special blade group (13b). It should not be used for blending hot foods, carbonated liquids, or food supplements. For protein shakes with powder and liquids only, the main jug should be used.
- Assembly: Ensure the blade gasket (13a) is positioned on the inside rim of the blade group (13b). Hold the blade group at the coupling from underneath and place it upside down in the cup (12c). Screw the locking ring (5c) to the cup (12c) clockwise until it is secure.
- Operation: Turn off the appliance. Fill the cup (12c) with ingredients, adding solids first, then liquids (reverse order compared to the main jug). Carefully place the blade group with gasket onto the cup. Screw the locking ring clockwise until secure. Turn the cup upside down, position the line on the locking ring (5c) in front of you, and push the cup down until it is securely locked. Plug in the power cord. Turn on the appliance by pressing the On/Off button (7); indicator lights (8, 9, 10) will flash. Select a pre-programmed speed to start.
- Finishing: Press the pre-programmed speed button when finished. To switch off, press the On/Off button and unplug the blender before removing the Smoothie2Go attachment. Pull the cup straight up to remove it from the base. Turn the cup upright and remove the blade assembly by twisting it counterclockwise. To remove the blade group from the locking ring, push with both thumbs from inside the ring until it snaps out.
- Attaching Lid: To attach the lid (12a) to the cup, ensure the gasket (12b) is inside the rim of the lid (12a) and twist clockwise. Carefully close the drinking spout.
Speed Selection (9):
Start blending by pressing one of the speed buttons. The indicator light of the selected function will glow, and others will turn off. Speeds can be changed by pressing a higher or lower speed button. To stop blending, press the selected speed button again.
Pulse Mode (8):
Used to break apart larger food pieces or control food texture. Activated by pressing the pulse button (8); the indicator light will glow, and speed program lights will flash. Start pulsing by holding a speed button (9) for the desired duration. To finish, press the pulse button again. Note: Pulse mode does not work with the crush ice feature.
Crush Ice Mode (10):
Press the crush ice button (10) to begin. The indicator light will glow. The blender will automatically cycle through a pre-programmed time and stop. To stop early, press the crush ice button again.
Blending Hot Ingredients:
Caution: Blending very hot ingredients can cause hot liquid and steam to be forced past the lid, leading to injury.
- The complete lid (including gasket and measuring cap) must be placed on the jug.
- Do not fill the jug beyond 700 ml for hot foodstuff.
- If preparing larger amounts, ingredients must cool to room temperature, and the jug must not be filled beyond 1300 ml.
Best Results Tips:
- Cut solid ingredients into small pieces.
- Always start with solid ingredients and a small amount of liquid, gradually adding more liquid.
- When pureeing solids, feed small portions gradually.
- If blending stops or ingredients stick, more liquid may be needed.
- Use pulse mode for solid or viscous ingredients to prevent blade stagnation.
- For small amounts, use a low speed.
- Oil can be added through the measuring cap's drip hole for mayonnaise.
- Do not store food or liquids in the jug.
- Avoid bumping or dropping the blender during operation.
- Keep your hand on top of the lid during operation.
- Do not fill the jug beyond 900 ml for milk-based drinks.
Maintenance Features
Care and Cleaning (C):
- Motor Body (6): Disconnect power before cleaning. Do not immerse in water or any other liquid. Wipe the motor body, control panel, and power cord with a damp or dry cloth only. Do not use abrasive cleaners or scouring pads.
- Jug and Smoothie2Go Attachments: Ensure the jug is empty before unscrewing the locking ring. Handle blades with caution. All detachable parts, including the Smoothie2Go attachments, are dishwasher-safe. Parts can also be hand-washed with hot, soapy water, then rinsed and dried thoroughly. For efficient cleaning of lids and blades, remove the gaskets (3/12b, 5a/13a).
Troubleshooting Guide:
- Blender does not operate: Check if the jug is attached properly. The jug handle should be on the right or left side of the motor body.
- Jug is leaking: Check if the gasket is loose, torn, or not mounted properly and in the right order.
- Liquid splashing out of the jug: Check maximum quantity recommendations. Check speed recommendations; the selected speed may be too high.
Disposal:
Do not dispose of the product with household waste at the end of its useful life. Disposal can be done at a Braun Service Centre or appropriate collection points in your country.
Warranty:
The product comes with a two-year warranty from the date of purchase. Warranty claims require proof of purchase (invoice) and must be submitted to an authorized Braun Service Station. The warranty does not cover damage from improper use, normal wear and tear, or repairs by unauthorized personnel.