Do you have a question about the Braun 740s-6 and is the answer not in the manual?
Safety precautions for using the shaver and its accessories.
Detailed explanation of the shaver's parts and components.
Instructions and recommendations for charging the shaver.
How to interpret shaver indicators for battery level and status.
Adjusting shaver modes for different skin sensitivities and preferences.
Advice and steps for achieving optimal shaving results.
Instructions on using shaver features like lock switch and trimmer.
Guide on how to clean the shaver after use.
Information on keeping the shaver in optimal condition, including cassette replacement.
Guidelines for responsible disposal of the product and battery.
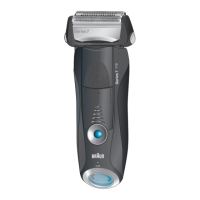
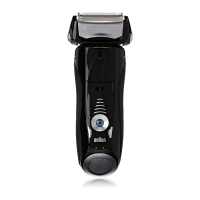
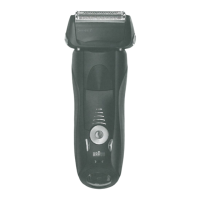
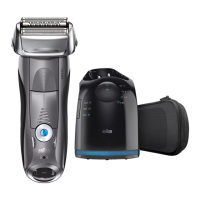
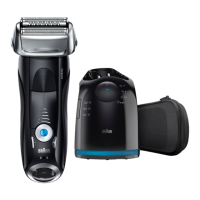
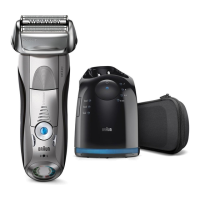
The Braun Series 7 740s-6 Wet & Dry shaver is designed to provide a high-quality, comfortable, and efficient shaving experience. This manual outlines its functions, usage, and maintenance to ensure optimal performance and longevity.
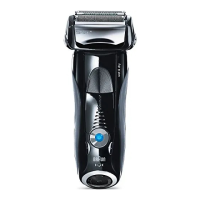
The shaver is equipped with a Foil & Cutter cassette (1) where the foil and inner blades are integrated into a single unit, ensuring precise cutting. For easy removal of this cassette, there's a Cassette release button (2). The Shaver head "lock" switch (3) allows you to fix one side of the foil, making it easier to shave difficult-to-reach areas. A Pop-out long hair trimmer (4) is integrated for styling sideburns, moustaches, and beards.
The shaver operates via an On/off switch (5). To personalize your shave, there are (-) setting button (sensitive) (6) and (+) setting button (intensive) (7) which adjust the shaver head's oscillation width to suit different skin types and beard densities. The Reset button (8) is used to reset the counter after replacing the Foil & Cutter cassette. The Shaver display (9) provides information on the battery charge status and indicates when the Foil & Cutter cassette needs replacement. For charging, there's a Shaver power socket (10) at the bottom of the unit.
The shaver comes with a Travel case (11) for protection and portability, and a Special cord set (12) for charging. A Brush (13) is included for cleaning, and Shaver oil (14) is provided for lubrication.
Charging: The shaver is designed for cordless operation and can be used immediately after purchase by charging it. To charge, ensure the shaver's On/off switch (5) is OFF. Connect the Special cord set (12) to the Shaver power socket (10) and then to an electrical outlet. A full charge takes approximately 1 hour and provides about 50 minutes of cordless shaving time, which may vary depending on beard growth. A 5-minute quick charge provides enough power for one shave. It's crucial to wipe any water from the electrical contacts before charging to prevent short circuits or other hazards. The recommended charging temperature is between 5°C and 35°C to protect the battery.
Shaver Display: The Shaver display (9) shows the battery charge status in three stages using green lights. During charging or use, the corresponding green light blinks. Once fully charged, all green lights illuminate continuously (if connected to power). If the battery capacity drops below 20%, a red light will flash, indicating enough power for 2-3 more shaves. After a few minutes of inactivity post-charging, the display enters stand-by mode and turns off.
Personalizing Your Shaver: The shaver offers personalized shaving settings to match your skin type and beard density. The (-) setting button (sensitive) (6) and (+) setting button (intensive) (7) allow you to adjust the shaver head's oscillation width. The On/off switch (5) pilot light indicates the current setting: dark blue for "intensive" (powerful shave), light blue for "normal," and white for "sensitive" (thorough comfortable shave, ideal for sensitive areas like the neck). To switch to "intensive," press the (+) button once. To switch to "normal," press the (-) button once. To switch to "sensitive," press the (-) button again. Pressing the (+) button from "sensitive" or "normal" will return it to "normal." The shaver remembers the last used setting when turned off and on again. For a fast shave over large areas, "intensive" is recommended. For sensitive areas like under the nose or chin, "sensitive" is advisable, while "normal" is suitable for other areas.
Shaving Tips: For best results, shave before washing your face, as dry skin allows for better hair capture. Hold the shaver at a 90-degree angle to your skin and stretch your skin with your free hand. Shave against the direction of your beard growth, gliding the shaver slowly. The Series 7 utilizes sonic vibrations to capture more hairs per stroke, providing a gentle yet deep shave. Applying too much pressure can reduce the effectiveness of the vibrations.
Shaver Head Lock Switch: The Shaver head "lock" switch (3) is useful for shaving hard-to-reach areas. Tilt the pivoting head backwards, then push the lock switch inwards to fix the head at an angle. To unlock, push the switch forward.
Pop-out Long Hair Trimmer: The Pop-out long hair trimmer (4) slides upwards for use. It's ideal for shaping sideburns, moustaches, and beards. When using the trimmer, avoid sliding it sideways on your skin to prevent cuts.
Wet & Dry Use: This shaver is designed for both wet and dry use and is suitable for use in the bath or shower. For safety reasons, it can only be operated cordless when used in wet conditions.
Water Cleaning: Regular cleaning is essential for maintaining optimal shaving performance. After each shave, it's recommended to clean the shaver with water. First, ensure the shaver is disconnected from the power cord. Apply a small amount of commercially available hand soap to the Foil & Cutter cassette (1). Turn the shaver ON and rinse the head under running water, allowing the foam to clean the blades. Warm water (around 40°C) enhances cleaning. After rinsing, turn the shaver OFF, gently tap the shaver head downwards for 2-3 seconds to remove excess water. Press the Cassette release button (2) to remove the Foil & Cutter cassette (1) and let it air dry. Do not wipe the foil surface as this may cause damage. Once dry, reattach the cassette and apply a drop of the included shaver oil to the foil surface and the long hair trimmer to maintain lubrication and prevent premature wear. Keep the oil out of reach of children and dispose of the empty bottle properly.
Brush Cleaning: For cleaning when water is not available, or for deeper cleaning, use the provided Brush (13). First, remove the Foil & Cutter cassette (1) by pressing the Cassette release button (2) while the shaver head is unlocked. Gently tap the cassette on a flat surface to dislodge loose hair clippings. Use the brush to clean the inner area of the pivoting head and around the shaver head receiver. Do not use the brush directly on the foil or inner blades, as this can damage them.
Foil & Cutter Cassette Replacement: To maintain 100% shaving performance, the Foil & Cutter cassette (1) should be replaced approximately every 18 months, or when the replacement symbol lights up on the Shaver display (9). The display will remind you for 7 shaves before automatically resetting. If the cassette is damaged or worn, replace it immediately to prevent skin irritation. To replace, ensure the shaver head is unlocked, press the Cassette release button (2), and remove the old cassette. Snap the new cassette into place until it clicks. After replacement, press the Reset button (8) with a ballpoint pen for at least 3 seconds to reset the counter. The replacement light will blink and then turn off, indicating a successful reset. Manual resets can be performed at any time. Do not attempt to disassemble the Foil & Cutter cassette.
Disposal: This product contains a rechargeable lithium-ion battery. For environmental protection, do not dispose of the product with household waste. Fully discharge the battery before disposal by running the shaver until it stops. Remove the battery according to the instructions provided in the manual (using a screwdriver to open the casing and detach the battery). Ensure the battery terminals are not short-circuited. Take the battery to a local recycling center or an appropriate collection point.
| Type | Electric Shaver |
|---|---|
| Model | 740s-6 |
| Series | Series 7 |
| Blades | 4 |
| Precision Trimmer | Yes |
| Wet & Dry Use | Yes |
| Battery Type | Lithium-ion |
| Charging Time | 1 hour |
| Usage Time | 50 minutes |
| Color | Silver |
| Pivoting Head | Yes |
| Travel Lock | Yes |
| Quick Charge | Yes |
| Voltage | 100-240 V |
| Replaceable Head | Yes |
| Cordless Use | Yes |
| Corded Use | No |
| Weight | 0.5 kg |
| Shaver Type | Foil |
| Shaver Technology | Sonic Technology |