6
7
Setting Month, Date and Time
a. Press Mode (5) button (“month” starts ashing)
Press Set
(4) button to set the correct month (1,2,3,…12)
b. Press Mode
(5) button (“date” start ashing)
Press Set
(4) button to set the correct date (1,2,3,…31)
c. Press Mode
(5) button (“hour” starts ashing)
Press Set
(4) button to set the correct hour (1,2,3,…12)
d. Press Mode
(5) button (“minute” starts ashing)
Press Set
(4) button to set the correct minute (0,1,2,3,…59)
e. Press Mode
(5) button again to lock in time settings. Digits will stop ashing.
Taking a Measurement
Wrap the cu around the arm (see “Applying the Arm Cu” section above).
1. Sit upright on the chair to have a correct posture.
2. Press the “START/STOP
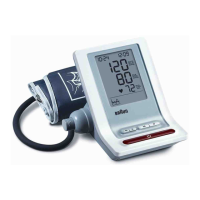
” (1) button, all elements of the display indicate
“888” during the rst 3 seconds. The measuring blood pressure symbol will
then ash on the display and the air pressure will automatically pump up
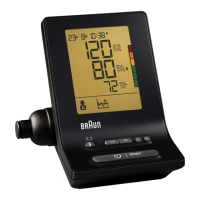
to certain pressure level and start measurement. (Fig.9 BP4900/BP5900)
Do not move or talk in the midst of taking blood pressure measurement.
3. After the air pressure has increased, it will slowly decrease. When the pulse
is detected, the HEART RATE
symbol will start ashing.
After taking blood pressure measurement, the product will turn o automatically
after 1 minute.
Memory Function
Your blood pressure monitor can store the latest readings of 48 measurements
for BP4900, or 99 measurements for BP5900.
Storing Measurement Data
After each blood pressure measurement, the Systolic pressure, Diastolic
pressure, Pulse rate and the time & date of specic day will be automatically
stored. Memory #01 is always the most recent one. Once the memory is full,
the oldest values will be overwritten.
Recalling Stored Readings
• Press “Memory
” (2) button, M:00 will appear on the display if there is
no data stored in the memory. If there is data stored in the memory, the
latest recorded set of measurement which is the Systolic pressure, Diastolic
pressure, Pulse rate, and the recording time and date and M:01 will appear
on the display for 1 minute.
• Press the “Memory
” (2) button again to read the next line of stored data.
The data called up on the display with 2-digit Memory number (ex. M:02).
7-Day Average Function
Full day Average
• Press the “Average ” (3) button once, “Full Day Average” result will show on LCD.
• Make sure the DATE / TIME is correct when taking measurement, so you may get the correct
7-Day Average result.
• If there is no data in memory within past 7 days, “
” will show on LCD.
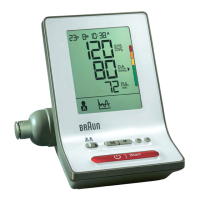
Display BP4900/BP5900
* For BP5900 only
Note: On BP5900, the Backlight goes on when the unit is turned on, buttons are pressed, or
when results are being displayed. It turns itself o after 10 seconds if no buttons are pressed.
HEART RATE SYMBOL
MEMORY RECORD
MEASURING ERROR
DISPLAY