12
Before plugging in
l
Make sure your electricity supply is the same
as the one shown on the underside of your
appliance.
l
This appliance has a polarized plug (one blade
is wider than the other.) To reduce the risk of
electrical shock this plug will t in a polarized
outlet only one way. If the plug does not t fully in
the outlet, reverse the plug. If it still does not t,
contact a qualied electrician. Do not attempt to
modify the plug in any way.
Before using for the first time
1 Remove the plastic blade covers from the knife
blade. Take care the blades are very sharp.
These covers should be discarded as they are to
protect the blade during manufacture and transit
only.
2 Wash the parts see ‘care and cleaning’.
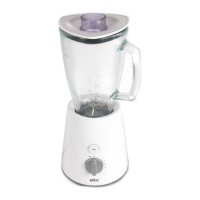
Key
Processor
1
Pusher
2
Feed tube
3
Lid
4
Bowl
5
Detachable drive shaft
6
Power unit
7
Pulse button
8
Speed 1 button
9
Speed 2 button
bk
OFF button
bl
Cord storage (at back)
bm
Safety interlocks
b
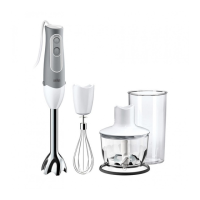
Knife blade
b
Dough tool (*included with certain models only)
b
4mm slicing/grating disc
b
2mm slicing/grating disc (*included with certain
models only)
b
Mini chopper/mill (*included with certain models
only)
bs
Storage bag (*included with certain models only)
bt
Spatula
To Use Your Food Processor
Illustrations
1
–
3
1 Fit the detachable drive shaft onto the power unit.
2 Then fit the bowl to the power unit and turn
clockwise until it locks into position.
3 Fit an attachment over the bowl drive shaft.
l
Always fit the bowl and attachment onto the
processor before adding ingredients.
4 Fit the lid - ensuring the top of the drive shaft/tool
locates into the centre of the lid.
5 Plug in, switch on and select a speed. (Refer to
the recommended usage chart).
l
The processor will not operate if the bowl or lid
are not fitted correctly into the interlock. Check
that the feed tube is positioned to the front and
the bowl handle is aligned to the right hand
side.
l
Use the pulse (P) for short bursts. The pulse
will operate for as long as the button is held in
position.
6 Reverse the above procedure to remove the lid,
attachments and bowl.
Important
l
Your processor is not suitable for crushing or
grinding coffee beans, or converting granulated
sugar to superfine sugar.
l
When adding almond essence or flavoring to
mixtures avoid contact with the plastic as this may
result in permanent marking.
Using The Attachments
Refer to recommended usage chart for
each attachment.
1 2 3 4 5 6 7 8 9 10
11 12
13
14 15 16 17 18 19 20
21 22 23 24 25 26 27 28 29 30
31 32 33 34 35 36 37 38 39 40
Knife Blade
Follow the instructions under ‘to use your food
processor’.
Hints and Tips
l
For coarser textures use the pulse control.
l
Cut food such as meat, bread, vegetables into
cubes approximately 2cm/¾ in cubes.
l
Cookies should be broken into pieces and added
down the feed tube while the appliance is running.
l
Take care not to over-process.
l
When making pastry use fat straight from the
fridge cut into 2cm/¾ in cubes.
1 2 3 4 5 6 7 8 9 10
11 12 13
14
15 16 17 18 19 20
21 22 23 24 25 26 27 28 29 30
31 32 33 34 35 36 37 38 39 40
Dough Tool
Follow the instructions under ‘to use your food
processor’.
Use for yeasted dough mixes.
Hints and Tips
l
Do not process for longer than 60 seconds.
l
Place the dry ingredients in the bowl and add the
liquid down the feed tube while the appliance is
running. Process until a smooth elastic ball of
dough is formed.
l
Re-knead by hand only. Re-kneading in the bowl
is not recommended as it may cause the processor
to become unstable.
1 2 3 4 5 6 7 8 9 10
11 12 13 14
15
16 17 18 19 20
21 22 23 24 25 26 27 28 29 30
31 32 33 34 35 36 37 38 39 40
–
1 2 3 4 5 6 7 8 9 10
11 12 13 14 15
16
17 18 19 20
21 22 23 24 25 26 27 28 29 30
31 32 33 34 35 36 37 38 39 40
Discs
To Use The Cutting Discs
1 Fit the drive shaft and bowl onto the power unit.
2 Holding by the center grip, place the disc onto the
drive shaft with the appropriate side uppermost.
3 Fit the lid.
4 Put the food in the feed tube.
5 Switch on and push down evenly with the pusher -
never put your fingers in the feed tube.
English
 Loading...