9
Before You Begin
Installation tools that are required
☐ Cordless Drill ☐ #1 Phillips Screwdriver ☐ Slotted Screwdriver
☐ #2 Phillips Bit ☐ Drill Bit Set ☐ Socket Set
☐ Level ☐ 1/2” Wrench or Adjustable Pliers ☐ Tape Measure
☐ Ladder or Step Stool ☐ Stud Finder ☐ Magnetic Bit Holder (For Drill)
☐ #2 Square Drive Bit ☐ Rubber Mallet (Optional) ☐ Gloves (Optional)
☐ Power Impact Driver (Optional) ☐ Masking Tape (Optional)
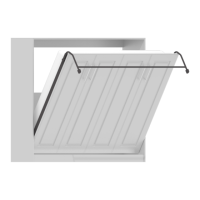
PREPARING THE WORK AREA
Use the dimensions below to clear a wall area where the bed be attached. The
middle of the room should also be clear and you should have all parts, hardware
and tools in your work area.
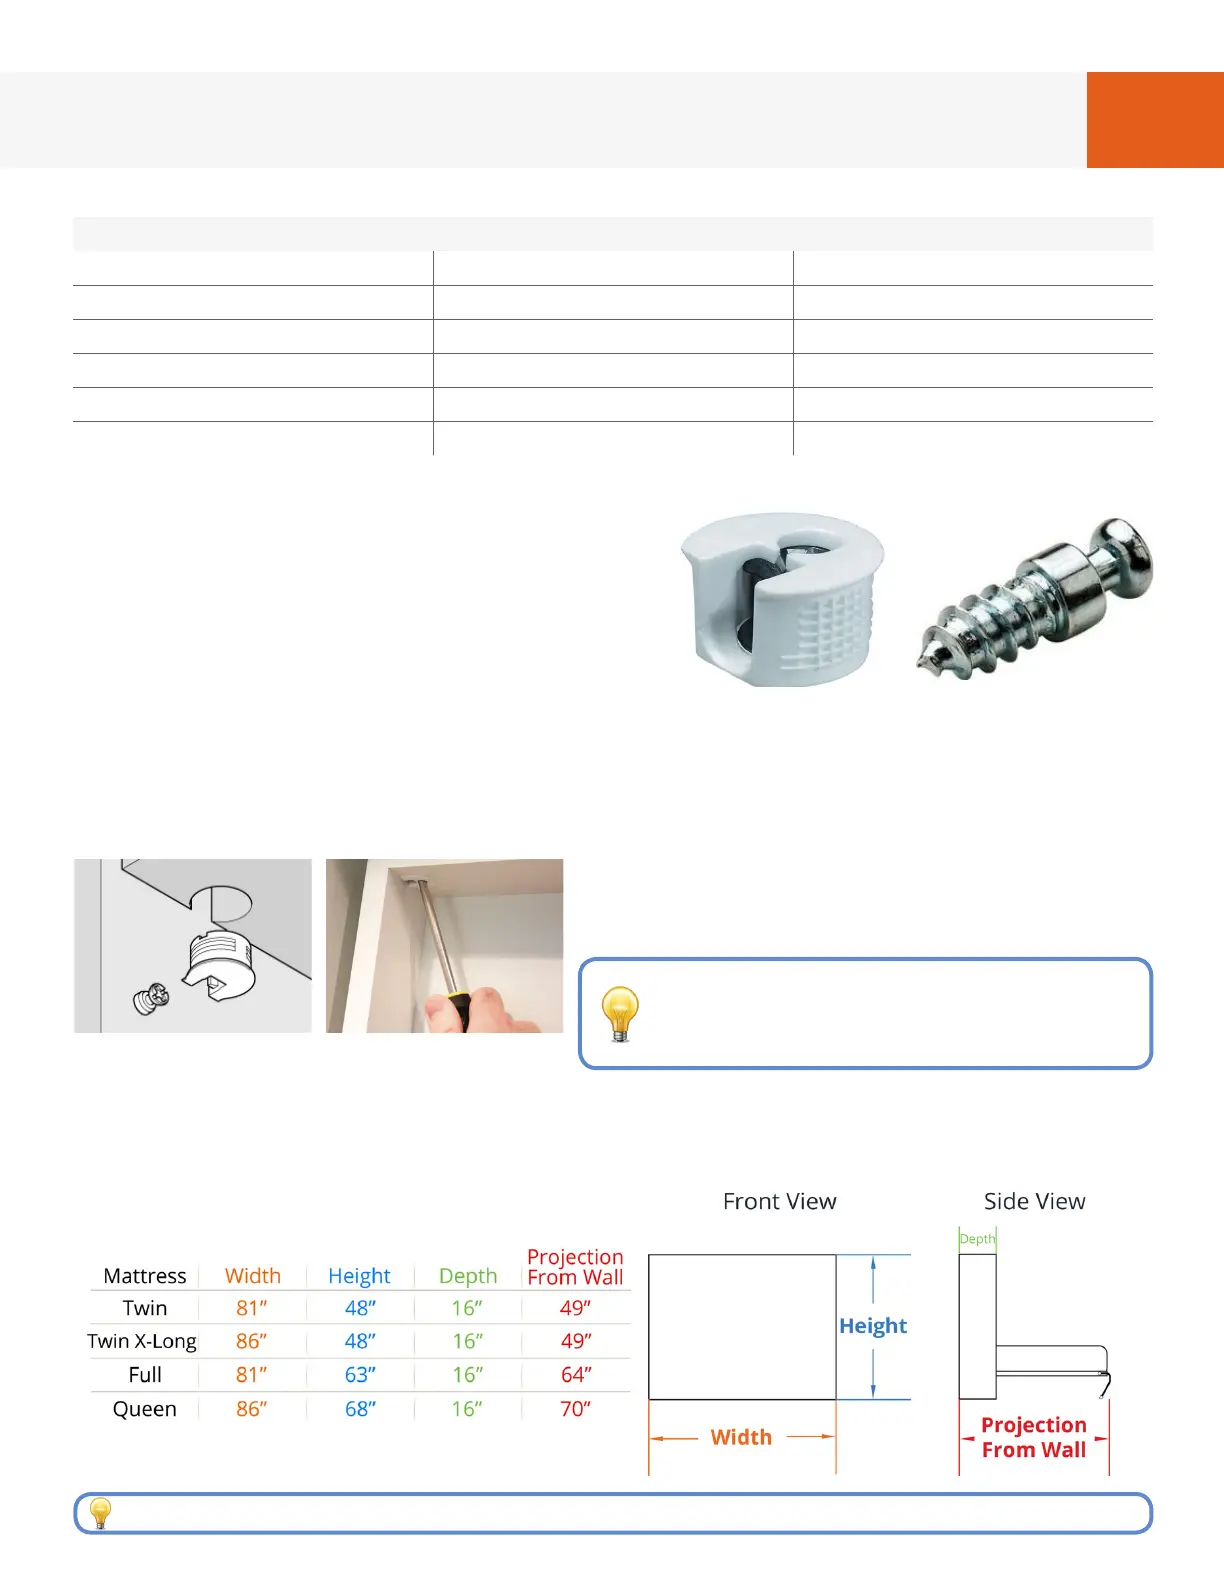
UNDERSTANDING CAM FITTINGS
The bed cabinet is assembled using
what’s known as a cam ttings. This
system allows for easy and exact
alignment of parts and are what secures
the bed pieces together. There are two
parts to this system: the cam ttings (Fig.
A) found in hardware package #6 and cam
screws (Fig. B) found in hardware package
#1. When inserting cam ttings, it’s important to properly align the at part
of the tting with the edge of the board (Fig. C). Cam ttings are tightened
by inserting a #1 Phillips screwdriver at a slight angle through the top hole
and twisting until snug (Fig. D). Once tightened, cam ttings have an equal
holding strength as screws. Never use
an electric drill to tighten cam ttings,
always hand-tighten.
FIG. A FIG. B
FIG. C
FIG. D
Turn cam ttings clockwise until snug,
being careful not to over-tighten
which can cause breakage.
Need to calculate the swing arc for ceiling fans, light xtures, etc? Visit: breda.us/arc