15
Chapter 2: Bed Cabinet assembly.
Chapter 2: Bed Cabinet assembly.
REQUIRED TOOLS:
#1 Phillips Screwdriver
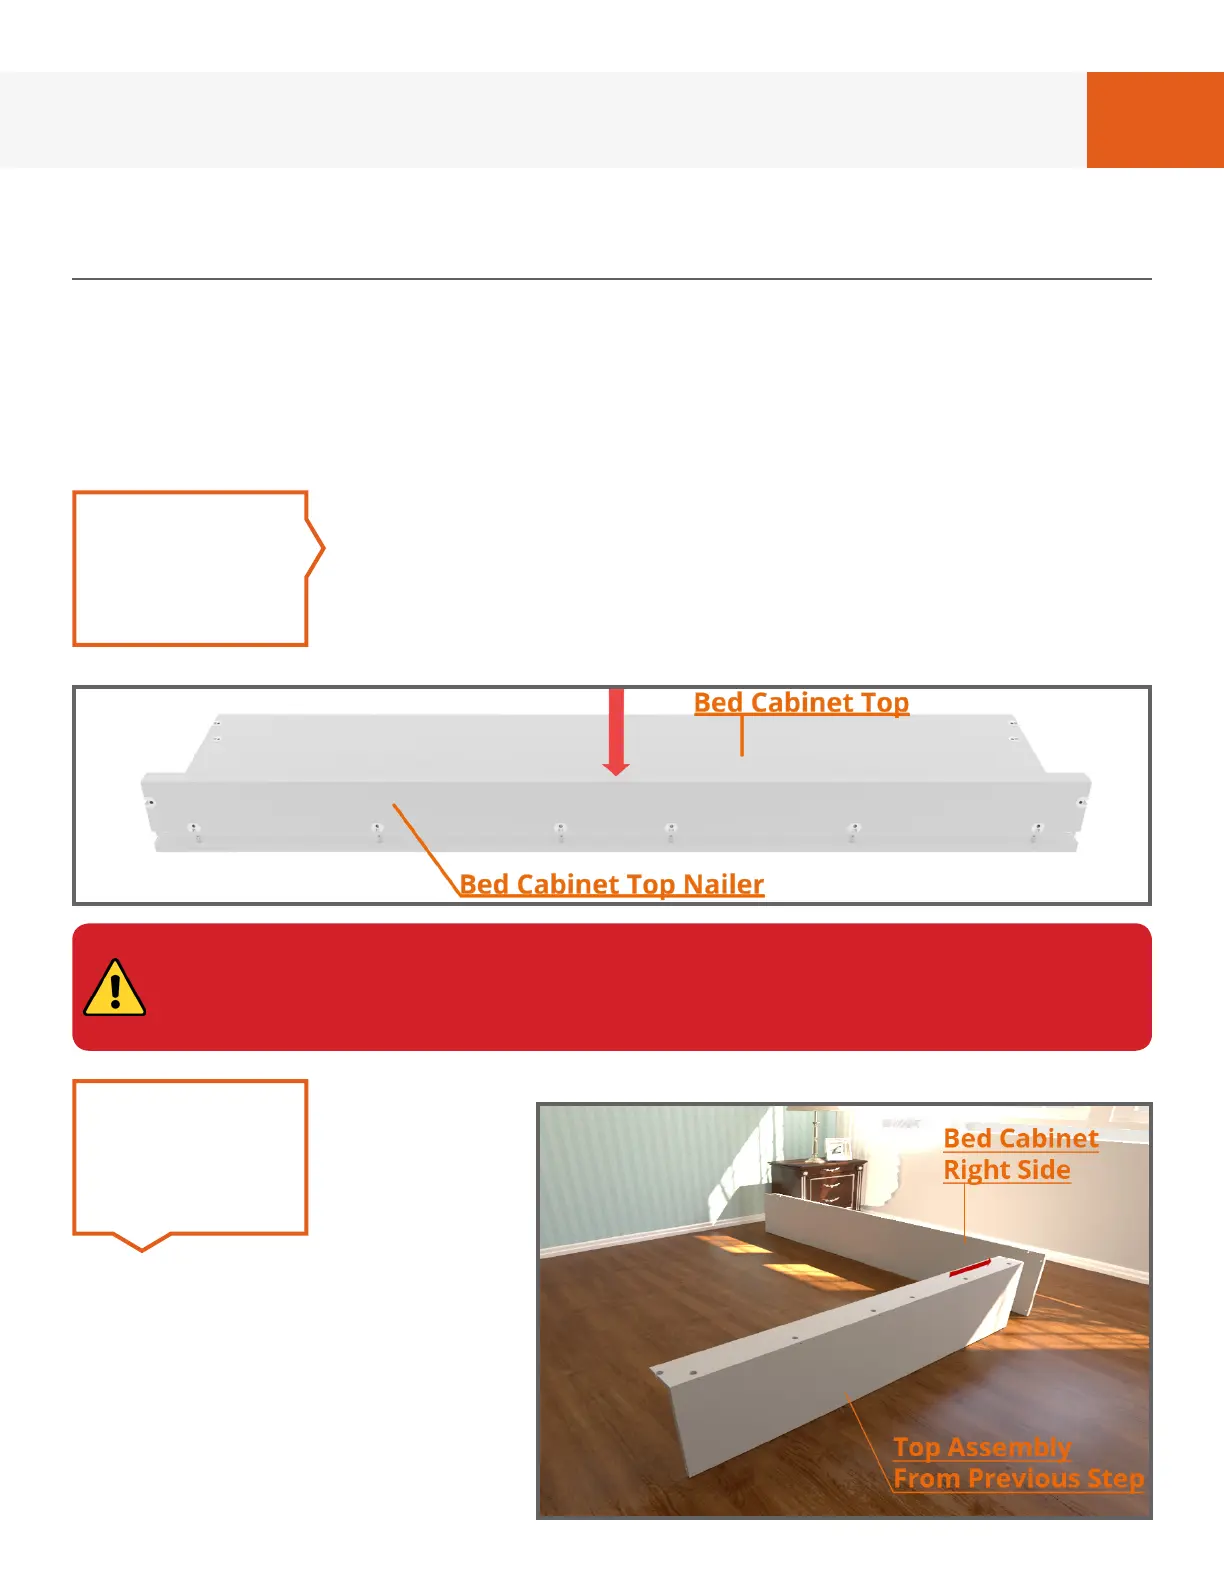
Position the “Bed Cabinet
Right Side” on it’s edge with
notch for the baseboard
facing up and position the top
assembly from previous step
as shown in Fig. 2B. Slide in
the direction of the arrow and
tighten all cam ttings.
STEP 2
FIG. 2B
CAM FITTINGS/SCREWS ARE OFFSET TO PREVENT THE TOP NAILER FROM BEING
INSTALLED BACKWARD. FROM THE VIEW ABOVE THE CAMS ARE FACING THE
CAMERA. ONCE ASSEMBLED, THESE WILL FACE THE WALL THE BED WILL ATTACH
TO AND NOT BE VISIBLE. DO NOT RE-DRILL HOLES IF THE CAMS DO NOT ALIGN.
FIG. 2A
Lower “Bed Cabinet Top Nailer” onto “Bed Cabinet Top”
as shown in Fig. 2A, Tighten cam tting using a #1 Phillips
screwdriver. Note: Make sure cam ttings are facing toward
and aligned to this back edge of the “Bed Cabinet Top” as
illustrated below.
STEP 1
OVERVIEW: In the following steps, you’ll assemble the Bed Cabinet on the oor,
then once assembled, tilt the Bed Cabinet up. To do this, you’ll need at least 3
extra inches of height clearance. If the height of your room is shorter than this,
you’ll have to assemble the Bed Cabinet vertically.