4
Connected device: Graviator Tilt
Bluetooth Activated
WiFi Activated
Activated
1.1 Assembly of the Ferminator Connect
For a quick and easy assembly of the Ferminator Connect see page 9.
1.2 Menu
Press for menu items:
Page 1: Ferminator operation
Page 2: Connect a Graviator or Tilt
Page 3: Fan Speed
Page 4: WiFi setup
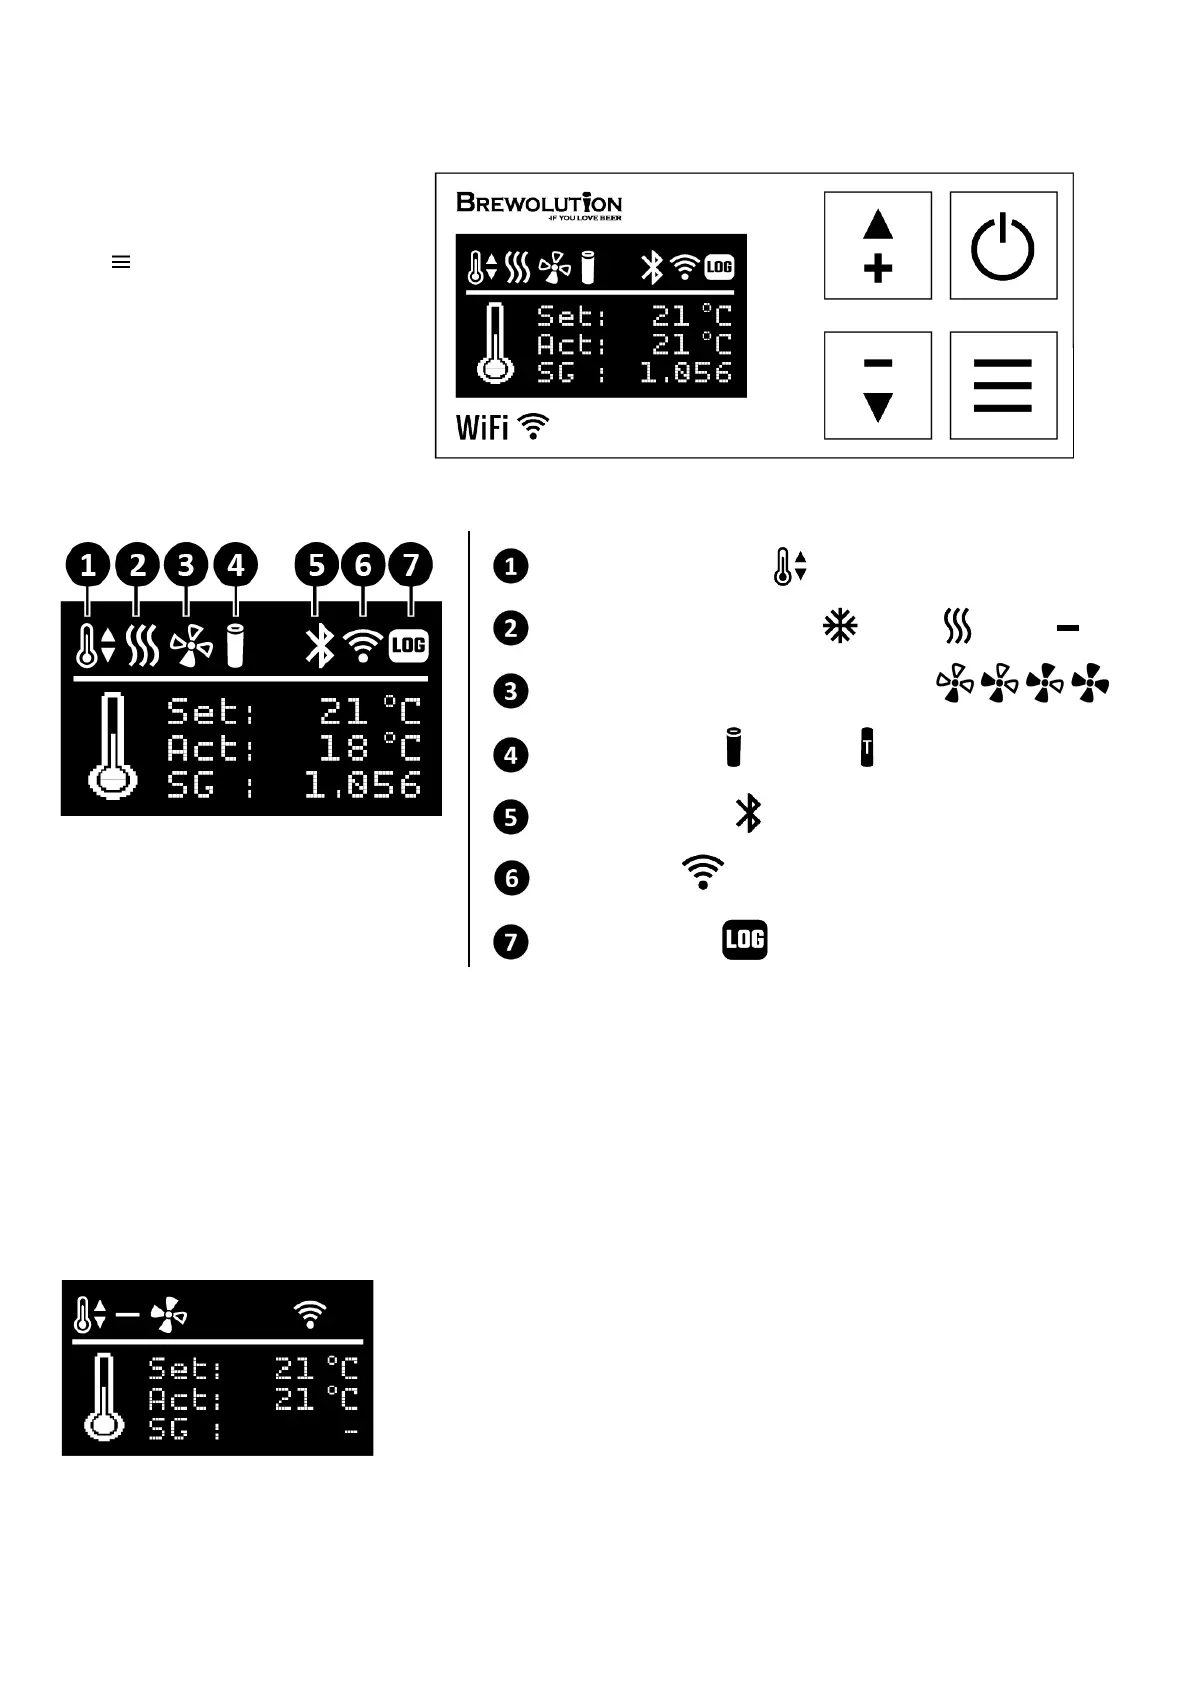
1.3 Display
1.4 Quick Startguide
Begin by connecting your Ferminator to your WiFi network follow the instructions in section 1.8, afterwards make an account
at BrewCreator.com and follow the instructions in section 1.9. For a quick overview of the menu and the display follow the
instructions in section 1.2 and 1.3. Read more about each of the menu pages in section 1.5 -1.9. Start fermenting with your
Ferminator and BrewCreator by following the steps in section 1.10.
1.5 Page 1: Program Setting
Press + or – button to set the desired temperature inside the Ferminator.
Press Start/Stop button to begin the temperature regulation of the Ferminator.
The temperature probe must be placed on the back of the fermenter, facing
away from the Cooling/Heating unit. It is a good idea to isolate the probe with
an isolation material to get an exact temperature measure of the brew as
possible and not the air around the fermenter. Even better would be to
measure the temperature inside the fermenter with a Graviator or thermowell.
The temperature probe should still be applied when using a Graviator or Tilt. The Ferminator will use the
temperature probe as a backup if it loses the connection to the Graviator or Tilt, ensuring the temperature is still
adjusted correctly.
In process
Temperature regulation icons: Cooling
can be adjusted in 4 levels:
Low High
Set Shows the set temperature.
Act Shows the actual temperature.
SG Shows the specific gravity from a
connected Graviator or Tilt (sold separately)