EasyManuals Logo

Briggs & Stratton 550e Series Service Information

Briggs & Stratton 550e Series
12 pages
To Next Page IconTo Next Page
To Previous Page IconTo Previous Page
Page #4 background imageLoading...
Page #4 background image
Page 4 of 12
ASSEMBLY INFORMATION
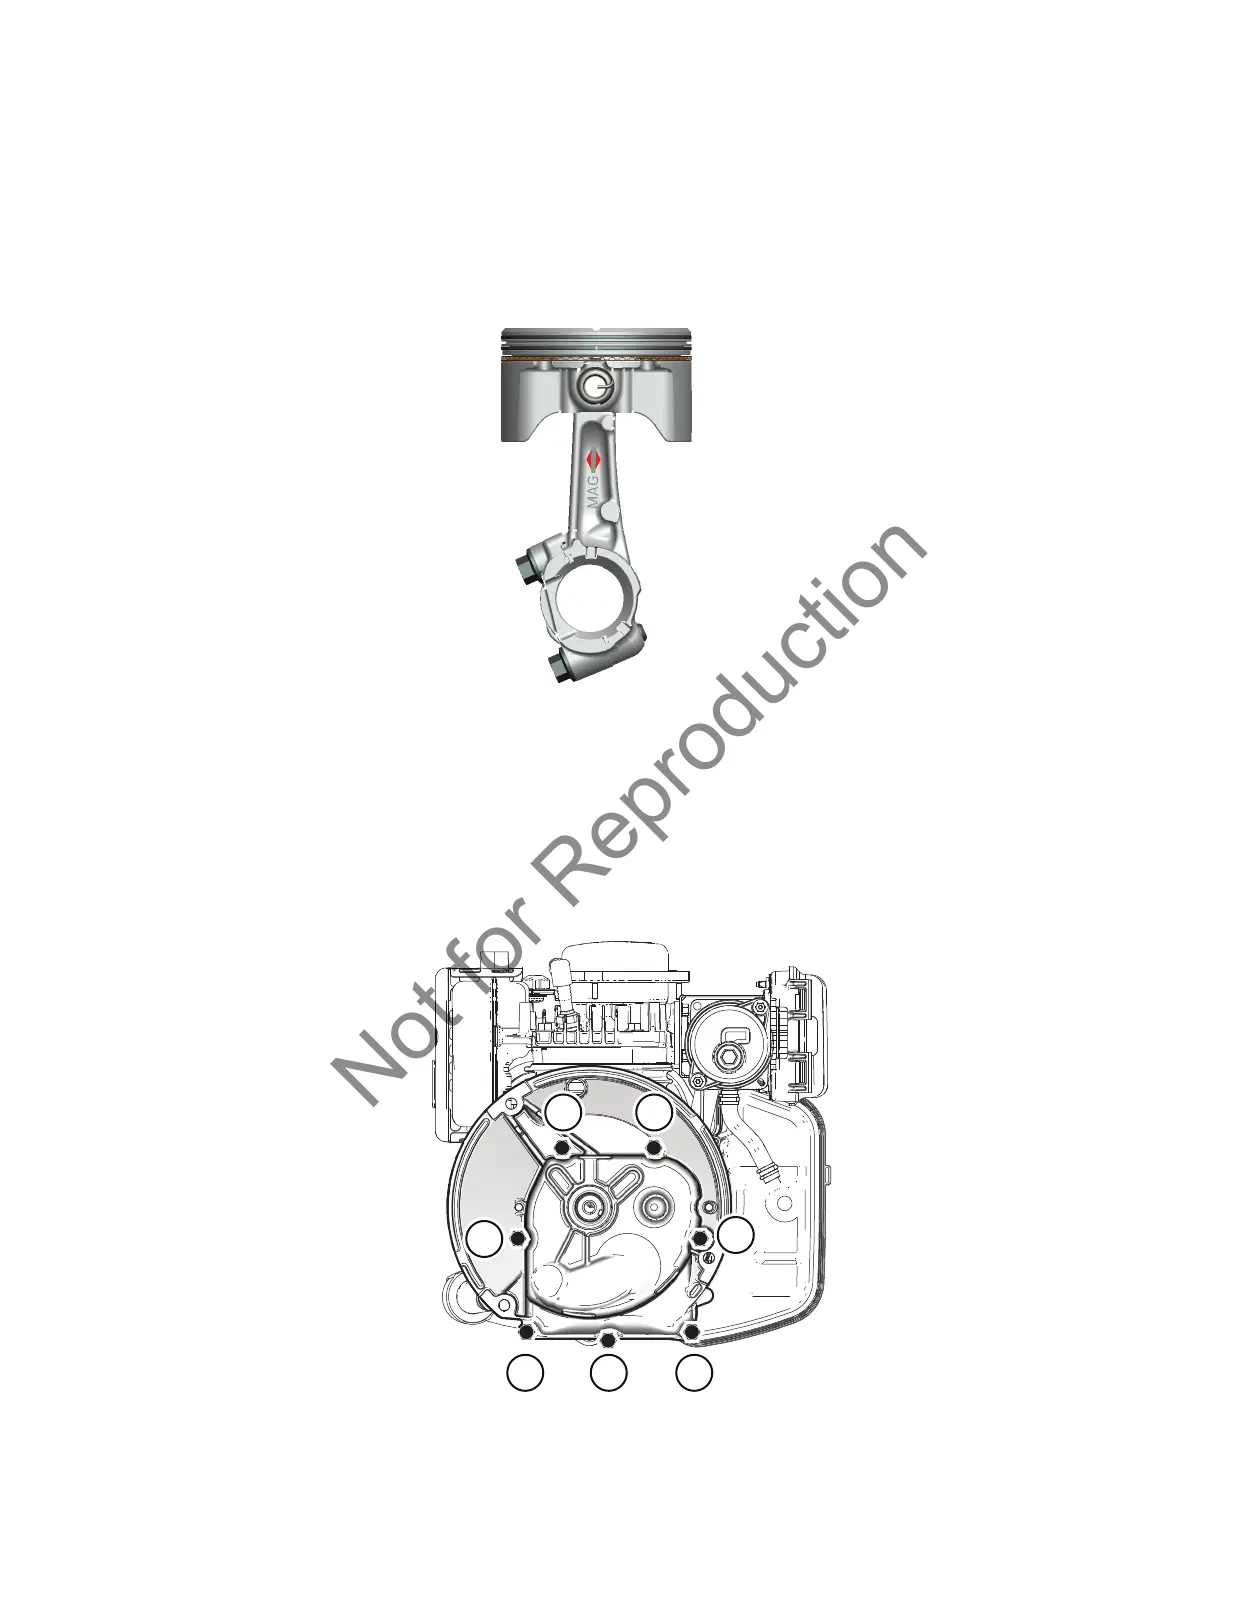
Piston Assembly and Orientation
The notch in the piston, the piston pin clip, and the MAG identification on the connecting rod all face the flywheel
side (mag side) of the engine (Figure 3). When installing replacement piston rings, the paint stripes on the rings
must be to the right side of the ring gaps.
Figure 3
Sump and Seals
Install the sump bolts in positions 1 through 6 (Figure 4). Install the self-tapping sump screw in position 7. Do not
use the self-tapping screw in any other hole location. Using the sequence shown, tighten the bolts to the torque
specification provided in this APSI.
1
7
4
2
53
6
Figure 4
Not for Reproduction

Other manuals for Briggs & Stratton 550e Series

Questions and Answers:

Question and Answer IconNeed help?

Do you have a question about the Briggs & Stratton 550e Series and is the answer not in the manual?

Briggs & Stratton 550e Series Specifications

General IconGeneral
Displacement127 cc
Starting SystemRecoil
Stroke45 mm
Fuel TypeUnleaded gasoline
Engine Type4-stroke, OHV
Torque5.5 ft-lbs
Cylinder1

Related product manuals