Do you have a question about the Brinno ATH2000 and is the answer not in the manual?
Remove the camera mounting screw before installation.
Install the screw according to the camera model.
Tighten the installed screw until it is secure.
Loosen the screw and remove the battery slot from the housing.
Install batteries into the battery slot.
Install camera and battery slot into the camera housing.
Tighten the screw to lock the battery slot's position.
Take out desiccant and pack it into the power housing.
Plug in power cable, turn on camera, and press battery level button.
Close the power housing and lock the latch securely.
Loosen the screws on the lens cover.
Remove the existing kit lens cover.
Mount the extension lens cover.
Tighten the screws after mounting.
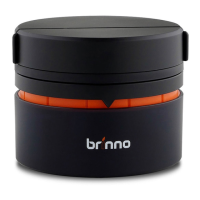
The Brinno ATH2000 Construction Power Housing is a robust and versatile accessory designed to protect and power Brinno time-lapse cameras in demanding outdoor environments. This user manual outlines its features, installation, and maintenance, ensuring optimal performance for long-term construction site monitoring.
The ATH2000 serves as a protective enclosure and an extended power source for compatible Brinno cameras. Its primary function is to safeguard the camera from weather elements (IPX5 weather resistant) and provide significantly extended battery life, making it ideal for prolonged time-lapse projects without frequent battery changes. The housing accommodates various Brinno camera models and offers interchangeable lens covers to support different lens configurations, including Brinno's BCS lenses.
Installation of Camera and Batteries: The installation process is straightforward, beginning with the removal of the camera mounting screw from the housing. Depending on the specific Brinno camera model (TLC130, TLC120, TLC2000 with kit lens, TLC200/TLC200Pro with kit lens, TLC2000 with BCS lens, or TLC200Pro with BCS lens), a screw is installed into the camera's designated position. The camera is then placed inside the housing, ensuring it faces the front, and the screw is tightened until secure.
For power, the battery slot is removed from the power housing by loosening a screw, and up to 16 AA batteries are installed. The battery slot is then reinserted into the housing, and the screw is tightened to lock it in place. Desiccant is packed into the power housing to manage internal humidity. Finally, the power housing is closed, and the latch is locked.
Battery Level Check: To check the battery level, users plug the power cable into their camera, turn the camera on, and press the battery level check button on the housing. An LED indicator provides immediate feedback:
Changing Lens Cover: The ATH2000 supports interchangeable lens covers to accommodate different Brinno lenses. To change the lens cover, screws on the existing cover are loosened, and the cover is removed. The desired extension lens cover (e.g., for Brinno BCS lenses) is then mounted, and its screws are tightened to secure it.
Device Components: The housing features a latch for secure closure, padlock eyelets for added security, and a camera mounting screw. It includes a tripod socket (1/4 inch) on both the bottom and back for flexible mounting options. A battery level check button provides quick power status, and a thumb screw facilitates access to the battery slot. A cord hole is available for optional power input accessories, allowing for continuous power from an external source if needed. The package also includes an extension lens cover for Brinno BCS lenses, a kit lens cover, a micro USB Type C adapter, a screwdriver, two straps, and desiccant.
Desiccant Replacement: To maintain the long-term functionality of the ATH2000, it is crucial to regularly replace the used desiccant. This helps prevent moisture buildup inside the housing, which could otherwise damage the camera or affect its performance.
Online Registration and Support: Users are encouraged to register their device online at www.brinno.com/support/registration. This provides access to support resources and ensures they receive updates or assistance. Manuals in other languages are also available on the Brinno support website.
The Brinno ATH2000 Construction Power Housing is an essential tool for professionals requiring reliable, long-term time-lapse monitoring in challenging outdoor conditions, offering robust protection and extended operational periods for compatible Brinno cameras.
| Brand | Brinno |
|---|---|
| Model | ATH2000 |
| Category | Camera Accessories |
| Language | English |