Section 5 Maintenance
Transaxle Oil
A general description for transaxle oil maintenance,
endations, and capacities is provided below.
xle oil can
Oil Type, Fill, and Drain
Ref
* Fil p
* Dr
* Ty o
* Transa
Transa
* Ch
leakage
* Check l every 6 months or every 200
hou w
This ccomplished by Parking vehicle on a level
surf ce, set park brake, turn off ignition switch, and
remove switch key, using a clean long bladed screw
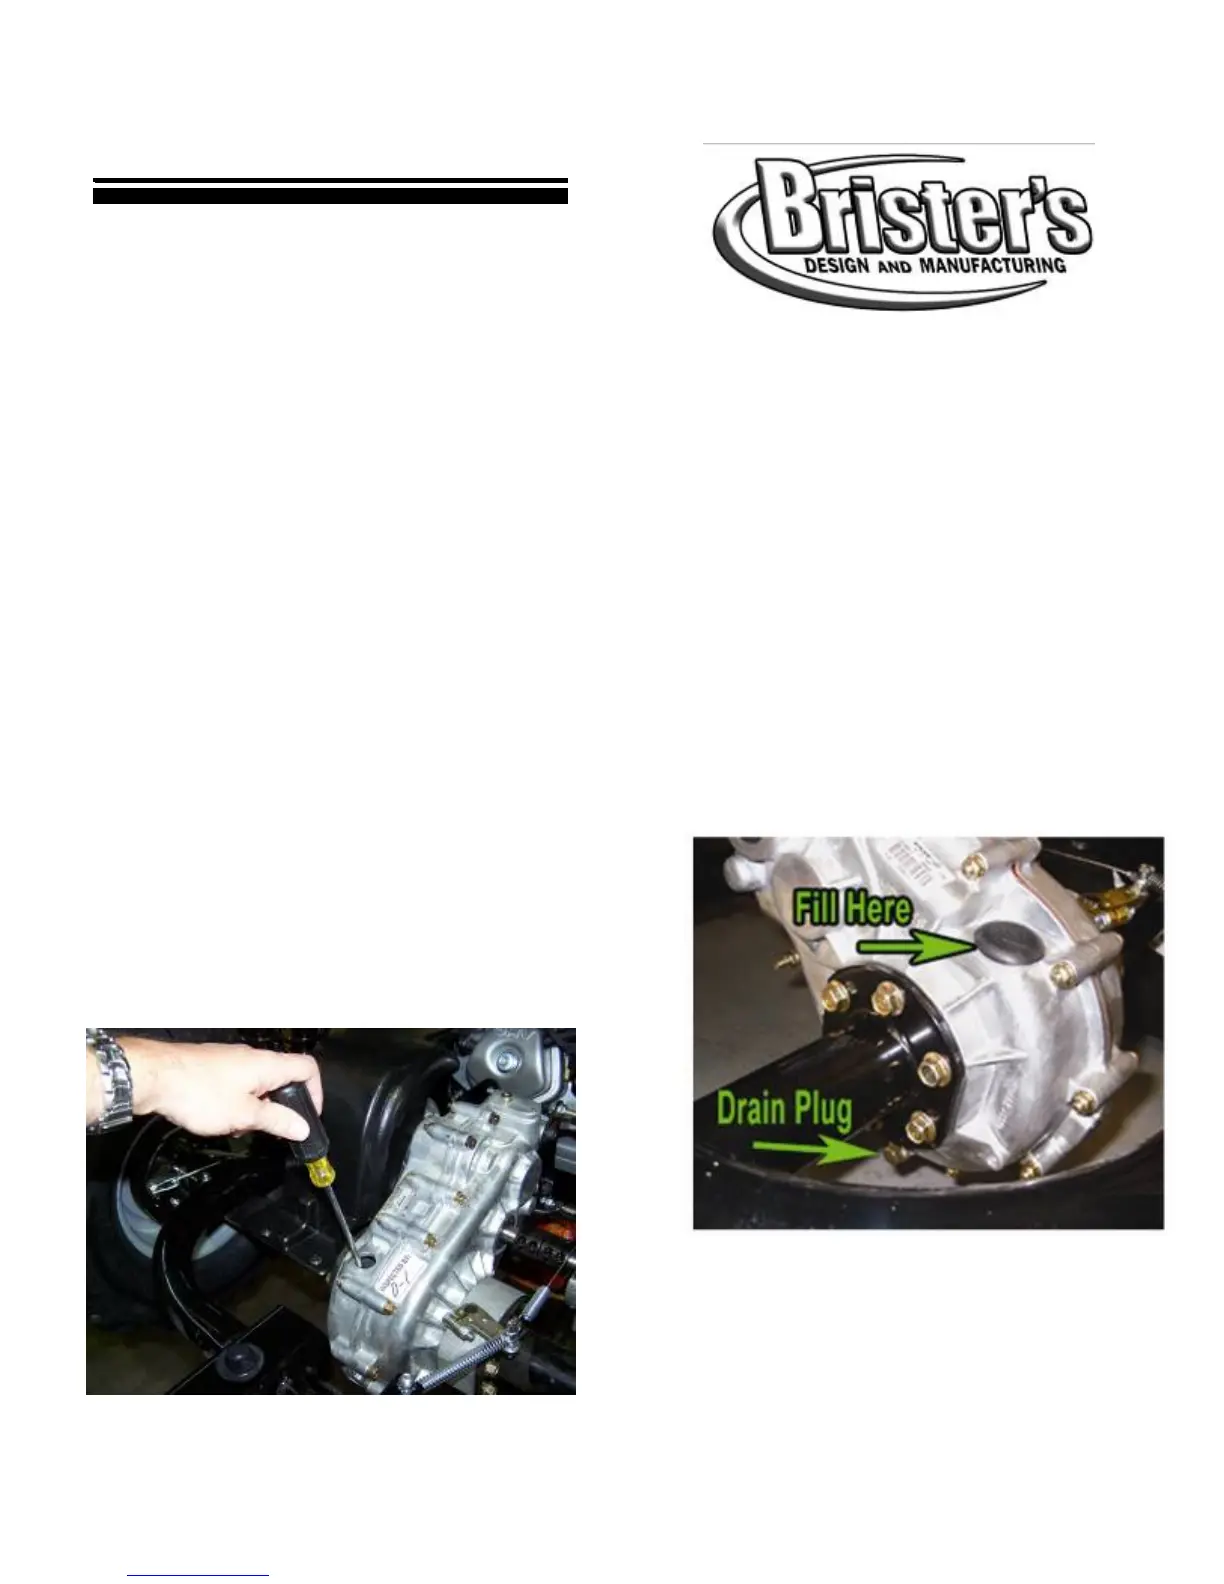
driv r hole until it
touch e the screw
There should be approximately 2.1/4” to 2.1/2” of
le on screw driver. Refer to Figure 5-5A
Change transaxle oil once a year or every 600 hours
hichever comes first).
recomm
NOTE:
Running vehicle low on transa
nd void warranty.
damage transaxle a
Transaxle
er to Figure 5-5
l ca location: At rear left hand side (See arrow)
ain plug location: At bottom center of transaxle.
pe f Lubrication: SAE 30W oil.
xle Lubrication Capacity: 20 oz.
xle Oil Maintenance Schedule
eck transaxle housing for damage and possible oil
after each use.
transaxle oil leve
rs ( hichever comes first).
can be a
a
er (or similar object) insert into fille
es the bottom of gear case. Remov
driver.
il visibo
*
(w
Transaxle Oil Change
Refer to Figure 5-5B
Warm oil drains quickly and completely. Therefore, drain
used transaxle oil while transaxle housing is still warm
as follows:
. Park vehicle on a level surface, set park brake,
turn off ignition switch, and remove switch key.
. Place a suitable container below the transfer
case to catch used oil. Remove fill cap and drain
plug.
. Allow used oil to drain completely and then
reinstall drain plug and tighten it securely.
transaxle case oil in a manner
ment. Do not
throw used oil in the trash, pour it on the ground,
or down a drain.
5. Fill transaxle housing with 20 oz. SAE 30W oil.
6. Replace fill cap and tighten securely.
1
2
3
4. Dispose of used
that is compatible with the environ
Figure 5-5B
Figure 5-5A
18
 Loading...