-6-
G
B
N
L
F
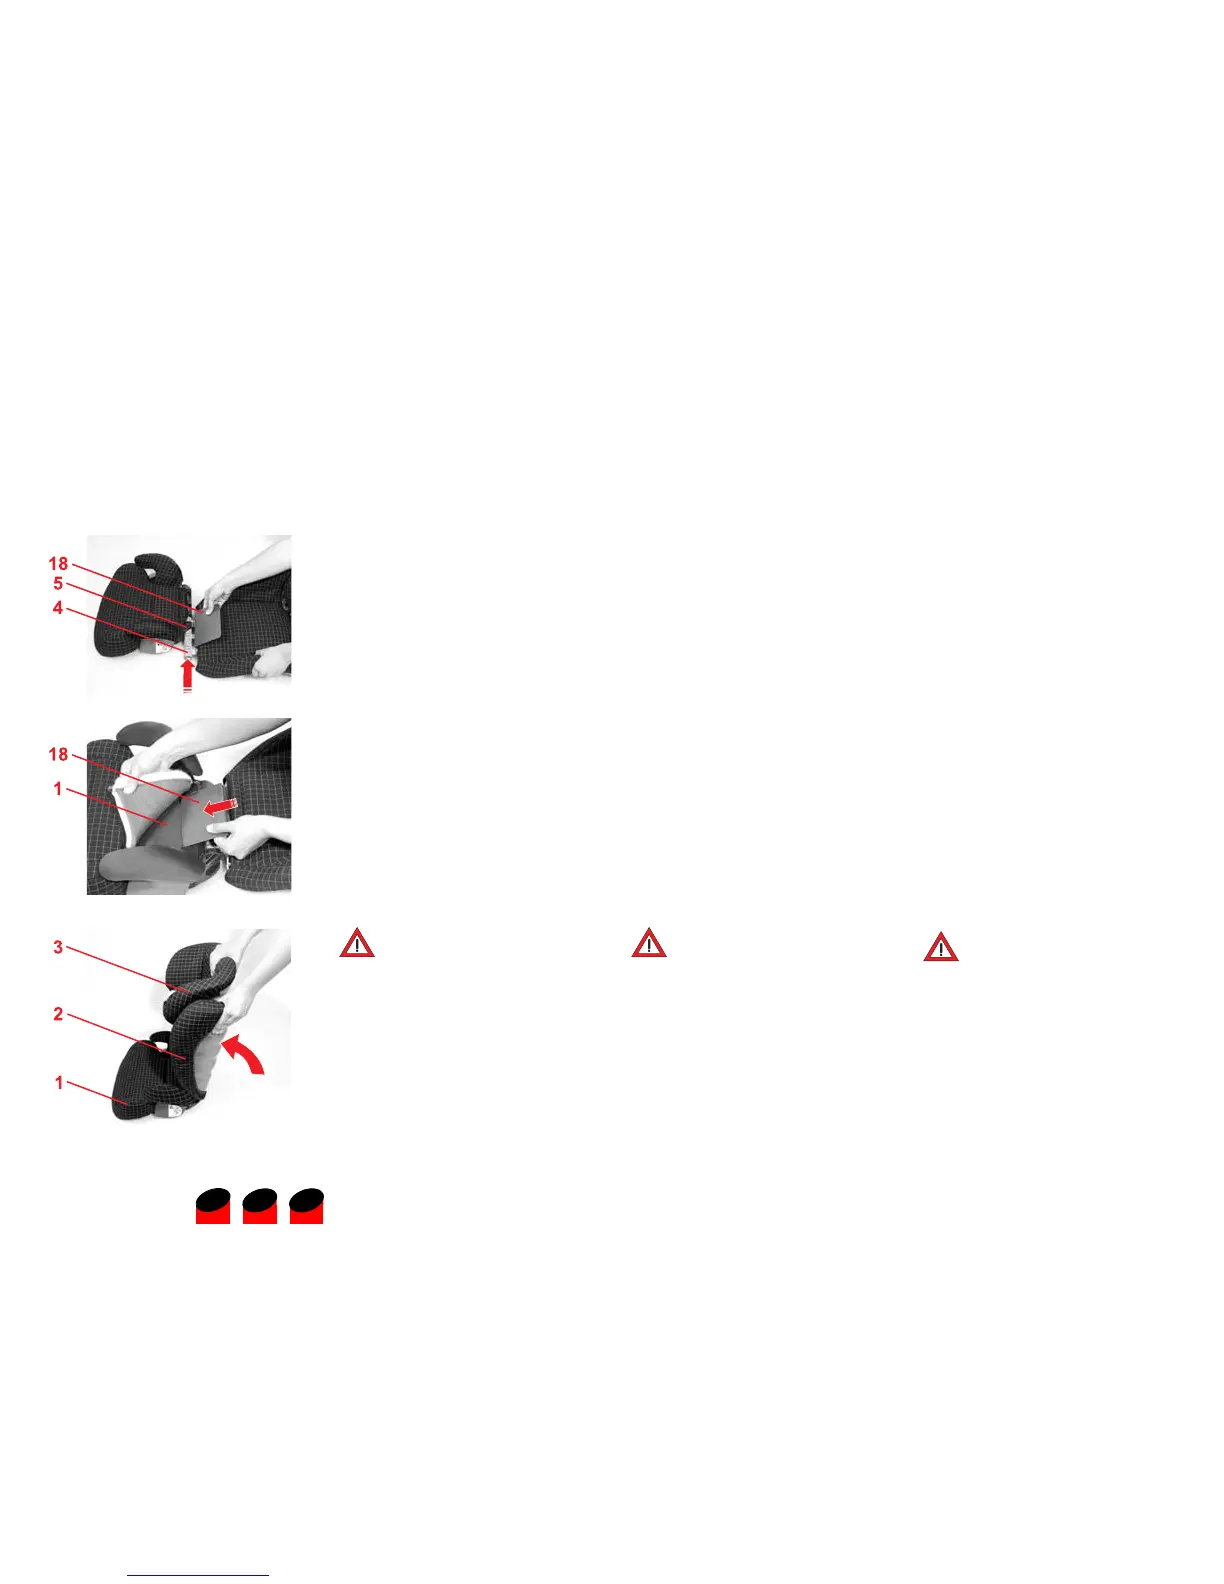
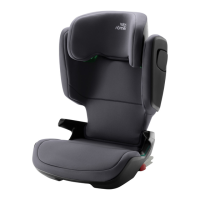
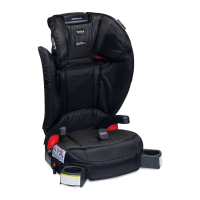
3.1 Attaching the backrest
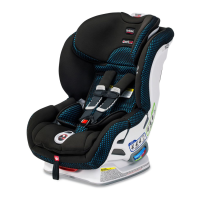
The child seat is composed of a seat
cushion 1 and a backrest 2 with an
adjustable headrest 3. The comination
provides your child with the desired
protection and comfort.
Þ Place the backrest 2 evenly behind
the seat cushion 1.
Þ Fold the axis cover 18 upwards.
Þ Push the articulated axis 4 of the
backrest 2 as far as possible into
the guide 5 on the seat cushion 1.
Þ Push the axis cover 18 under the
seat cushion cover in such a way 1,
that is rests on the plastic surface.
Danger! When swivelling up
the backrest 2, nothing must
come between the backrest 2
and the seat cushion 1 in the
area of the articulated axis 4.
Caution! You or your child could pinch
your fingers, injuring them.
Þ Turn the backrest 2 upwards until it
engages.
3.1 Bevestiging van de
rugleuning
Het kinderzitje bestaat uit een
zitkussen 1 en een rugleuning 2 met
instelbare hoofdsteun 3. Deze
combinatie biedt uw kind de gewenste
bescherming en comfort.
Þ Leg de rugleuning 2 plat achter het
zitkussen 1.
Þ Klap de scharnierafdekking 18
omhoog.
Þ Schuif de scharnieras 4 van de
rugleuning 2 zo ver mogelijk in de
geleiding 5 van het zitkussen 1.
Þ Schuif de scharnierafdekking 18
dusdanig onder de bekleding van
het zitkussen 1, dat deze op het
kunststofoppervlak ligt.
Gevaar! Als de rugleuning 2
wordt opgeklapt, mag zich in de
buurt van de scharnieras 4
niets tussen rugleuning 2 en
zitkussen 1 bevinden.
Voorzichtig! Uw vingers of die van uw
kind kunnen klem komen te zitten en
gewond raken.
Þ Draai de rugleuning 2 naar boven
totdat deze vastklikt.
3.1 Fixation du dossier
Le siège enfant se compose d'une
assise 1 et d'un dossier 2 à appui-tête
réglable 3. Cette combinaison offre à
votre enfant la protection et le confort
souhaités.
Þ Placez le dossier 2 à plat derrière
l'assise 1.
Þ Rabattez le cache du dispositif
d'articulation 18 vers le haut.
Þ Poussez l'axe d'articulation 4 du
dossier 2 aussi loin que possible
dans le guidage 5 de l'assise 1.
Þ Faites glisser le cache du dispositif
d'articulation 18 sous la housse de
l'assise 1, de sorte que la partie en
plastique repose à plat.
Danger ! Lors du redressement
du dossier 2, aucun objet ne
doit se trouver dans la zone de
l’axe de basculement 4 entre le
dossier 2 et le coussin d’assise
1.
Attention ! Vous ou votre enfant
risquez par ex. de vous coincer les
doigts ou de vous blesser.
Þ Basculez le dossier 2 vers le haut
jusqu'à ce qu'il s'encliquète.