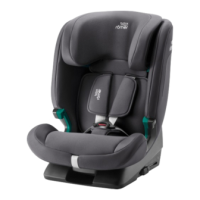
This document is a user guide for the Britax Römer EVOLVAFIX child safety seat, designed for children with a body height between 76 cm and 150 cm, and a maximum weight of 22 kg. The seat is intended for use in forward-facing car seats.
The EVOLVAFIX offers two primary fastening types:
- Fastening type A (76 – 105 cm, from 15 months, maximum weight 22 kg): This type uses a 5-point harness to secure the child within the seat. The child seat itself is secured to the car seat using ISOFIX connectors and a TopTether.
- Fastening type B (100 – 150 cm): For this type, the child is secured by the vehicle's 3-point seat belt. The child seat can be further secured with ISOFIX connectors (Fastening type B1) or used without ISOFIX (Fastening type B2), relying solely on the vehicle's 3-point seat belt. Britax Römer recommends using Fastening type B1.
Usage Features:
Headrest Adjustment:
The headrest can be adjusted to the child's height.
- For Fastening type A (76 – 105 cm): The headrest should be positioned so that the shoulder straps exit at or up to 3 cm above the child's shoulder height. To adjust, press the adjustment button and pull the shoulder straps forward, then keep the release button pressed while sliding the headrest to the correct height.
- For Fastening type B (100 – 150 cm): The headrest should be two finger-widths above the child's shoulder height. To adjust, keep the release button pressed and slide the headrest to the correct height. The headrest has a lock that corresponds to a height of approximately 125 cm. For children taller than 125 cm (up to 150 cm), an upper area of the headrest can be unlocked by extending the headrest to its maximum, holding down a switch, and tilting it up.
Seat Angle Adjustment:
The seat can be used at different angles. To adjust, pull the adjustment button forward and slide the seat to the desired position until it audibly locks. When using Fastening types B1 and B2, ensure the seat belt remains taut after adjusting the angle.
Securing the Child Seat (Fastening type A):
- Select a suitable car seat: i-Size approved car seats or those with ISOFIX installation brackets tested and approved by Britax Römer are suitable. Only forward-facing car seats are approved.
- Attach insertion aids (optional): These aids simplify connecting the ISOFIX locking arms to the car's ISOFIX installation brackets.
- Prepare TopTether: The TopTether must be secured to an approved anchor point in the vehicle, marked with a specific symbol. Never use luggage hooks.
- Fasten ISOFIX: Extend the ISOFIX locking arms, connect them to the car's ISOFIX installation brackets until they audibly lock and the ISOFIX indicators turn green. Push the child seat firmly into the backrest of the car seat.
- Tighten TopTether: Ensure the TopTether is not trapped, then pull the belt to tighten it until its indicator shows a finger-width of green.
Securing the Child Seat (Fastening type B1 - with ISOFIX and 3-point seat belt):
- Prepare child seat: Ensure the child seat is configured for Fastening type B.
- Select a suitable car seat: i-Size approved car seats or those with 3-point seat belts are suitable. Only forward-facing car seats are approved.
- Attach insertion aids (optional): Similar to Fastening type A, these aids can be used for easier ISOFIX connection.
- Fasten ISOFIX: Extend the ISOFIX locking arms, connect them to the car's ISOFIX installation brackets until they audibly lock and the ISOFIX indicators turn green. Push the child seat firmly into the backrest of the car seat.
- Secure seat belt:
- Set the headrest to the highest position and open the light-green belt holder.
- Pass the diagonal belt through the light-green belt holder. Ensure the diagonal belt faces away from the child seat's alignment.
- Engage the buckle tongue in the seat belt lock.
- Place the lap belt in both dark green belt guides.
- Place the diagonal belt on the side of the seat belt lock into the dark green belt guide.
- Ensure the seat belt lock is not in the area of the dark green belt guide.
Buckling in the Child (Fastening type A):
- Open the harness buckle.
- Place the harness buckle at the front.
- Place the shoulder straps over the child's shoulders, ensuring they are not twisted.
- Bring the two buckle tongues together and insert them into the harness buckle until they audibly lock.
- Pull the adjustment belt until the shoulder straps are tight to the child's body, ensuring hip straps are positioned as low as possible over the child's hips.
Buckling in the Child (Fastening type B):
- Ensure the child seat is secured with Fastening type B1 or B2.
- Engage the vehicle's buckle tongue in the seat belt buckle.
- Place the lap belt into the two dark green belt guides, ensuring it is not twisted.
- Place the diagonal belt on the side of the seat belt lock into the dark green belt guide.
- Feed the lap belt into the dark green SecureGuard.
- Tighten the seat belt by pulling on the diagonal belt. Ensure the lap belt is as low as possible over the child's hips.
Checks Before Every Journey:
- Fastening type A: Child seat and child secured with Fastening type A, ISOFIX locking arms locked and extended, ISOFIX indicators green, TopTether secured and taut (finger-width of green visible), straps tight and not twisted, headrest correctly adjusted, shoulder pads in correct position, child seat used as intended for age/size.
- Fastening type B: Child seat and child secured with Fastening type B1 or B2, headrest correctly adjusted, lap belt in both dark-green belt guides and SecureGuard, diagonal belt to the side of the seat belt lock in the dark-green belt guide and in the light-green diagonal belt holder, button for light-green belt holder closed, diagonal belt not in SecureGuard, diagonal belt centrally over collar bone and not over neck, 3-point seat belt not twisted, child seat used as intended for age/size. For B1, ISOFIX locking arms locked, in same position, and indicators green.
Unbuckling the Child:
- Fastening type A: Press the red button on the harness buckle. Loosen shoulder straps for easier exit.
- Fastening type B: Press the release button on the seat belt lock.
Changing Fastening Types:
- From A to B (100 – 150 cm): This involves stowing the 5-point harness and fastening the SecureGuard.
- Loosen shoulder straps from the headrest by detaching them from the headrest cover.
- Open the harness buckle and loosen the belt by pressing the adjustment button and pulling shoulder straps forward.
- Extend the headrest to maximum.
- Place buckle tongues in lateral belt guides.
- Stow the 5-point seat belt: Place buckle tongues into recesses, open shoulder pads, slide them under the backrest cover, secure them with push-buttons, and tighten the harness.
- Fasten SecureGuard: Remove the cover from the harness buckle, lift and slide the grey removable disc with the harness buckle out towards the backrest, turn over the grey removable disc (SecureGuard up, harness buckle down), stow the harness buckle in the recess, and slide the grey removable disc back into its holder.
- From B to A (76 – 105 cm): This involves attaching the 5-point harness.
- Press the switch to unlock the headrest's upper area.
- Slide the headrest to the lowest position, fold up the headrest cover, and pull the cover forward.
- Attach harness buckle: Detach the cover from the SecureGuard, lift and slide the grey removable disc with the SecureGuard out towards the backrest, turn over the grey removable disc (harness buckle up, SecureGuard down).
- Prepare the change: Extend headrest to maximum, keep button on switch depressed, tilt switch down.
- Attach 5-point harness: Thread the harness buckle through the rear slot in the cover. Loosen the belt, remove shoulder pads from backrest cover, close shoulder pads with push-buttons (ensuring straps are threaded correctly), remove buckle tongues from their recess, and insert buckle tongues into dark green belt guides.
- Connect shoulder straps with the headrest: Fold down headrest cover, loosen push-buttons, place shoulder straps into headrest slots, and close push-buttons.
Maintenance Features:
Harness Buckle Cleaning:
- Remove harness buckle: Open the harness buckle, loosen the belt, extend the headrest to maximum, place buckle tongues in lateral belt guides. Remove the cover from the harness buckle, lift and slide the grey removable disc with the harness buckle out towards the backrest, turn over the grey removable disc, thread the metal plate through the cover, and remove the cover from the harness buckle.
- Clean belt lock: Soak the belt lock in warm water with washing-up liquid for at least an hour, then rinse thoroughly and dry.
- Attach harness buckle: Thread the metal plate through the cover.
Cover Cleaning:
The headrest cover, seat cover, harness buckle cover, and SecureGuard cover can be removed and washed in a washing machine at 30 °C with a mild detergent on a fine wash program. Shoulder pads can be washed with lukewarm soapy water. Plastic parts and straps can be cleaned with soapy water. Do not use strong cleaning agents. The seat cover is an integral safety component and the product must not be used without it. Only original Britax Römer replacement covers should be used.
Shoulder Pads Cleaning:
- Remove shoulder pads: Loosen the child seat, loosen the belt by pressing the adjustment button and pulling shoulder straps forward. Open the two shoulder pads, place the TopTether forwards above the seat, and unhook the pocket. Extend the shoulder straps slightly to see the belt loops, unhook them from the plastic web, and pull the shoulder pads forwards out of the belt slots.
- Attach shoulder pads: Follow the removal steps in reverse order. Ensure shoulder pads and straps are not twisted or reversed, and straps are positioned beneath the cover's edge.
Troubleshooting:
- Harness buckle issues: If buckle tongues are slow to release, don't lock, don't lock audibly, are difficult to insert, or require a lot of force to open, clean the harness buckle.
- ISOFIX connection issues: If ISOFIX locking arms cannot be connected to the vehicle's ISOFIX installation brackets, clean the vehicle's ISOFIX installation bracket.
Storage and Disposal:
- Storage: Store the product in a secure, dry location between 20 and 25 °C. Avoid leaning heavy objects on it, direct sunlight, heat sources, moisture, liquids, dust, and salt spray.
- Disposal: Do not dismantle the product. To prevent third parties from using a defective product, cut through the shoulder straps and remove the approved label. Follow local disposal regulations.