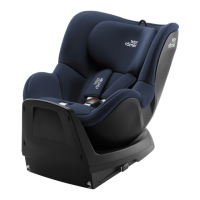
The BRITAX RÖMER DUALFIX PLUS is a child safety seat designed for use in vehicles, providing secure and comfortable transport for infants and young children. This user guide outlines its functions, technical specifications, usage, and maintenance.
Function Description
The DUALFIX PLUS is a versatile child seat that can be used from birth up to a maximum weight of 20 kg. It supports both rear-facing and forward-facing installations, offering flexibility as the child grows. The seat features an adjustable headrest and seat angle, allowing for optimal comfort and safety at different stages of development. It is equipped with an ISOFIX installation system for secure attachment to the vehicle, along with a support leg and an ISOFIX pivoting base for enhanced stability. The seat also includes a 5-point harness system to keep the child safely restrained.
Important Technical Specifications
- Designation: DUALFIX PLUS
- Body Height:
- Rear-facing: 40-105 cm (with insert for newborn babies up to a maximum of 60 cm)
- Forward-facing: From 15 months and 76-105 cm
- Body Weight: ≤ 20 kg
- Approval: Designed and approved according to the requirements of UN R129/03.
- Installation: ISOFIX installation with support leg.
- Harness System: 5-point harness.
- Adjustments: Adjustable headrest, seat angle, and harness straps.
- Safety Features: Warning signs are used throughout the guide to indicate potential danger situations, including:
- DANGER! Highlights dangerous situations which, if not avoided, lead to serious injuries or death.
- WARNING! Indicates a dangerous situation which, if not avoided, can lead to serious injuries or death.
- CAUTION! Indicates a dangerous situation which, if not avoided, can lead to slight to moderate injuries.
- NOTE: Indicates actions that can lead to damage.
- Specific warnings include risks of injury from damaged child seat, burns from hot components, injury during use, unsecured objects, front airbag, unsecured seat, slack straps, and omitted checks.
Usage Features
- User Guide: It is crucial to read and understand the user guide before using the product.
- Intended Use: The product is exclusively designed for securing a child in a vehicle.
- Misuse: The product should not be used as a toy, left unsecured in the car, or used with missing or damaged parts. It should not be exposed to moisture, wet conditions, liquids, dust, or salt spray. Heavy objects should not be leaned on the product.
- Adjusting Headrest: The headrest can be adjusted by pulling the adjustment ring (1) and simultaneously pulling the headrest (2) upwards or downwards. The shoulder pads (4) and shoulder strap (6) will adjust accordingly. Ensure the headrest is correctly adjusted so that the shoulder straps are at or slightly above the child's shoulders.
- Use of Newborn Insert: The insert for newborn babies (3) is used for children up to a maximum of 60 cm. It is placed into the child seat and secured with the harness buckle (5) and plastic hooks (7).
- Adjusting Seat Angle: The seat angle can be adjusted by pressing the adjustment button (1) and sliding the seat (2) to the desired position. This allows for comfortable recline in both rear-facing and forward-facing modes.
- Change Direction of Travel: The seat can be rotated 360 degrees to switch between rear-facing and forward-facing positions. This is done by pressing the rotation button (2) and turning the seat (1) to the desired direction. The red indicator on the rotary button (3) must not be visible, indicating a secure lock.
- Secure Child Seat (ISOFIX Installation):
- Select Seat: Ensure the vehicle seat is suitable for ISOFIX installation.
- Attach Insertion Aids: The ISOFIX installation bracket (1) and insertion aid (2) are used to simplify connecting the ISOFIX locking arms.
- Position Child Seat: Place the child seat on the vehicle seat.
- Fastening the ISOFIX:
- Press the locking button (4) and release button (2) to extend the ISOFIX locking arms (1).
- Push the ISOFIX locking arms (1) onto the ISOFIX installation brackets until they audibly lock in place.
- Check that the ISOFIX indicators (3) are green.
- Push the child seat firmly against the vehicle seat backrest.
- Adjust the support leg (1) by pressing the adjustment button (3) and extending it until it firmly rests on the vehicle floor. The red swivel indicator (2) must not be visible.
- Loosen Child Seat:
- Keep holding the adjustment button (1) depressed.
- Slide the lower section of the support leg (2) into the upper section.
- Release the adjustment button (1).
- Press the locking button (5) and the release button (4) to slide the ISOFIX locking arm (3) back into the bottom section of the seat.
- Buckling in and Unbuckling:
- Boarding and Exit: Press the rotary button (2) and simultaneously turn the seat (1) towards the car door.
- Buckle Child In: Place the child in the seat, ensure the shoulder straps (1) are tight, and buckle the harness buckle (2) by inserting the buckle tongues (5) until they audibly lock. Adjust the shoulder straps (1) and adjustment belt (4) for a snug fit.
- Check Before Every Use: Verify that the ISOFIX locking arms are extended and green, the support leg is stable, the red indicator on the support leg is not visible, the seat audibly locks, the red rotation indicator on the rotary button is not visible, and the straps are tight.
- Unbuckle Child: Open the harness buckle (1) by pressing the red button.
Maintenance Features
- Cover: The seat cover can be removed for cleaning.
- Remove the two hooks (2) from the loops (3) in the cover of the headrest (1).
- Open the Velcro (5).
- Remove the foam parts (6).
- To remove the cover from the headrest, press the adjustment button (4) and pull both shoulder straps (6) forwards at the same time.
- The shoulder pads are not connected to the shoulder straps. If you pull on the shoulder pads, the belt is not loosened. Only pull on the shoulder straps.
- Open the harness buckle (3) by pressing the red button.
- Adjust the headrest (1) to the highest position.
- Loosen the rubber loops (2) on the bottom edge of the headrest.
- Remove the hooks (7) at the top edge of the headrest.
- Remove the cover.
- Cleaning: The removable covers and wash them in the washing machine. The seat reducer, seat cover, and headrest can be cleaned. Wash the cover at 30°C with a mild detergent on the washing machine's fine wash machine cycle. Shoulder pads and straps can be washed with lukewarm soapy water. Plastic parts and straps can be cleaned with soapy water. Do not use strong detergents (such as solvents).
- Attach Cover: To reattach the cover, follow the steps in the reverse order.
- Shoulder Pads:
- Remove Shoulder Pads: Loosen the belt, press the adjustment button (3) and pull both shoulder straps (2) forwards at the same time. The shoulder pads are not connected to the shoulder straps. If you pull on the shoulder pads, the belt is not loosened. Only pull on the shoulder straps.
- Open the shoulder pad (1) on the Velcro (4) on the side.
- Fold away the black cover strip (5).
- Detach the shoulder pad (1) from the hook (6).
- Attach Shoulder Pads: Open the shoulder pad (1) on the hook (3).
- Place the shoulder strap (4) on the strap (2).
- Fold the black cover strip (5) onto the shoulder strap (4).
- Close the shoulder pad (1) using the Velcro closure (6) on the side.
- Troubleshooting: If the ISOFIX connection is not working correctly, ensure the ISOFIX locking arms of the child seat are connected to the ISOFIX installation brackets of the vehicle. Clean the vehicle's ISOFIX installation bracket if necessary.
- Storage and Disposal:
- Store the product in a secure and dry location.
- Keep the storage temperature between 20 and 25 °C.
- Do not lean heavy objects on the product.
- Do not store the product directly next to sources of heat or in direct sunlight.
- Protect the product from moisture, wet conditions, liquids, dust, and salt spray.
- Do not dismantle the product.
- Follow the disposal regulations applying in your country.
For any questions, please get in touch with:
BRITAX RÖMER Child Safety EMEA
www.britax-roemer.com
contact@britax.com
BRITAX RÖMER Kindersicherheit GmbH
Theodor-Heuss-Strasse 9
89340 Leipheim
Germany