EasyManua.ls Logo

British Fires NEW FOREST User Manual

British Fires NEW FOREST
25 pages
To Next Page IconTo Next Page
Page #1 background imageLoading...
Page #1 background image
© 2022 British Fires
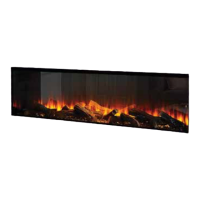
NEW FOREST ELECTRIC 48" & 63" FIREPLACES
INSTALLATION & USER INSTRUCTIONS
EN

Questions and Answers:

British Fires NEW FOREST Specifications

General IconGeneral
ModelNew Forest
TypeElectric Fireplace
Remote ControlYes
StyleContemporary
Flame EffectLED
Installation TypeWall Mounted
Fuel Bed OptionsLog

Summary

Important Notes and Safety Precautions

General Safety Precautions

Essential safety guidelines for operating the electric fireplace to prevent hazards.

Electrical Safety and Fire Prevention

Warnings related to electrical hazards, grounding, and preventing fires during operation.

Usage Restrictions and Environmental Safety

Guidelines on where not to use the appliance and precautions for surrounding materials.

Child Safety and Supervision

Specific instructions for safe use around children and vulnerable individuals.

FCC Compliance Statement

Information regarding the device's compliance with FCC regulations for radio frequency energy.

Appliance Specifications and Data

Appliance Plug Specifications

Details about the 3-pin plug and the length of the power cord.

New Forest 48" Electric Fire Specifications

Technical data including weight, dimensions, voltage, and heating elements.

New Forest 63" Electric Fire Specifications

Technical data including weight, dimensions, voltage, and heating elements.

Heat Output and Auxiliary Consumption Data

Details on heat output types, energy consumption, and room temperature control options.

Preparation and Installation Guidelines

Component Checklist

A detailed list of all parts provided with the appliance for installation and use.

Site Preparation and Placement Guidelines

Instructions on preparing the installation site and choosing a suitable location for the appliance.

Combustible Material Clearances

Specifies minimum distances required between the appliance and combustible materials.

Safe Unpacking and Lifting Procedures

Step-by-step instructions for safely unpacking the appliance, highlighting lifting techniques.

Appliance Preparation Steps

Corner Bracket Assembly and Orientation

Guide to assembling, orienting, and reinstalling the corner bracket for cable management.

Installing Blanking Plates and Trims

Steps for attaching blanking plates and side trims to the appliance for different installation types.

Removing and Reinstalling Front Glass

Instructions for safely removing and reinstalling the front glass panel of the appliance.

Electrical Hard-Wiring Procedures

Attaching L-Shaped Brackets

Guide on how to attach the L-shaped wall brackets to the appliance for fixing.

Removing Glass Panels for Hard-Wiring

Detailed steps for safely removing front and side glass panels before electrical work.

Preparing for Hard-Wiring Connections

Instructions on removing the fuel bed and side glass panels for access to wiring.

Hard-Wiring Appliance Details

Accessing Wiring Connections

Procedure for removing the rear glass and accessing the internal wiring connections.

Wiring Connections and Terminations

Steps for disconnecting existing cables and making new wire connections to the PCB.

Cable Securing and Power Check

Instructions for securing cables with clamps and verifying electrical connection and power.

Finalizing Hard-Wiring and Installation

Reinstalling Glass Panels and Fuel Bed Tray

Steps for reinstalling glass panels and the fuel bed tray after wiring.

General Installation Requirements

Overall requirements for installation, including wall strength, flatness, and power access.

Stud Wall Installation Warnings

Important warning regarding headers in stud wall installations for proper support.

Installation Options Overview

One-sided (fully-recessed) Installation Dimensions

Diagram and dimensions for a one-sided, fully-recessed fireplace installation.

Two-sided Installation Diagrams

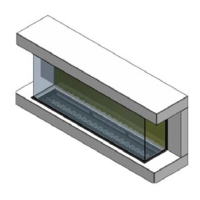
Diagram and dimensions for a two-sided fireplace installation configuration.

Three-sided Installation Diagrams

Diagram and dimensions for a three-sided fireplace installation configuration.

Non-Combustible Overhang Requirements

Guidelines on non-combustible materials for overhangs above the appliance.

False Chimney Breast Installation

Stud Wall Fixing: Framework Preparation

Steps for preparing the framework for stud wall installation, including dimensions.

Stud Wall Fixing: Securing the Structure

Instructions on safely securing the framework to the wall and checking fixings.

Stud Wall Fixing: Appliance Installation

Steps for inserting the appliance into the prepared stud wall structure and securing it.

Floating Installation Procedures

Stud Wall Fixing: Adding Finishing Boards

Instructions for adding finishing boards after the appliance is secured in the stud wall.

Floating Installation: Bracket Preparation

Steps for preparing the appliance and wall bracket for a floating installation.

Floating Installation: Securing the Bracket

Instructions on drilling, installing wall anchors, and securing the mounting bracket to the wall.

Completing Floating Installation

Floating Installation: Mounting the Appliance

Steps for mounting the appliance onto the wall bracket and securing it.

Floating Installation: Suite Assembly and Finishing

Procedures for attaching suite fixing brackets, assembling the surround, and installing panels.

Fuel Bed Layout Instructions

Forest View Fuel Bed: Crystal and Slate Placement

Instructions for scattering small crystals and placing slate pieces on the frosted base.

Forest View Fuel Bed: Terrain and Husk Placement

Steps for arranging Forest terrain and Husk materials to cover the base.

Forest View Fuel Bed: Log Placement

Guide on positioning the logs on the fuel bed, noting care with glass.

Fuel Bed Arrangement Options

Slate View Fuel Bed: Crystal and Slate Arrangement

Instructions for evenly scattering crystals and placing slate pieces on the base.

Slate View Fuel Bed: Log Positioning

Guide for placing logs on the fuel bed, with a reminder about glass contact.

Diamond Light Fuel Bed Configuration

Diamond Light Fuel Bed: Crystal Arrangement

Instructions for scattering small crystals and placing larger crystals on the frosted base.

Diamond Light Color Settings

Information on the different color settings available for the Diamond Light fuel bed.

Remote Control Operation

Remote Control Pairing Procedure

Step-by-step guide to pair the remote control with the electric fireplace.

Remote Control Overview and Functions

Description of the remote controller, its buttons, and the LCD screen display.

Appliance Operating Features

Standby and Main Power Operation

How to turn the appliance on and off using the main power switch.

Adjusting Flame Effect Brightness

Guide on how to change and select different flame effect brightness levels.

Heating and Temperature Control

Instructions for adjusting temperature settings and understanding the fan delay function.

Open Window Detection Feature

Explanation of the feature that turns off heating if room temperature drops significantly.

Overheat Protection System

Information on the safety cut-out device and procedure if it activates.

Fuel Bed Color Adjustment

How to change the color of the fuel bed lighting.

Setting the Sleep Timer

Instructions for setting the automatic shutdown timer for the appliance.

Down Lighting Control

How to turn the internal down lighting on and off.

Setting Clock and Weekly Timer

Guide to setting the current time and configuring weekly timer schedules.

Advanced Appliance Operation and Maintenance

Detailed Heat Settings and Conversion

Specifics on available temperature settings and unit conversion (°C/°F).

Preset Timer Programming

How to program preset ON/OFF timers for different modes and days.

Using Auto Mode for Timers

Instructions on utilizing "auto mode" for multiple preset timer executions.

Setting Daily Schedules

How to set ON/OFF times and temperatures for specific days and modes.

Checking Timer Settings

How to review programmed timer settings (ON/OFF times and temperatures).

Safety Cut-Out System Explained

Details the overheat protection device and the procedure to reset it after activation.

General Cleaning Procedures

Guidelines for cleaning the appliance, including glass panels and ventilation grilles.

Remote Handset Battery Replacement

Instructions for replacing the batteries in the remote control handset.

Troubleshooting and Spare Parts

Troubleshooting: Fire Not Switching On

Solutions for when the electric fire fails to power on.

Troubleshooting: No Heat Emission

Steps to resolve issues where the appliance is not emitting heat.

Troubleshooting: Automatic Shut-Off

Solutions for when the appliance unexpectedly shuts off during operation.

Troubleshooting: Display Code 88

Explanation and solution for the '88' error code on the display panel.

Troubleshooting: Display Code EE

Explanation and solution for the 'EE' error code indicating an electrical fault.

Troubleshooting: Display Code OP

Explanation and solution for the 'OP' error code related to window detection.

List of Spare Parts

A list of available spare parts for the appliance.

Spare Parts Identification

Spare Parts for New Forest 48" (1200)

Exploded diagram and part numbers for the 48" model.

Spare Parts for New Forest 63" (1600)

Exploded diagram and part numbers for the 63" model.

Two Year Limited Warranty Information

Warranty Coverage Details

Information on which products are covered by the limited warranty.

Warranty Terms and Conditions

The terms and conditions governing the two-year limited warranty period.

Warranty Exclusions

Specific items and conditions not covered by the limited warranty.

State and Provincial Law Applicability

Explanation of how local laws affect the warranty rights.

Appliance Dimensions and Features

Dimensions and Specifications for 48" Model

Detailed dimensions, electrical specifications, and features for the 48" model.

Dimensions and Specifications for 63" Model

Detailed dimensions, electrical specifications, and features for the 63" model.

Related product manuals