6
3. StarPro Max/Plus External Model Guidelines
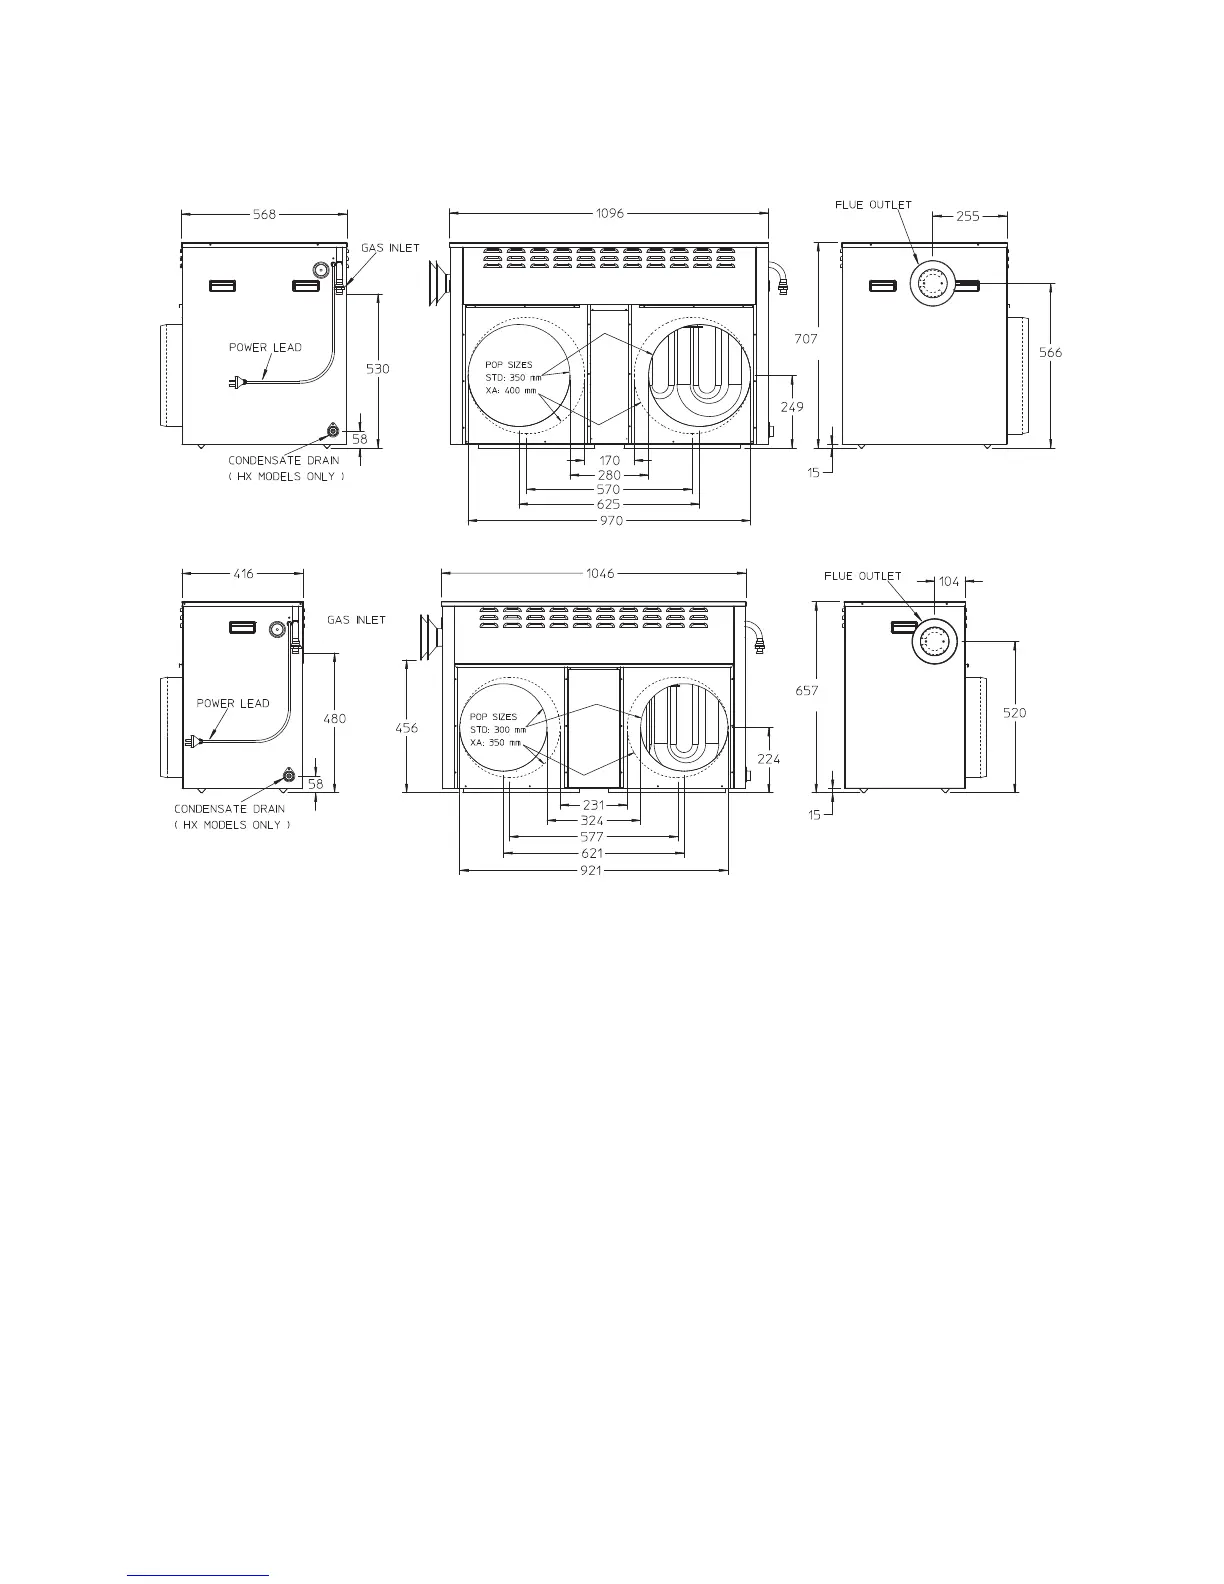
3.1 Heater Dimensions
HX30E and MX30E (MX Illustrated)
HX23E and MX21E (MX Illustrated)
3.2 Service Clearances
Side
A minimum clearance of 500mm must be provided at the side facing away from the house.
Front/Back
A minimum clearance of 300mm must be provided at each end of the heater.
Top
A minimum clearance of 1000mm must be provided above the heater roof. This c
learance must be maintained for
the entire surface area of the heater roof.
3.3 Reversing the Heater
The duct orientation of StarPro Max/Plus External heaters can be reversed if the installation requires it.
• Remove the screws at the bottom edge of the front panel of the heater, and carefully lift away the front panel,
without scratching or marking it.
• There will be two blanking plates behind the front panel, which cover the two pop holes. Remove the two
blanking plates.
• Fit the two blanking plates to cover the original pop holes to prevent air leakage.
• Above the original pop holes there will be a flashing bracket secured by screws, which needs to be reversed.
Remove the flashing bracket, and fit it to the new pop outlet side of the heater.
• Gently fit the front panel back in place on the reverse side from where it was removed, and fasten using the
screws along the bottom edge.
3.4 Installation of Pops
• Insert pops into the hole in pop plate, ensuring pop flange is placed over the INNER supply air wall of the
cabinet.
• Spread the pop flange to fit tightly into the hole in the cabinet (the notch side overlapping the other).
• Secure the pops with the rivets supplied.
MX
810 HX
 Loading...