8
1. Getting Started 1-2 Attaching and detaching the lens
Note 1: The 65mm and the 100mm viewframes in the viewfinder are automatically
switched as the respective lenses are attached.
Note 2: When mounting the 45mm lens, insert the dedicated viewfinder into the accessory
hotshoe on the camera body. Refer to the instruction manual of the 45mm lens for
more information.
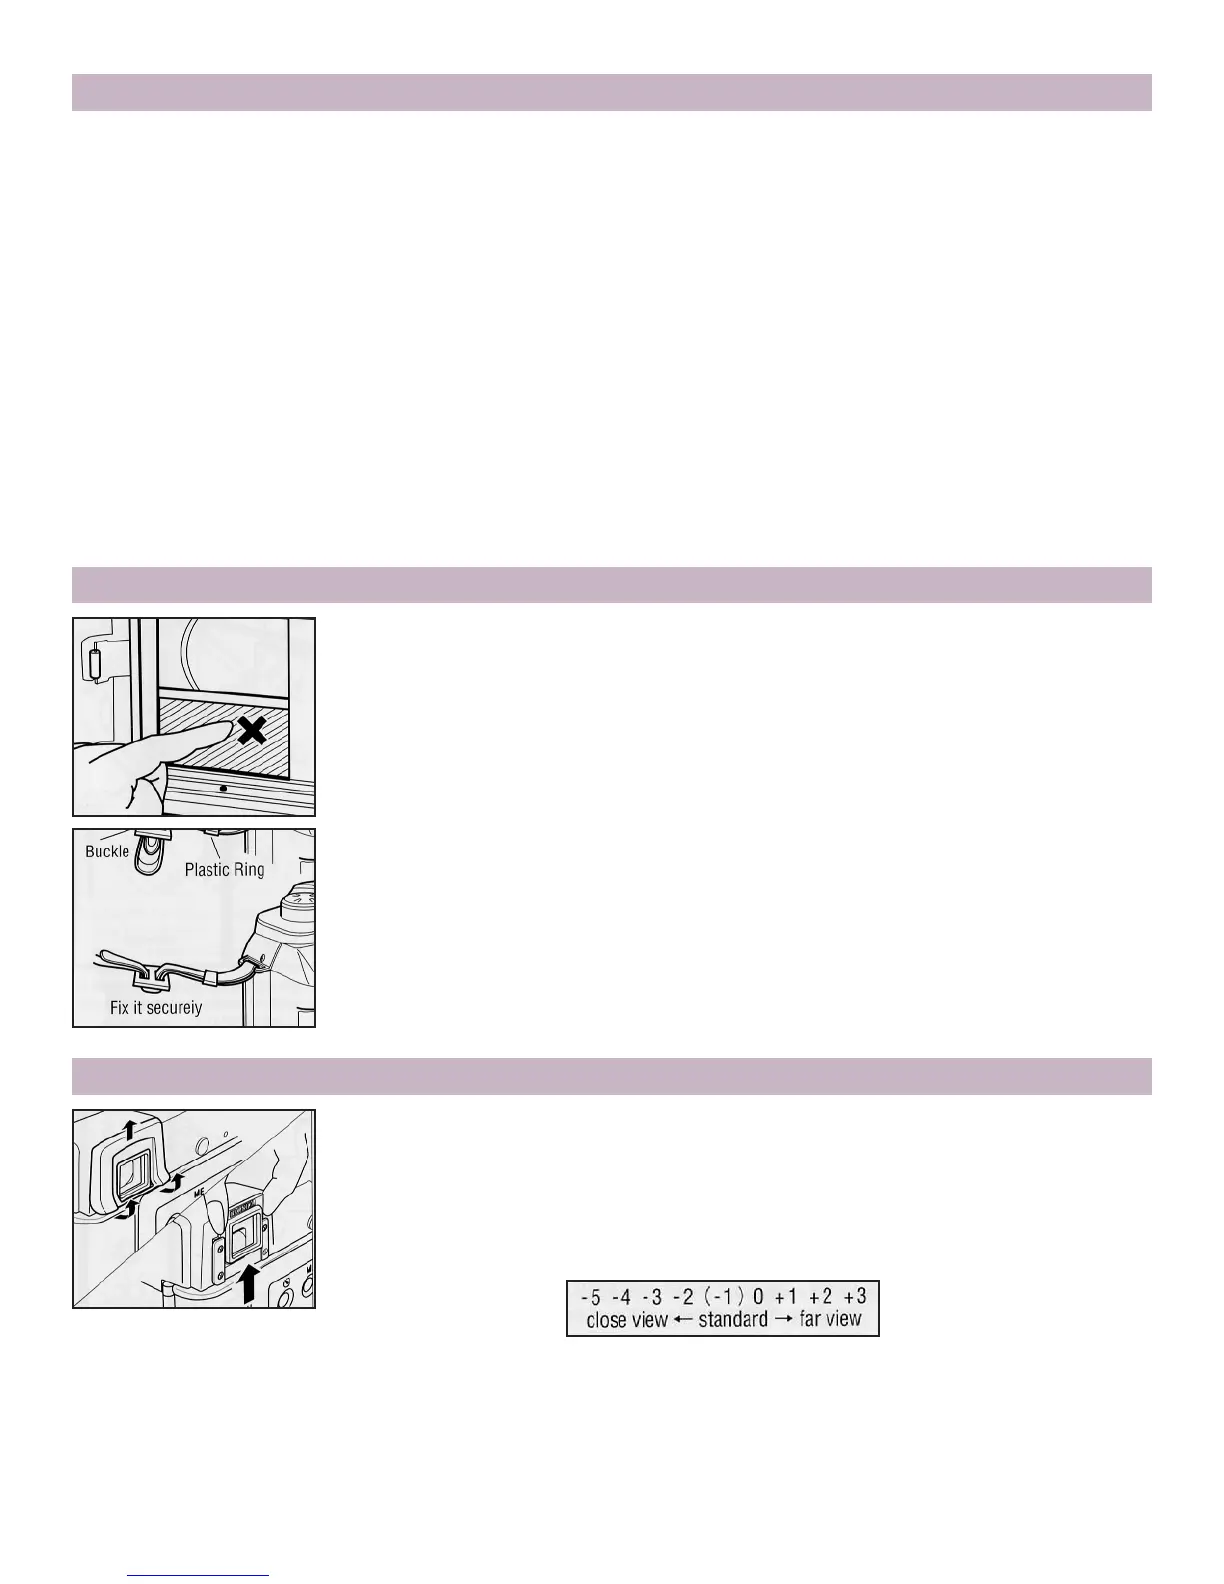
Note 3: When attaching or detaching lenses, do not use excessive force to rotate or twist
the lens.
Note 4: Never attempt to detach the lens while the shutter is open in B (bulb) shooting.
Note 5: This camera employs a lens shutter, so normally the film would be improperly
exposed when changing lenses. To prevent this, a light shielding curtain is auto-
matically drawn out by the lens detaching action, covering and protecting the film.
Do not press or touch this curtain with fingers or sharp objects.
1. Getting Started 1-3 Attaching strap
1. Getting Started 1-4 Attaching the proper diopter adjustment lens
1-3 Attaching the Strap
Three camera strap lugs are provided with this camera. To carry the
camera in a horizontal position, attach the strap to the upper lugs on
both sides. To suspend the camera in a vertical position, use the
upper and lower lugs on the right side of the camera body. Follow
the procedure illustrated above to thread the strap through the lugs
and rings.
Note: Make sure the strap is properly attached to the lugs or the
camera may be accidentally dropped.
1-4 Attaching the Proper Diopter Adjustment Lens
1. A set of nine viewfinder eyepiece lenses are prepared as optional
accessories, from -5 to ±3 diopter, including the normal eyepiece lens
of -1 diopter that comes attached to the camera.
2. Detach the rubber viewfinder cup as shown above, and slide the
standard viewfinder eyepiece lens out from the eyepiece frame.
3. Replace the proper diopter adjustment eyepiece lens by sliding it
into the eyepiece frame. Attach the rubber eyecup.
 Loading...