38
9.4.1 USER MENU
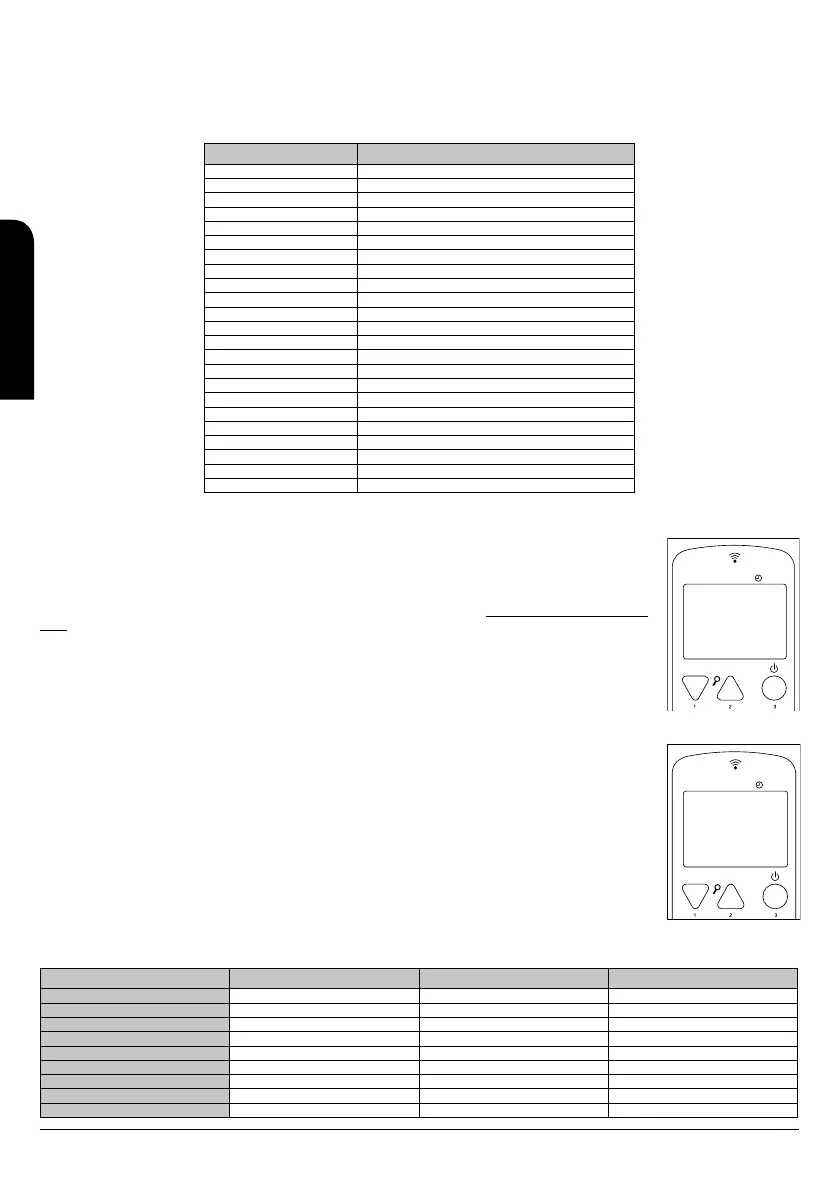
The following table briefly describes the menu structure in the stove or insert. In the attached table, only the options available to the user are
specified.
The 01 menu element is disabled in some models.
MENU Sub-menu 1.
01- Reg. aux. fan ** Only channelling stoves
02 - Clock adjustments
01- Day
02- Hour
03- Minute
04- Day
05- Month
06- Year
03 - Programme setting ** See point 10.4.4.
04 - Select Language
01 - Spanish
02 - Portuguese
03 - Italian
04 - French
05 - English
06 - Catalan
Choose probe
01- Internal probe
02- Cont. probe Rem.
06- Stand-by Mode
07 - Buzzer mode
08 - Initial load
09 - Boiler State Provides information on the status of the stove.
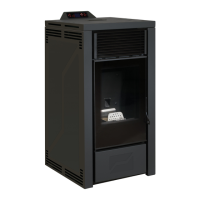
9.4.2 MENU 1. AUXILIARY FANS
This menu is only available for ductable stoves, because they are provided with one or two auxiliary fans to control
the working power of the stove independently. It means that is possible to configure the operation of the fans
separately, to activate one of them and deactivate the other one, it is also possible to choose their operation speed
independently.
It is possible to configure it pressing button nº 1 to change the values of fan 2 (only models Neva-Extra and Alicia
Extra), and button nº 3 to do the same with the fan 3 (only for model canalizable de 10 kW). (see drawing D59).
We can set the next values:
A: automatic speed. The fan speed is proportional to the working power of the stove.
0: deactivation of the auxiliary fan
1-5: working fan speed, being 5 the lowest and 5 the highest.
NOTE: In all the other models, menu 1 has no utility. For this reason, the visualization (by default) is not operative.
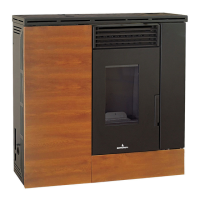
9.4.3 MENU 2. CLOCK
It sets up the time and date. To set the clock up you have to move by the different submenus and introduce the
data, changing values with buttons 1 and 2. The card has a lithium battery that allows the clock to work during 3/5
years (see drawing D60).
9.4.4 MENU 3. PROGRAMME ADJUSTMENT (TIMETABLE SCHEDULE OF THE STOVE OR INSERT)
IMPORTANT NOTE. Before starting the set up of the stove or insert, please check that the time and date
shown are correct. Otherwise, the selected programming would be set up depending on the time and date
set by default and this could not satisfy your needs.
The following table briefly describes the programming menu structure in the stove where are detailed all the
different options.
MENU Sub-menu 1. Sub-menu 2. VALUE
03 - Programme setting
1- Set up chrono
01- Set up chrono ON/OFF
2- Daily programme
01 - PROG daily ON/OFF
02- Start 1 Day Hour
03- Stop 1 Day Hour
04- Start 2 Day Hour
05- Stop 2 Day Hour
D59
MENU
Menú 01
FAN-2 2
FAN-3 A
D60
MENU
06
Menu 02
MONTH
CLOCK
INSTALLATION, OPERATING AND SERVICING INSTRUCTIONS RADIOFREQUENCY SERIES
EN