FLYING YOUR DRONE
With the batteries fully charged and installed, and the power cable connected to
the drone:
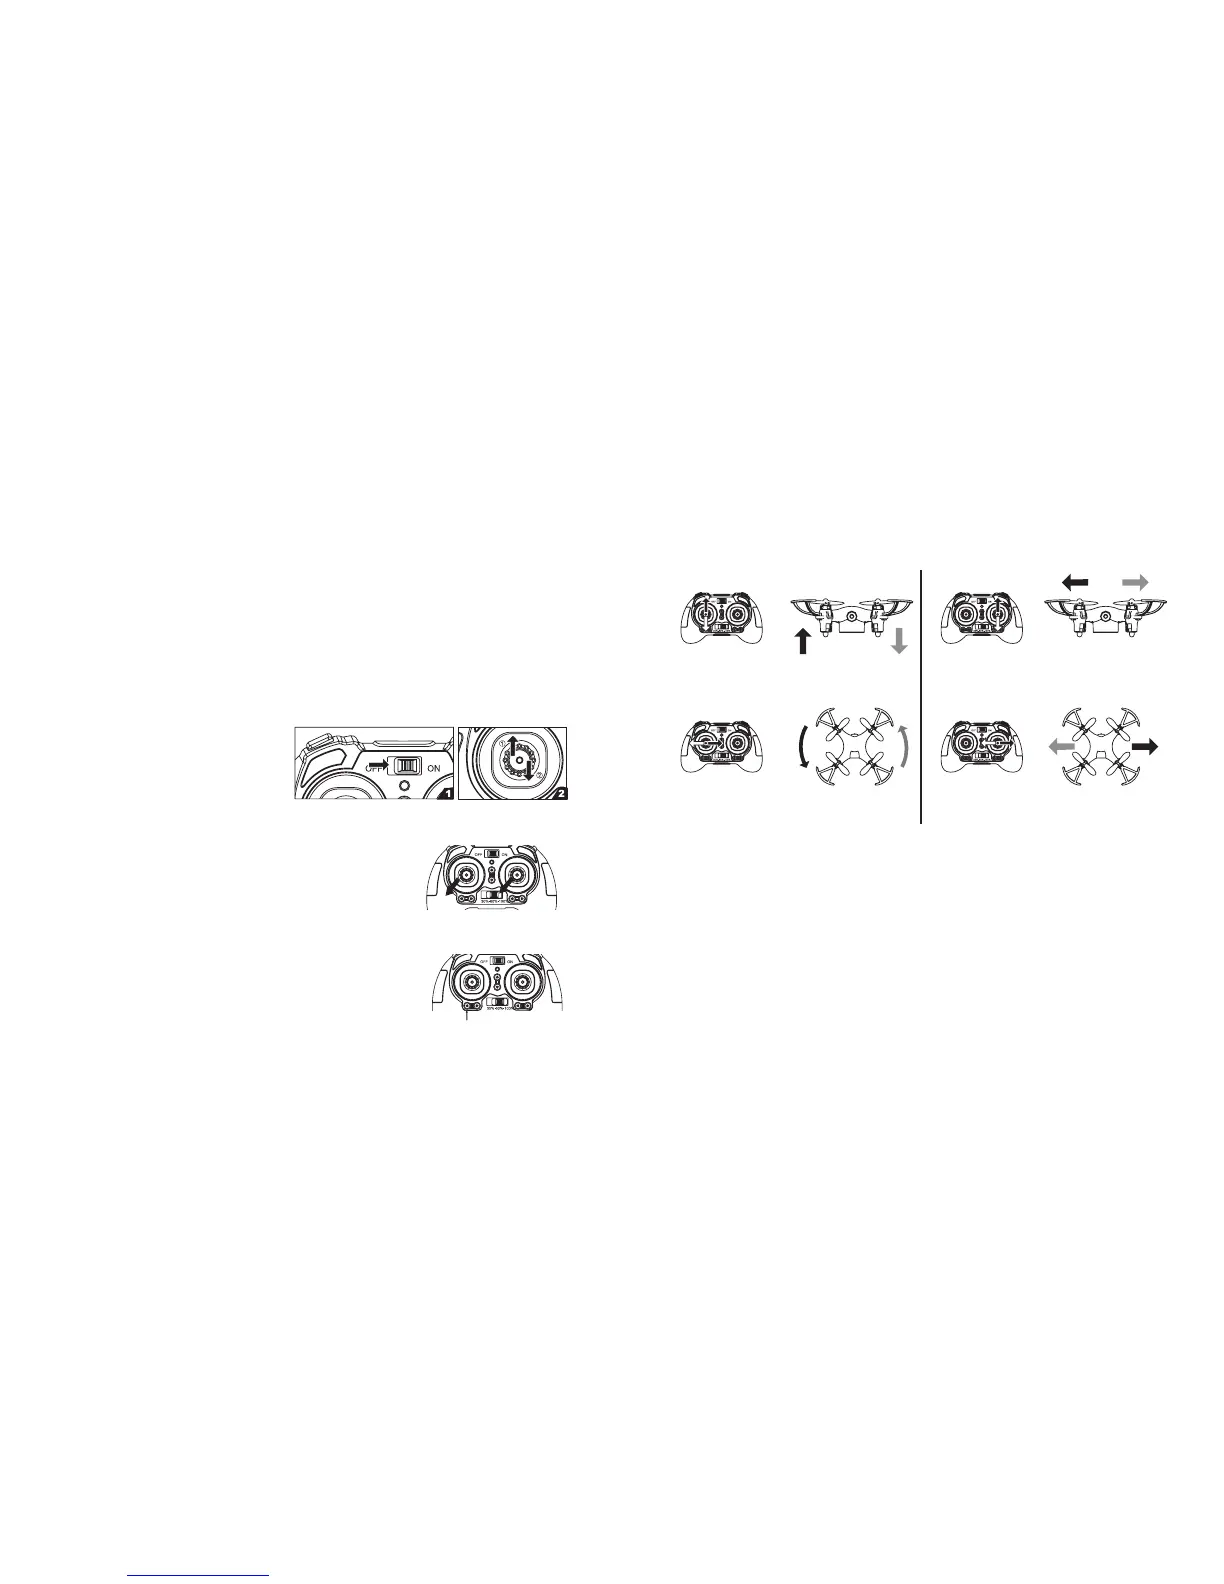
1. Slide the controller's Power
switch to the ON position.
2. Push the left joystick to the
highest position and then to the
lowest position to connect the drone and the controller. The controller beeps and
the LED lights stop flashing.
3. Pull the left and right joysticks to the left corner at the
same time and hold for 3 seconds. The drone's rotor
blades will begin turning.
4. Use the joysticks to control movement, as illustrated
on Page 11. Always move the joysticks slowly to maintain control.
Alternatively, you can press the One Key Takeoff Button
to raise the drone approximately 5 feet (1.5 meters). It
will hover until you use the left joystick to change the
height.
1110
SETTING YOUR SPEED
The drone has three speed settings. Slide the Speed Selector to 30% (slowest), 60%,
or 100% (fastest) to set your speed. The drone will beep to indicate a speed change.
While learning to use the drone, it is advisable to start by using the slowest speed
setting (30%).
Push the left joystick up and down to control
the drone's ascent and descent. Release to
hover at the current height.
Push the left joystick right and left to control
the drone's right and left rotation.
Push the right joystick up and down to control the
drone's forward and backward movement.
Push the right joystick right and left to
control the drone's right and left movement.
Left Joystick Right Joystick
One Key Takeoff Button
If the drone crashes, the rotor blades will stop. Repeat Step 3 to resume flight.
NOTE: When the battery is becoming depleted, the LEDs will flash. To avoid losing
control of the drone, land the drone as soon as possible and recharge the battery.