AX1500 WiFi 6 Range Extender
AX1500 WiFi to Gigabit Ethernet Adapter
Model: E2/AX2
Quick Installation Guide
support@brostrend.com
Video Installation Guide is available via this link:
https://www.brostrend.com/pages/video-guide
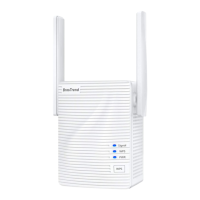
WPS
RESET
LED indicator
Gigabit Ethernet port:
For connecting with a wired device, such as your
smart TV, computer, game console, etc.
Reset button
WPS button
FAQ
Čeština
Režim práce 1: Nastavení jako rozšiřovač WiFi signálu Režim práce 2: Nastavení jako univerzální adaptér WiFi na Ethernet
Metoda 1: Nastavení pomocí webového rozhraní správy
1. Zapněte. Zasunete rozšiřovač do zásuvky poblíž routeru.
2. Připojte své WiFi zařízení k výchozí WiFi síti rozšiřovače: BrosTrend_EXT nebo připojte počítač k
Ethernetovému portu rozšiřovače pomocí Ethernetového kabelu.
3. Otevřete webový prohlížeč, zadejte http://brostrendwifi.com nebo 192.168.0.254 do adresního řádku
(NE do vyhledávacího okna) a navštivte webové rozhraní.
4. Vytvořte heslo pro přihlášení do budoucna (doporučeno). Pak klikněte na Další.
5. Vyberte Režim Rozšiřovač / Režim Adaptér WiFi na Ethernet Režim přístupového bodu a klikněte
na Další.
6. Vyberte WiFi síť(y), kterou(ch) chcete rozšířit, zadejte správná hesla k WiFi, a pak klikněte na OK.
7. Přizpůsobte názvy (SSID) a hesla rozšířených WiFi, a pak klikněte na Zesílit.
8. Zkontrolujte, zda se rozšiřovač úspěšně připojil k vaší WiFi síti podle stavu LED indikátoru.
9. Zasunete rozšiřovač do elektrické zásuvky zhruba uprostřed mezi WiFi routerem a místem s nekvalitním
WiFi signálem. Dokončeno!
1. Viz Režim práce 1: Nastavení jako rozšiřovač WiFi signálu pro první nastavení zařízení.
2. Poté připojte k tomuto zařízení vaše kabelové zařízení pomocí Ethernetového kabelu. Nastavení
dokončeno!
(Kabelová zařízení: chytrá televize, herní konzole, počítač, IP kamera, Blu-Ray přehrávač atd.)
Režim práce 3: Nastavení jako bezdrátový přístupový bod
1. Zapněte. Připojte rozšiřovač do zásuvky poblíž routeru.
2. Připojte své WiFi zařízení k výchozí WiFi síti rozšiřovače: BrosTrend_EXT nebo připojte počítač k
Ethernetovému portu rozšiřovače pomocí Ethernetového kabelu.
3. Otevřete webový prohlížeč, zadejte http://brostrendwifi.com nebo 192.168.0.254 do adresního
řádku (NE do vyhledávacího okna) a navštivte webové rozhraní.
4. Vytvořte heslo pro přihlášení do budoucna (doporučeno). Pak klikněte na Další.
5. Vyberte Režim přístupového bodu a klikněte na Další.
6. Přizpůsobte názvy WiFi a hesla WiFi, klikněte na Uložit. Poté počkejte asi 1 minutu, dokud LED
nezačne pomalu blikat červeně.
7. Připojte toto zařízení k internetovému portu Ethernetu (LAN portu) pomocí Ethernetového kabelu.
Nastavení dokončeno!
Metoda 2: Nastavení pomocí tlačítka WPS
1. Zapnutí: Zapojte rozšiřovač do zásuvky poblíž směrovače. Počkejte, až indikátor LED začne blikat
červeně.
2. Stiskněte tlačítko WPS na svém směrovači.
3. Do 2 minut stiskněte tlačítko WPS na rozšiřovači, indikátor LED začne rychle blikat zelená.
4. Počkejte, až indikátor LED zůstane stabilně svítit, což znamená úspěšné připojení k vašemu směrovači.
* Po spárování pomocí WPS, z důvodu zabezpečení sítě, připojte své bezdrátové zařízení k nově rozšířeným
sítím a navštivte http://brostrendwifi.com v prohlížeči, abyste nastavili heslo pro přihlášení k nově
rozšířeným síťem. V opačném případě bude webové uživatelské rozhraní otevřeno pro jakákoliv zařízení
připojená k rozšířeným sítím.
* Nach der WPS-Kopplung sollten Sie aus Gründen der Netzwerksicherheit Ihr drahtloses Gerät mit den
neu erweiterten Netzwerken verbinden und http://brostrendwifi.com in einem Browser besuchen,
um ein Anmeldepasswort für Ihre neu erweiterten Netzwerke einzurichten. Andernfalls bleibt das
Web-Benutzeroberfläche für alle Geräte offen, die mit den erweiterten Netzwerken verbunden sind.
Deutsch
Arbeitsmodus 1: Einrichtung als WiFi-Verstärker Arbeitsmodus 2: Einrichtung als universeller
WiFi-zu-Ethernet-Adapter
Methode 1: Einrichtung über die Web-Management-Benutzeroberfläche
1. Schalten Sie ein. Stecken Sie den Verstärker in eine Steckdose in der Nähe des Routers.
2. Verbinden Sie Ihr WiFi-Gerät mit dem Standard-WiFi-Netzwerk des Verstärkers: BrosTrend_EXT,
oder verbinden Sie Ihren Computer über ein Ethernet-Kabel mit dem Ethernet-Port des Verstärkers.
3. Öffnen Sie einen Webbrowser, geben Sie http://brostrendwifi.com oder 192.168.0.254 in die
Adressleiste (NICHT in das Suchfeld) ein, um die Web-Benutzeroberfläche zu besuchen.
4. Erstellen Sie ein Anmeldepasswort für zukünftige Anmeldungen (empfohlen). Klicken Sie
dann auf Weiter.
5. Wählen Sie den Verstärkermodus / WiFi-zu-Ethernet-Adapter-Modus aus und klicken Sie
auf Weiter.
6. Wählen Sie das/die WiFi-Netzwerk(e) aus, das/die Sie erweitern möchten, geben Sie die richtigen
WiFi-Passwörter ein und klicken Sie dann auf OK.
7. Passen Sie die erweiterten WiFi-Namen (SSID) und Passwörter an und klicken Sie dann auf Erweitern.
8. Überprüfen Sie, ob der Verstärker gemäß dem Status der LED-Anzeige erfolgreich mit Ihrem
WiFi-Netzwerk verbunden ist.
9. Stecken Sie den Verstärker in eine Steckdose etwa in der Mitte zwischen Ihrem WiFi-Router und der
WiFi-Deadzone. Fertig!
1. Bitte beziehen Sie sich auf Arbeitsmodus 1: Einrichtung als WiFi-Verstärker, um das
Gerät zuerst einzurichten.
2. Verbinden Sie dann Ihr verkabeltes Gerät mit diesem Gerät über ein Ethernet-Kabel.
Einrichtung abgeschlossen!
(Verkabelte Geräte: Smart TV, Spielkonsole, Computer, IP-Kamera, Blu-Ray-Player, etc.)
Arbeitsmodus 3: Einrichten als drahtloser Zugangspunkt
1. Schalten Sie das Gerät ein. Stecken Sie den WiFi-Verstärker in eine Steckdose in der Nähe des Routers.
2. Verbinden Sie Ihr WiFi-Gerät mit dem Standard-WiFi-Netzwerk des Verstärkers:
BrosTrend_EXT, oder verbinden Sie Ihren Computer über ein Ethernet-Kabel mit dem
Ethernet-Port des Verstärkers.
3. Öffnen Sie einen Webbrowser, geben Sie http://brostrendwifi.com oder 192.168.0.254 in die
Adressleiste (NICHT in das Suchfeld) ein, um die Web-Benutzeroberfläche zu besuchen.
4. Erstellen Sie ein Anmeldepasswort für zukünftige Anmeldungen (empfohlen). Klicken Sie dann auf Weiter.
5. Wählen Sie den AP-Modus aus und klicken Sie auf Weiter.
6. Passen Sie die WiFi-Namen und WiFi-Passwörter an, klicken Sie auf Speichern. Warten Sie dann etwa
1 Minute, bis die LED langsam rot blinkt.
7. Verbinden Sie dieses Gerät mit einem internetfähigen Ethernet-Port (LAN-Port) mit einem Ethernet-Kabel.
Einrichtung abgeschlossen!
Methode 2: Einrichtung über die WPS-Taste
1. Einschalten: Stecken Sie den Verstärker in eine Steckdose in der Nähe des Routers. Warten Sie,
bis die LED-Anzeige rot blinkt.
2. Drücken Sie die WPS-Taste auf Ihrem Router.
3. Drücken Sie innerhalb von 2 Minuten die WPS-Taste am Verstärker, die LED-Anzeige beginnt
schnell Grün zu blinken.
4. Warten Sie, bis die LED-Anzeige dauerhaft leuchtet, was eine erfolgreiche Verbindung mit Ihrem
Router anzeigt.
Q1: I cannot log into the Web UI of the extender. What should I do?
For initial setup, make sure your wireless device (e.g., smartphone) is connected to
the extender's default network, BrosTrend_EXT, and disable Mobile Data if enabled.
If BrosTrend_EXT does not appear in the WiFi list, please refer to Q4 to reset the
extender to its factory default settings and then set up again.
If the extender has been set up successfully, make sure your wireless device is connected
to the extender’s newly extended network before logging into the web UI..
Verify that http://brostrendwifi.com is correctly entered in your browser's address bar
(NOT in the search box).
Clear your browser cache and try again.
If you are setting up using a wired device (e.g., a computer), make sure that your computer
is set to Obtain an IP address automatically and Obtain DNS server address
automatically.
Q4: How to reset the extender back to factory default setting?
Plug the extender into a power outlet and wait for 1 minute until it fully powers on,
then press the RESET button on the right side of the extender using a needle-like
object for 1-3 seconds. The LED indicator will blink fast in yellow at first, then after
1 minute, it will blink slowly in red, indicating a successful reset.
Q5: What should I do if I forgot my web UI login password?
Please refer to Q4 to reset the extender first. Then connect to the default WiFi
network BrosTrend_EXT and then visit http://brostrendwifi.com on a web
browser to create a new web UI login password. This time, it is recommended
to note down your login password for future logins.
Q3: Configuration was successful, but it keeps indicating that the
password "isn't correct" when trying to connect to the extended
WiFi network. What should I do?
A3:
The password might have been entered incorrectly during the setup. Please try to
connect to the extended network on the other WiFi band using the same password.
If the issue persists, please refer to Q4 to reset the extender, then set up the extender
again.
Please try the following methods:
Q6: What should I do if I forgot the extended WiFi networks’ passwords?
If you have a computer, you can find or change the passwords by following these steps:
Connect your computer to the extender using an Ethernet cable.
Open a web browser and enter http://brostrendwifi.com in the address bar to access the web UI.
Navigate to WiFi Settings, where you'll find the passwords for your extended networks.
Q2: The extender cannot find my router’s WiFi network. What should I do?
Ensure your router’s WiFi networks are available on other wireless devices.
Change your router’s WiFi channel and try again.
Change your router’s encryption type to WPA-PSK, WPA2-PSK or WPA/WPA2-PSK
and try again.
If you need any assistance, please send an email to
support@brostrend.com
together with your on-line order number. We will reply to you within 24 hours.
If you don't have a computer, please refer to Q4 to reset the extender. then set up the extender
again, and this time, it's recommended to note down the passwords.
Working Mode 1: Set up as a WiFi Extender
Solid Green:
This extender/adapter is in a proper position and receiving strong
signal from your router.
Solid Yellow:
This extender/adapter is receiving good signal from your router.
Solid Red:
This extender/adapter is receiving weak signal from your router.
Please relocate it closer to your router for better performance.
Blinking Red Slowly:
This extender/adapter is powered on, while setup is not completed
or fails to receive any signal from your router. Please relocate it
closer to your router or set it up again.
This extender/adapter is pairing with your existing router via WPS
method. Please wait until the pairing completes.
In this case, you need to configure the IP Address and DNS server address of these
devices as AUTO OBTAIN.
Working Mode 2: Set up as a Universal WiFi to Ethernet Adapter
Please refer to Working Mode 1: Set up as a WiFi Extender to set up
the adapter first.
1
2
Then connect your wired device to this adapter with an Ethernet cable.
Setup completed !
Game Console
4K TV
Desktop PC Printer
Blu-Ray Player
IP Camera
Working Mode 3: Set up as a Wireless Access Point
Devices
Blinking Green Fast:
Obtain an IP address automatically
Use the following IP address:
Obtain DNS server address automatically
Use the following DNS server addresses:
IP address:
Subnet mask:
Default gateway:
Preferred DNS server:
Alternate DNS server:
Plug the extender into a power outlet
in the same room as your existing
WiFi router. Wait until the LED
indicator blinks red slowly.
WPS
RESET
LED indicator blinks red slowly
Power on
1
* If the websites are inaccessible, please refer to
Q1 in FAQ.
2. Open a web browser, type
http://brostrendwifi.com
or 192.168.0.254 in the address
bar (NOT in the search box) to
access the web UI.
Connect to Your Existing WiFi Network
2
1. Connect your WiFi device to the
default WiFi network of the extender:
BrosTrend_EXT, or connect your
computer to the Ethernet port of the
extender with an Ethernet cable.
Set up via Web Management InterfaceMethod 1:
XXXXX
WLAN
BrosTrend_EXT
4. Select Extender Mode / WiFi to Ethernet
Adapter Mode and click Next.
Working Mode
Please choose the working mode based on your scenario.
Extend your existing WiFi network / Connect your wired device to WiFi.
Extender Mode / WiFi to Ethernet Adapter Mode
Next
Convert the existing wired network to a WiFi network.
AP Mode
5. Choose the WiFi network(s) you want to
extend, enter the correct WiFi password(s),
then click OK.
Internet Settings
Please choose the WiFi network you want to extend.
My_Home_WiFi 5G
WiFi Network Password
Cancel OK
3. Create a login password for future logins
(recommended). Then click Next.
For network security, please set a login password
for logging in to the web UI.
Set up Login Password
Login Password
Confirm Password
NextNot now
6. Customize the extended WiFi names
(SSID) and passwords, then click Extend.
We here set up on a mobile phone as an example. Actual setup steps on a desktop or tablet could be slightly different.
WPS
RESET
Plug the access point into
a power outlet.
Wait until the LED indicator
blinks red slowly.
LED indicator
blinks red slowly
Power on
1
* If the websites are inaccessible, please
refer to Q1 in FAQ.
2. Open a web browser, type
http://brostrendwifi.com
or 192.168.0.254 in the
address bar (NOT in the
search box) to access
the web UI.
Create Your Wireless Access Point Network
2
1. Connect your WiFi device to the
default WiFi network of this
access point: BrosTrend_EXT,
or connect your computer to
the Ethernet port of this access
point with an Ethernet cable.
XXXXX
WLAN
BrosTrend_EXT
For network security, please set a login password
for logging in to the web UI.
Set up Login Password
Login Password
Confirm Password
3. Create a login password for future logins
(recommended). Then click Next.
NextNot now
4. Select AP Mode and click Next.
Working Mode
Please choose the working mode based on your scenario.
Extend your existing WiFi network / Connect your wired device to WiFi.
Extender Mode / WiFi to Ethernet Adapter Mode
Next
Convert the existing wired network to a WiFi network
AP Mode
5. Customize the WiFi names and WiFi
passwords, click Save. Then wait about
1 minute until the LED blinks red slowly.
WPS
RESET
Ethernet cable
The LED indicator lighting solid green indicates a successful Internet connection. Otherwise, please refer
to Q4 in FAQ to reset this access point and try again.
Ethernet (LAN)
Internet Enabled
Ethernet Port
or
Connect the access point to an Internet-enabled Ethernet port or LAN port of your
router with an Ethernet cable. Setup completed!
Connect to the Internet
3
Save
WiFi Settings
5 GHz WiFi Name
BrosTrend_5G
5 GHz WiFi Password
5G
2.4 GHz WiFi Name
BrosTrend_2.4G
2.4 GHz WiFi Password
2.4G
Zde to nastavujeme na příkladu mobilního telefonu. Skutečné kroky nastavení na stolním počítači nebo tabletu by mohly být trochu odlišné.
Hier richten wir es anhand eines Mobiltelefons als Beispiel ein. Die tatsächlichen Einrichtungsschritte auf einem Desktop oder Tablet könnten leicht unterschiedlich sein.
Tipy: Pro zajištění kvality signálu rozšiřovače:
Rozšiřovač musí být instalován ve dosahu vašeho WiFi routeru.
Prosím, udržujte rozšiřovač daleko od elektroniky s silným rušením, jako jsou mikrovlnné trouby,
indukční vařiče a lednice, atd.
Tipps: Um die Signalqualität des Verstärkers sicherzustellen:
Der Verstärker muss im Bereich Ihres WiFi-Routers installiert sein.
Bitte halten Sie den Verstärker von Elektronikgeräten mit starker Störung fern, wie Mikrowellenherd,
Induktionsherd und Kühlschrank usw.
A1:
A2:
Please try the following methods:
A4:
A5:
A6:
We here set up on a mobile phone as an example. Actual setup steps on a
desktop or tablet could be slightly different.
*This method is applicable if your router has a WPS button. Otherwise, use Method 1.
Extended WiFi Names:
XXXXXX_EXT or XXXXXX_5GEXT
(XXXXXX: the WiFi name of your router)
Password:
The same as the WiFi password of your existing router.
1. Power on: Plug the extender into a power outlet in the same room as your existing router. Wait until the LED indicator blinks red.
2. Press the WPS button on your router.
3. Within 2 minutes, press the WPS button on the extender, the LED indicator on extender will start to blink green fast.
4. Wait until the LED indicator turns solid on, which indicates a successful connection with your router.
Set up via WPS button
Method 2:
WPS
RESET
WPS
Press
7. Check if the extender connects to your WiFi network successfully according to the
status of the LED indicator.
Solid green: Strong signal
Solid yellow: Good signal. Recommended
to move the extender closer to the router
Solid red: Weak signal. Please move the
extender closer to the router for better
performance
Blinking red: Extension failed.
Please connect to the WiFi
network of the extender
(BrosTrend_EXT) and set up again
LED indicator lighting solid on indicates a successful extension. You can connect to the following WiFi
networks to access the Internet.
LED indicator blinking red indicates the extension failed. Please connect to the following network to
extend again.
2.4 GHz WiFi Name: My_Home_WiFi_EXT
2.4 GHz WiFi Password: XXXXXXXX
5 GHz WiFi Name: My_Home_WiFi_5GEXT
5 GHz WiFi Password: XXXXXXXX
WiFi Name: BrosTrend_EXT
After the WPS pairing, for network security, please connect your wireless device to the newly extended WiFi
and visit http://brostrendwifi.com on a browser to set up a login password for your newly extended WiFi.
Otherwise, the Web UI will be open to any devices connected to the extended WiFi.
Extend
Internet Settings
Upstream WiFi Name
My_Home_WiFi
2.4 GHz Extended WiFi Name
My_Home_WiFi_EXT
2.4 GHz Extended WiFi Password
5 GHz Extended WiFi Name
My_Home_WiFi_5GEXT
5 GHz Extended WiFi Password
Same as the upstream WiFi password
Same as the upstream WiFi password
2.4G
5G
5G
Plug the extender into an electrical outlet halfway between your WiFi router and the WiFi dead zone.
Please keep the extender away from working
electrical appliances with strong interference,
such as microwave oven, induction cooker,
and refrigerator, etc.
Relocate
3
Solid Green: Strong signal
Solid Yellow: Good signal
Solid Red: Weak signal
Router
Devices
Halfway
The extender must be installed within the range
of your WiFi router.
To ensure the signal quality of the extender:
http://brostrendwifi.com
http://brostrendwifi.com