EasyManua.ls Logo

Brother CV3550 - User Manual

Brother CV3550
37 pages
Print Icon
To Next Page IconTo Next Page
Loading...
Brother CV3550 Coverstitch Machine
View & Buy Here:
https://www.thesewingstudio.co.uk/brother-cv3550-coverstitch-machine.ir

Table of Contents

Questions and Answers

  • L
    Linda BaileyJul 28, 2025
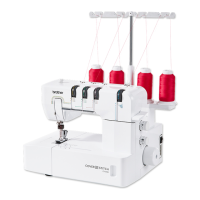
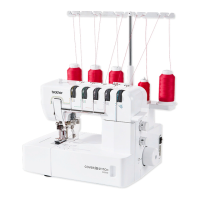
    Why are threads breaking on my Brother CV3550?
    • S
      swilkinsJul 28, 2025
      Thread breakage in your Brother Sewing Machine can occur due to several reasons. It might be due to improper threading, tangled thread around the spool pin or thread holders, thread tension being too tight, incorrect installation of the needle, or using the wrong type of needle. Ensure you are threading the machine correctly, check for and remove any tangled thread, adjust the thread tension, install the needle properly, and use the recommended needle type 130/705H.
  • D
    Donald AdkinsAug 3, 2025
    What to do if my Brother CV3550 Sewing Machine needles break?
    • J
      Joe MendozaAug 3, 2025
      If the needles on your Brother Sewing Machine are breaking, it could be due to several reasons. The needles might be bent or blunt, incorrectly installed, or you might be pulling the material too hard during sewing. Replace bent or blunt needles with a new one and ensure correct installation. Avoid pressing or pulling the material forcibly while sewing.
  • G
    Grant HoAug 7, 2025
    Why is my Brother Sewing Machine skipping stitches?
    • J
      Jennifer GrahamAug 7, 2025
      Skipped stitches on your Brother Sewing Machine can occur if the needle is bent or blunt, installed incorrectly, or is the wrong type. Improper threading or insufficient presser foot pressure can also cause this issue. Replace a bent or blunt needle, ensure the needle is correctly installed, and use the recommended needle type 130/705H. Make sure the machine is threaded correctly and increase the presser foot pressure by turning the pressure adjustment screw clockwise.
  • D
    daniel97Aug 12, 2025
    What to do if fabric puckers when using my Brother Sewing Machine?
    • D
      Donna RobinsonAug 12, 2025
      If the fabric puckers while using your Brother Sewing Machine, it might be due to thread tension being too tight or improper threading. Decrease the thread tension when sewing lightweight or fine material and ensure that the machine is threaded correctly, checking for any tangled thread.
  • J
    Joseph HaynesAug 17, 2025
    Why are the stitches not uniform on my Brother Sewing Machine?
    • J
      John RandolphAug 17, 2025
      If the stitches are not uniform on your Brother Sewing Machine, it is likely that the thread tensions are not adjusted properly. Adjust the thread tension to resolve this issue.
  • C
    charlesyuAug 22, 2025
    How to fix a Brother CV3550 Sewing Machine that does not feed fabric?
    • R
      Rachel GarciaAug 22, 2025
      If your Brother Sewing Machine is not feeding fabric, the presser foot pressure may be too loose. Turn the pressure adjustment screw clockwise to increase the presser foot pressure.

Summary

Important Safety Instructions

ADANGER: Electric Shock Hazards

Key safety precautions to prevent electric shock when operating the sewing machine.

AWARNING: Fire, Burn, and Injury Hazards

Essential safety measures to avoid fire, burns, electric shock, and personal injury.

ACAUTION: Safe Machine Operation

Guidelines for safe usage, including handling the plug, needles, and power.

Machine Care and Repair Guidance

Recommendations for maintaining the machine's condition and when to seek professional repair.

General Safety and Regional Usage

User Safety by Region

Specific safety advice tailored for users in different geographical regions.

ACAUTION: Unattended Machine Operation

Precautions for turning off the machine when not in use or during servicing.

Electrical Safety for UK;EIRE;MALTA;CYPRUS

Electrical safety notes, fuse replacement, and outlet suitability for specific regions.

Machine Introduction and Warnings

ACAUTION: Needle and Power Safety

Safety instructions regarding power and needle handling during operation.

Motor Operation and Warning Labels

Explains motor operation, cooling, and details machine warning labels.

Chapter 1: Machine Parts and Functions

Machine Identification (Cover & Top Cover Stitch)

Identifies main parts for both Cover Stitch and Top Cover Stitch machine models.

Basic Operation Controls and Features

Covers powering, handwheel direction, cover operation, presser foot, and bed extension.

Needle, Tension, and Stitch Adjustments

Details on adjusting needle, looper thread tension, stitch length, and differential feed.

Accessories for Cover Stitch Model

Included Accessories List

Lists and codes of accessories included with the Cover Stitch machine.

Optional Accessories List

Lists optional accessories available for purchase for the Cover Stitch machine.

Accessories for Top Cover Stitch Model

Included Accessories List

Lists and codes of accessories included with the Top Cover Stitch machine.

Optional Accessories List

Lists optional accessories available for purchase for the Top Cover Stitch machine.

Machine Powering and Basic Operation

Powering On;Off and Foot Controller

Instructions on powering the machine on/off and operating the foot controller for speed control.

Handwheel and Presser Foot Procedures

Details on handwheel operation and procedures for attaching/removing the presser foot.

Specialized Sewing Features

Free-Arm Sewing Setup

Instructions on how to remove the bed extension for free-arm sewing.

Looper Thread Tension Adjustment

Guide on adjusting the looper thread tension for different fabric types.

Stitch Adjustments and Settings

Adjusting Stitch Length

How to change the stitch length using the adjustment dial on the machine.

Differential Feed Adjustment

Explanation and adjustment of differential feed for fabric feeding and preventing puckering.

Pressure and Tension Adjustments

Presser Foot Pressure Setting

How to adjust the presser foot pressure for optimal sewing performance.

Thread Tension Dial Settings

Guide to adjusting tension dials for cover stitch and top cover stitch models for balanced stitches.

Needle Handling and Replacement

Needle Description and Check

Details on the recommended needle type, its parts, and how to check its condition.

Needle Removal and Installation

Step-by-step procedures for safely removing and installing sewing machine needles.

Chapter 2: Preparation Before Threading

Thread Tree and Spool Setup

Instructions for setting up the thread tree and using spool caps.

Spool Mats and Thread Nets

Guidance on using spool mats and thread nets for smooth thread feeding.

Pre-Threading Machine Checks

Essential checks and preparatory steps before beginning the threading process.

Chapter 3: Threading (Cover Stitch Model)

Looper Threading Procedure

Step-by-step guide for threading the looper on the Cover Stitch machine.

Needle Threading (Cover Stitch Model)

Needle Thread Usage by Stitch Type

Explains which needles are used for different stitch types in the cover stitch model.

Left, Center, and Right Needle Threading

Detailed instructions for threading each needle individually.

Chapter 4: Threading (Top Cover Stitch Model)

Looper Threading Procedure

Step-by-step guide for threading the looper on the Top Cover Stitch machine.

Needle Threading (Top Cover Stitch Model)

Needle Thread Usage by Stitch Type

Explains which needles are used for different stitch types in the top cover stitch model.

Left, Center, and Right Needle Threading

Detailed instructions for threading each needle individually.

Top Cover Spreader and Thread Guide

Attaching;Removing Spreader and Guide

Procedures for attaching and removing the top cover spreader and thread guide.

Threading the Top Cover Spreader

Top Cover Threading Steps

Step-by-step guide for threading the top cover spreader for specific stitches.

Chapter 5: Stitch Comparison and Tension

Triple Cover Stitch Tension Guide

Explains balanced tension and troubleshooting for loose or tight needle threads in triple cover stitch.

Cover and Chain Stitch Tension Settings

Cover Stitch (Wide;Narrow) Tension

Details on balanced, loose, and tight needle thread tension for cover stitches.

Chain Stitch Tension Guide

Explains tension settings and troubleshooting for chain stitches.

Top Cover Stitch Tension Details

Triple Top Cover Stitch Tension

Guidance on tension settings for balanced, loose, and tight top cover threads.

Top Cover Stitch (Wide;Narrow) Tension

Adjusting tension for balanced, loose, or tight top cover threads.

Chapter 6: Sewing Operations

General Sewing Safety and Flat Fabric Sewing

Safety advice and step-by-step instructions for sewing flat fabric.

Removing Fabric (Cover Stitch Model)

How to properly remove fabric after sewing on the Cover Stitch model.

Removing Fabric (Top Cover Stitch Model)

Fabric Removal Steps

Step-by-step guide for removing fabric after sewing on the Top Cover Stitch model.

Specific Sewing Techniques

Cover Stitch Sewing Method

Detailed steps for sewing a cover stitch, including fabric folding and marking.

Tubular Garment Sewing

Instructions for sewing tubular garments like cuffs, including free-arm sewing.

Advanced Sewing Procedures

Free-Arm Sewing Execution

Steps for performing free-arm sewing by removing the bed extension.

Stabilizing Stitch Ends

Method for reinforcing the start and end of stitching using scrap fabric.

Troubleshooting Common Issues

Machine Problems and Solutions

Guide to identifying and resolving common problems with the sewing machine.

Machine Maintenance and Cleaning

Cleaning Procedures

Instructions on how to clean the sewing machine using the included brush.

Machine Specifications Overview

Cover Stitch Model Specifications

Technical specifications for the Cover Stitch model, including speed, dimensions, and needle types.

Top Cover Stitch Model Specifications

Technical specifications for the Top Cover Stitch model, including speed, dimensions, and needle types.

Brother CV3550 Specifications

General IconGeneral
TypeCoverstitch
Differential FeedYes
Differential Feed Ratio0.7 - 2.0
Free ArmYes
LightingLED
Number of Threads3
Number of Needles1, 2, 3
Stitch Length2 - 4 mm
Presser Foot Lift6 mm
Stitch Width3 - 6 mm

Related product manuals