Do you have a question about the Brother DCP-L2531DW and is the answer not in the manual?
Explains conventions used for warnings, cautions, and notes in the manual.
Provides essential instructions for safe operation and maintenance of the machine.
Details safety measures related to the power cord to prevent hazards.
Warns about handling the laser unit and potential eye damage from laser beams.
Provides regulatory notices for MFC models sold in the United States.
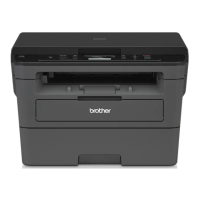
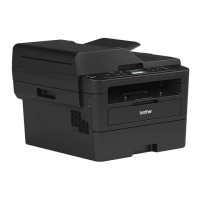
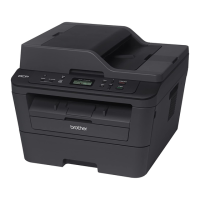
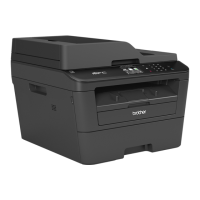
Compares model features, specifications, and capabilities in a comparative table.
Details network interface types and node types supported by different models.
Provides machine life, part life, MTBF, MTTR, and maintenance parts lifespan.
Lists toner cartridge and drum unit specifications, including page yields and shelf life.
Specifies media types, paper input, weight, and size supported by ADF.
Details modem speed, transmission speed, ITU-T group, and fax capabilities.
Outlines copy speed, first copy out time, print resolution, and auto duplex scanning.
Details scanner resolution (optical/interpolated) and scanning speed for various models.
Introduces troubleshooting procedures and aims to help pinpoint issues.
Outlines essential safety precautions to prevent secondary problems during maintenance.
Lists checks for operating environment, power supply, paper, and consumables before repair.
Provides cross-section drawings and identifies key parts of the printer and scanner.
Explains how the machine indicates errors and guides troubleshooting steps for various issues.
Lists error codes, their descriptions, and references for further troubleshooting.
Details error messages displayed on the LCD for touch panel and non-touch panel models.
Lists communication error codes and their causes, with references for solutions.
Provides detailed steps for diagnosing and resolving common machine problems.
Lists specific error codes, their causes, and recommended remedies or part replacements.
Addresses common paper feeding issues like jams, misfeeds, and wrinkles with step-by-step remedies.
Helps identify and resolve image quality issues such as light prints, streaks, and fogging.
Guides users through resolving issues related to computer connections and driver problems.
Provides solutions for issues like inability to print via network or connect to access points.
Addresses issues where the LCD or LED displays are not working, or panel operations fail.
Troubleshoots issues related to toner detection, replacement messages, and drum errors.
Guides on diagnosing and resolving fuser unit failures and related errors.
Provides steps for troubleshooting laser unit failures and related issues.
Addresses issues related to Main PCB and memory failures, offering specific solutions.
Solves problems like no document feed, multiple documents fed, or document jams in the ADF.
Helps diagnose and fix image defects that occur during the scanning process.
Addresses issues related to fax transmission, reception, communication errors, and buffer problems.
Covers general troubleshooting for issues like inability to print, firmware updates, or tray recognition.
Emphasizes critical safety measures and warnings before performing disassembly.
Details how to pack the machine components, including carton and protective materials.
Illustrates and identifies various types of screws used in the machine for easy reference.
Provides a table listing screw locations, types, quantities, and recommended tightening torques.
Specifies lubricating oil types, points, and quantities for proper machine maintenance.
Shows diagrams and names of various gears within the machine's drive system.
Illustrates the routing paths for various internal harnesses and cables within the machine.
Provides a visual flow chart outlining the sequence of disassembly and reassembly steps.
Step-by-step instructions for disassembling various parts of the machine.
Covers essential preparation steps, including transferring FAX data and disconnecting cables.
Details the initial steps of disconnecting cables and removing external accessories.
Details the procedure for removing the cord hook from the machine's exterior.
Step-by-step guide to safely remove the back cover of the machine.
Instructions for detaching and removing the outer chute assembly.
Explains how to remove the front cover and its support flap for access.
Provides instructions for removing the right side cover of the machine.
Details the steps to remove the fuser cover, revealing the fuser unit.
Instructions for detaching and removing the inner chute assembly.
Guide to removing the left side cover and associated harnesses/holders.
Step-by-step instructions for removing the document scanner unit.
Explains how to remove the Automatic Document Feeder unit and its components.
Details the removal of the ADF unit itself and related cables.
Instructions for removing the ADF cover and document stopper.
Steps to detach and remove the document sub tray from the ADF unit.
Guide to removing the document separate roller assembly.
Instructions for removing the ADF separation holder assembly.
Details removing the second side CIS unit and its flat cable for duplex scanning models.
Instructions for removing the document cover assembly on models without an ADF.
Step-by-step guide to remove the panel unit on touch panel models.
Details the removal of the panel unit and its connection to the PCB.
Instructions for removing the panel PCB, NFC PCB, and LCD components.
Steps to detach and remove the touch panel assembly.
Guide to removing the panel unit on non-touch panel models.
Details the removal of the panel unit and its connection to the PCB.
Instructions for removing the panel PCB assembly.
Steps to detach and remove the LCD screen from the panel unit.
Details removing the panel flat cable and first side CIS unit components.
Instructions for removing the modem flat cable and PCB assembly.
Step-by-step guide to remove the joint cover assembly.
Details the procedure for removing the fuser unit and its associated harnesses.
Instructions for removing the low-voltage power supply PCB assembly, including safety warnings.
Steps to detach and remove the new toner sensor PCB assembly.
Guide to removing the HVPS flat cable and high-voltage power supply PCB.
Instructions for removing the cooling fan and its harness.
Details removing toner box and MP relay PCBs and associated harnesses.
Step-by-step guide to remove the laser unit and its flat cable.
Instructions for removing the filter from the air duct.
Details removing the wireless LAN PCB, applicable for wireless network models.
Steps to detach and remove the roller holder assembly.
Instructions for removing the main printed circuit board assembly.
Guide to removing the T1 clutch and registration clutch components.
Details the procedure for removing the Frame L unit, including manual feed and MP models.
Instructions for removing the paper feed motor and its flat cable.
Steps to detach and remove the fuser gear.
Details removing the toner sensor PCB assembly on models with a toner box.
Instructions for removing the front cover sensor.
Steps to detach and remove the eject sensor PCB assembly.
Guide to removing the registration front/rear actuator holder assembly.
Details removing the paper feed roller and sensor PCB assemblies.
Procedures for after replacing the main PCB, including firmware and settings.
Lists the essential tasks to perform after replacing the main PCB assembly.
Outlines the necessary tools and files for the replacement procedure.
Step-by-step guide for installing sub and main firmware onto the machine.
Instructions on how to check the current firmware version installed on the machine.
Procedure to initialize the EEPROM parameters of the main PCB using a specific function code.
Guides on setting model specifications, serial numbers, and laser unit adjustments.
Instructions for calibrating the touch panel on touch panel model machines.
Details on obtaining white level data for CIS units and setting scan areas.
Procedure for actions required after replacing the low-voltage power supply PCB.
Steps to follow after replacing the laser unit, including entering adjusted values.
Procedures for actions after replacing panel unit or control PCB components.
Steps to perform after replacing ADF, CIS, or document scanner units.
Introduces maintenance mode functions for checking, setting, and adjusting the machine.
Explains methods to access the machine's maintenance mode for service personnel.
Provides specific key sequences for service personnel to enter maintenance mode.
Outlines procedures for end users to access specific maintenance functions under guidance.
A comprehensive list of available maintenance mode functions with corresponding codes and references.
Provides detailed explanations and operating procedures for various maintenance mode functions.
Function to initialize EEPROM settings for operation parameters and user switches.
Function to reset the machine to its factory shipping state for repair or resale.
Tests the performance of the automatic document feeder by counting scanned pages.
Prints test patterns to check for image quality issues like missing images or flaws.
Allows setting various operational parameters via worker switches using the control panel.
Prints the current settings of worker switches for reference and documentation.
Verifies the functionality and display of the control panel's LCD screen.
Tests the responsiveness and correct operation of each key on the control panel.
Shows the version information for the machine's firmwares and programs.
Verifies the operational status of various sensors, solenoids, and clutches in the machine.
Checks and displays the connection status of the wired LAN interface.
Allows modification of various print settings that are controlled via the computer.
Adjusts USB return values, print positions, and ON/OFF settings for specific functionalities.
Fine-tunes the printing position in horizontal and vertical directions based on speed levels.
Transfers received fax data, communication reports, or machine log information to another machine.
Adjusts the start and end positions of the scanning process for better alignment.
Acquires white level data for CIS units and stores it along with scan area information.
Verifies toner cartridge compatibility, country code, and version information.
Calibrates the touch panel to ensure accurate input response.
Conducts paper feed and eject tests using various print patterns.
Prints a frame pattern on one side of the paper to check for printing flaws.
Prints a frame pattern on both sides of the paper to check for printing flaws.
Prints test patterns to check the condition of the develop roller or exposure drum.
Customizes machine settings for language, functions, and worker switches based on region.
Prints machine maintenance data, including consumable levels and replacement counts.
Tests the fan operation at different speeds (100%, 50%, OFF).
Clears fax data stored in the machine's memory.
Displays various machine logs, including error history, serial numbers, and page counts.
Shows the latest error code that has occurred on the machine's LCD.
Transmits error lists to a remote service station for remote analysis.
Resets the detection counter for irregular power supply after replacing the PCB.
Exits maintenance mode, restarts the machine, and returns it to the ready state.
Provides access to additional service functions like drum cleaning and error list printing.
Procedure to clean the drum unit using a special cleaning sheet kit.
Prints the communication error list, also known as the Communication List.
Resets the drum counter after replacing the drum unit.
Illustrates the electrical connections and component interdependencies within the machine.
Lists parts that require periodic replacement as part of routine maintenance.
Explains the format and location of serial number labels on the printer for identification.
Guides on how to reset machine settings to default values via the control panel.
Provides instructions for installing the necessary driver for machine identification via USB.
| Print Technology | Laser |
|---|---|
| Functions | Print, Copy, Scan |
| Paper Input Capacity | 250 sheets |
| Automatic Duplex Printing | Yes |
| Mobile Printing | Brother iPrint&Scan, AirPrint, Google Cloud Print |
| Scanner Type | Flatbed |
| Copy Resolution | Up to 600 x 600 dpi |
| Dimensions | 410 x 398.5 x 272 mm |
| Print Speed | Up to 30 ppm |
| Print Resolution | 2400 x 600 dpi |
| Connectivity | USB 2.0, Wi-Fi |
| Display | 2-line LCD |
| Scan Resolution | 1200 x 1200 dpi |
| Copy Speed | Up to 30 cpm |