EasyManua.ls Logo

Brother M945 Super ACE III - User Manual

Brother M945 Super ACE III
4 pages
Print Icon
To Next Page IconTo Next Page
Loading...
GETTING STARTED:
M945 Super ACE III Computerised Sewing Machine
To help you get started, please follow these simple instructions in the order shown below.
However, before you do so, read the safety instructions in the Instruction Manual.
Step 1
Unpack the sewing machine, and familiarise yourself with all the parts and
controls that are mentioned in these instructions.
Step 2
Prepare the sewing machine for use.
XC5406051
Foot
Controller
Power
Switch
Bobbin
Winder Shaft
Stitch Length
Lever
Stitch Width
Lever
Stitch Selection
Keys
Sewing Speed
Controller
Needle
Position
Button
Reverse
Stitch
Button
Start/Stop
Button
Take-up
Lever
Guide
Thread
Cutter
Bobbin
Cover
Needle
Threader
Lever
Presser Foot and
Needle Assembly
Presser Foot
Lever
Accessory Compartment
(bobbins inside)
Spool Pin
Tension
Dial
Thread Guide
Figure 1a Figure 1b
The machine can be operated either by the start/stop
button or by the foot controller.
If you intend to use the foot controller, plug it in as
shown in
figure 1a and place it on the floor.
Plug in the mains connector at the right hand side of
the machine, as shown in
figure 1a. Connect the
mains plug into a wall socket.
Set the tension dial to 4.
Set the stitch width lever to minimum and the stitch
length lever to midway (
figure 2a).
Set the sewing speed controller to midway (
figure 2b).
Mains Plug
Tilt the lid of the accessory compartment up and towards you to open it.
Inside are various accessories including a number of bobbins.
More accessories, including two spool caps, can be found inside the accessory pouch packed with the machine.
figure 2a
figure 2b
Question and Answer IconNeed help?

Do you have a question about the Brother M945 Super ACE III and is the answer not in the manual?

Summary

Step 1: Get Started with Your Sewing Machine

Step 2: Prepare the Sewing Machine for Use

Step 3: Wind the Bobbin

Step 4: Set the Bobbin

Step 5: Upper Threading

Step 6: Thread the Needle and Start Sewing

Starting to Sew

Instructions on how to begin sewing, including fabric placement, speed control, starting/stopping, and reversing.

Overview

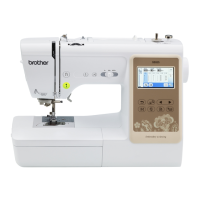
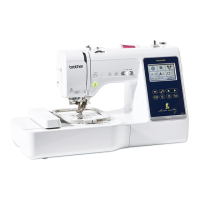
The Brother M945 Super ACE III is a computerised sewing machine designed for a variety of sewing tasks, from basic mending to more advanced projects. It offers both manual and automated features to enhance the sewing experience.

Function Description:

The primary function of the M945 Super ACE III is to perform sewing operations. It can be operated either via a start/stop button on the machine's body or through a foot controller, offering flexibility to the user. The machine supports various stitch types and allows for adjustments to stitch length and width, enabling customisation for different fabrics and project requirements. It also features an automatic needle threader, simplifying one of the more tedious aspects of sewing. Bobbin winding is an integrated function, allowing users to prepare bobbins with their desired thread quickly. The machine is equipped with a thread cutter for convenient finishing of seams.

Important Technical Specifications (Inferred from the manual):

  • Power Source: Mains electricity, connected via a mains connector and plug.
  • Control: Computerised, with physical buttons and levers for stitch selection, length, width, and speed.
  • Threading: Automatic needle threader.
  • Bobbin System: Integrated bobbin winding shaft and a front-loading bobbin cover.
  • Tension Control: Manual tension dial (recommended setting: 4).
  • Speed Control: Sewing speed controller (adjustable, recommended midway for beginners).
  • Foot Control: Optional foot controller for hands-free speed modulation.
  • Accessories: Includes bobbins, spool caps, and an accessory pouch.

Usage Features:

  1. Setup and Preparation:

    • Power Connection: The machine connects to a standard wall socket via a mains plug, with the mains connector located on the right-hand side of the machine.
    • Foot Controller: For those preferring foot operation, the foot controller plugs into the machine as shown in Figure 1a and is placed on the floor.
    • Initial Settings: Before sewing, the tension dial should be set to 4. The stitch width lever should be at its minimum, and the stitch length lever at midway (Figure 2a). The sewing speed controller should also be set to midway (Figure 2b) for ease of use, especially for beginners.
    • Accessory Compartment: The lid of the accessory compartment tilts up and towards the user to reveal various accessories, including bobbins. Additional accessories, such as two spool caps, are found in an accessory pouch.
  2. Bobbin Winding (Step 3):

    • Power On: The power switch must be set to 'on' (I), and the sewing speed controller to maximum for efficient winding.
    • Thread Placement: A spool of thread is placed on the spool pin, with the thread coming from the bottom (Figure 3a). A suitable spool cap, slightly larger than the spool, is pushed firmly onto the spool pin to secure the thread. For fine threads, the spool cap can be pulled back slightly to create a small gap (Figure 3b).
    • Thread Path: Thread is unwound, passed under the thread guide (Figure 3c), looped behind and over a hook, then clockwise around a disk (Figure 3d).
    • Bobbin Loading: A bobbin is clipped onto the bobbin winding shaft (Figure 3e) and pushed firmly to the right until it clicks into place.
    • Winding Process: The thread is wound clockwise around the bobbin 4-5 times, then passed through a slit and pulled to the right to trim it on the cutter. The machine is started (using the start/stop button or foot controller) and continues winding until the shaft stops automatically.
    • Finishing: The bobbin winding shaft is pushed back to the left, the thread is cut (Figure 3f), and the bobbin is removed. The thread is unwound from the disk.
  3. Bobbin Setting (Step 4):

    • Opening Cover: The bobbin cover is opened by sliding the latch to the right (Figure 4a).
    • Inserting Bobbin: With about 15cm (6in) of thread trailing, the bobbin is inserted into the shuttle, ensuring the thread direction is anti-clockwise (Figure 4b). The thread is guided around the channel and pulled towards the user to trim it on the cutter.
    • Closing Cover: The bobbin cover is closed by inserting the tab into the slot (Figure 4c) and pushing down on the right side until it clicks shut (Figure 4d).
  4. Upper Threading (Step 5):

    • Preparation: The presser foot is raised by pushing the presser foot lever upwards (Figure 5a), and the needle is raised by pressing the needle position button (Figure 5b).
    • Thread Path: A spool of thread is placed on the spool pin. Approximately 500mm (20in) of thread is unwound, held with a finger, and passed under the thread guide and down the slot (Figure 5c).
    • Take-up Lever: The thread is passed down to the right of the take-up lever guide, under the guide, and back up the left side (Figure 5d). It is then pulled up the left side of the take-up lever guide and all the way to the back of the slot (Figure 5e).
    • Engaging Take-up Lever: The thread is pulled over to the left, then back downwards (Figure 5f) to hook around the take-up lever. If it doesn't hook, the process should be repeated.
    • Finishing: The presser foot is lowered by pushing the presser foot lever downwards (Figure 5g).
  5. Needle Threading (Step 6):

    • Initial Thread Path: The thread is passed behind the needle guide, leaving about 15cm (6in) trailing (Figure 6a), and then pulled out to the left, underneath the threading guide (Figure 6b).
    • Using Needle Threader: The needle threader lever is pushed downwards while gently pulling the thread forwards to hook it around the threading guide (Figure 6c). The lever is pushed all the way down until the threader rotates to engage with the needle (Figure 6d). The threader hook will pass through the eye of the needle from the back.
    • Looping Thread: The thread is pulled to the right across the threader, where it should slip under the hook (Figure 6e).
    • Releasing Threader: Holding the thread loosely, the needle threader lever is released, allowing the hook to come back out of the eye and spring upwards. This action should pull a loop of thread through the needle (Figure 6f). If not, retry.
    • Final Step: The loop is pulled to draw the thread all the way out through the back of the needle. The presser foot is raised, and the thread is passed between the toes of the foot and out towards the back of the machine.
  6. Starting to Sew:

    • Power On: Set the power switch to 'on' (I).
    • Machine State: Ensure the presser foot is up (using the presser foot lever) and the needle is at its highest position (using the needle position button).
    • Fabric Placement: Place the fabric under the foot, with the needle about 1 cm (3/8 in) from the rear edge, then lower the presser foot.
    • Speed Setting: Set the sewing speed control to midway until comfortable with the machine.
    • Operation: Press the start/stop button or use the foot controller to begin. Press the start/stop button again or release the foot controller to stop. To reverse sew, press and hold the reverse stitch button.
    • Finishing: Raise the presser foot and needle. Gently pull the fabric out and cut the thread using the thread cutter (Figure 7).

Maintenance Features:

  • The manual implies regular cleaning and care, though specific instructions are not detailed in the provided excerpt. However, the presence of an accessory compartment suggests that tools for basic maintenance (e.g., cleaning brushes, screwdrivers) might be included.
  • The design of the bobbin area, with an easily removable cover, facilitates access for cleaning lint and thread debris.

Additional Information:

For advanced features and comprehensive usage, users are directed to the Instruction Manual. Customer support contact details (phone, email, website) are provided for further assistance.

Brother M945 Super ACE III Specifications

General IconGeneral
BrandBrother
ModelM945 Super ACE III
CategorySewing Machine
LanguageEnglish

Related product manuals