EasyManua.ls Logo

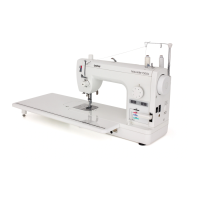
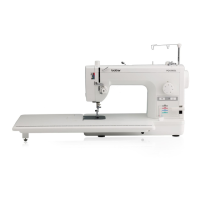
Brother PQ-1500 User Manual

Brother PQ-1500
25 pages
To Next Page IconTo Next Page
Page #1 background imageLoading...
Page #1 background image
SEWING MACHINE
PQ1500
OPERATION MANUAL

Questions and Answers:

Brother PQ-1500 Specifications

General IconGeneral
TypeMechanical
Max Stitch Speed1500 stitches per minute
Feed MechanismDrop Feed
Needle PositionCenter
Stitch OptionsStraight stitch only
Thread TensionAdjustable
Bobbin WindingAutomatic
Needle SystemDB x 1
NeedleHAx1
Presser Foot LiftManual
Power Requirements110V

Summary

IMPORTANT SAFETY INSTRUCTIONS

DANGER

To reduce the risk of electric shock, follow specific precautions for electrical hazards.

WARNING

To reduce risks of burns, fire, electric shock, or injury, adhere to general safety guidelines.

CAUTION For U.S.A. only

Polarized plug information for US customers to prevent electric shock.

PLEASE READ BEFORE USING YOUR SEWING MACHINE

For safe operation

Follow essential guidelines for safe operation, including handling moving parts and power.

For a longer service life

Tips for maintaining the machine's longevity, including storage and cleaning.

For repair or adjustment

Guidance on seeking repairs or adjustments for malfunctions.

Accessories

Names of Parts

Before You Begin

Tension Dial

Adjusts upper thread tension for proper stitch formation and fabric balance.

Power Cord and Foot Controller

Connects the machine to power and controls sewing speed via foot pedal.

Hand Wheel

Manually controls needle movement, always turn towards you.

Stitch Length Regulator

Allows adjustment of stitch length for different sewing needs.

Reverse Stitch Lever

Enables sewing in reverse to reinforce stitches, push lever down.

Presser Foot Lift Lever

Lifts the presser foot to insert or remove fabric easily.

Knee Lift

Allows hands-free lifting of the presser foot using a knee control.

Pressure Adjustment Dial

Adjusts the pressure of the presser foot on the fabric for different materials.

Thread Cutter Button

Trims upper and bobbin threads at the end of seams automatically.

Needle Stop Position Button

Sets the needle to stop either in the fabric or in the raised position.

Light Switch

Turns the sewing area light on and off.

Feed Dog Adjustment Knob

Adjusts the height of the feed dogs to match fabric weight.

Foot Pressure and Feed Dog Position

Selects feed dog positions and adjusts pressure for various fabric types.

Changing Needles and Light Bulb

Changing the Needle

Procedure for safely replacing the sewing machine needle.

Changing the Feed Pin

Instructions for changing the feed pin for different sewing applications.

Changing Light Bulbs

Steps to safely replace the sewing light bulb.

Threading (1)

Bobbin Winding

Step-by-step guide to winding thread onto the bobbin.

Bobbin Insertion

Instructions for correctly inserting the wound bobbin into the bobbin case.

Threading (2)

Upper Threading

Detailed steps for guiding the upper thread through the machine's threading path.

Using the Automatic Needle Threader

Guide to operating the automatic needle threader for quick threading.

How to Pull Out the Bobbin Thread

Stitch Samples and Needle Chart

Stitch Samples

Procedure for testing stitch length and creating sample stitches.

Thread Tension

Guidance on adjusting thread tension for optimal stitch appearance.

Changing Presser Feet

Zipper Foot

Instructions for attaching and using the zipper foot.

General purpose Foot

Details on the standard foot used for most sewing tasks.

Pin Feed Foot

Foot designed for sewing difficult fabrics like velvet and suede.

Rolled Hem Foot

Used for creating neat rolled hems on fabric edges.

Invisible Zipper Foot

Specialized foot for attaching invisible zippers.

1/4" Foot

Used for precise 1/4 inch or 1/8 inch seam allowances in quilting.

Quilting Foot

Spring-action foot for free-motion quilting and embroidery.

Walking Foot

Ensures even feeding of multiple fabric layers, ideal for quilting.

Basic Sewing (1)

Basic Sewing

Step-by-step guide to performing basic sewing operations.

Pin Feeding (for hard-to-handle fabrics)

Technique for sewing difficult fabrics using pin feeding.

Pin Feeding Unit

Details on the pin feeding unit and its operation for even fabric feeding.

Basic Sewing (2)

Rolled Hem Foot

Detailed instructions for using the rolled hem foot to create finished hems.

Basic Sewing (3)

Zipper Foot

Instructions for attaching and using the zipper foot for sewing zippers.

Invisible Zipper Foot

1/4" Foot

Quilting Foot

Walking Foot

Lining

Seam Guide

Caring for Your Machine

Cleaning the Machine

Step-by-step instructions for cleaning the sewing machine.

Lubrication Points

Identifying and maintaining lubrication points for smooth operation.

Keep Your Sewing Machine Clean

Guidelines for cleaning the machine's exterior and parts.

Precautions

Important precautions to protect the machine from damage and ensure longevity.

Trouble Shooting

Thread Breakage

Troubleshooting steps for common causes of thread breakage.

Skipped Stitches

Solutions for issues causing skipped stitches during sewing.

Fabric Puckers

Addressing fabric puckering problems and their causes.

Fabric Won't Feed Properly or Irregular Stitches

Resolving issues with fabric feeding and irregular stitch formation.

Loop In Seam

Troubleshooting thread looping issues in seams.

Needle Breakage

Causes and solutions for needle breakage during operation.

Sewing Machine Doesn't Run

Diagnosing and fixing problems when the sewing machine does not operate.

Machine Is Noisy

Identifying and resolving sources of excessive noise from the machine.

Automatic Needle Threader Doesn't Work

Troubleshooting the automatic needle threader if it fails to function.

Thread Cutter Doesn't Work

Resolving issues when the thread cutter feature is not working.

Related product manuals