Do you have a question about the Brother X L 2010 and is the answer not in the manual?
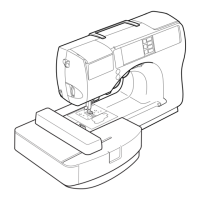
Identifies and describes the main components of the sewing machine, including key parts like the bobbin winder and stitch length dial.
Lists and illustrates the various accessories included with the sewing machine, detailing their purpose and storage.
Explains how to use the pattern selector dial to choose different stitches and their preset widths.
Details how to adjust the stitch length dial for various stitch types and explains the numbering system.
Describes the function and operation of the reverse sewing button for back-tacking and reinforcing seams.
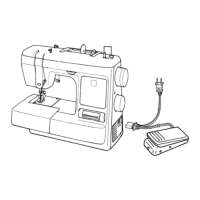
Explains how to operate the sewing machine speed using the foot controller.
Instructs on how to turn the sewing machine's built-in light on or off using the switch.
Provides step-by-step instructions for winding thread onto the bobbin correctly.
Details the process of threading the lower (bobbin) thread through the shuttle race.
Guides on how to thread the upper thread through the machine's tension disks and take-up lever.
Explains the method to bring the lower thread up to the needle plate level.
Describes how to adjust upper thread tension for optimal stitch quality and troubleshooting common issues.
Instructions on how to set up and perform a straight stitch, including needle positions.
Guidance on selecting and sewing zigzag stitches, including width and length adjustments.
Step-by-step instructions for creating a blind hem stitch for neat finishing.
Explains how to perform an overedging stitch to prevent fabric fraying.
Details how to use the elastic stitch for mending or sewing stretchy fabrics.
Provides instructions for making automatic buttonholes using the buttonhole foot.
Guides on how to attach buttons securely using the sewing machine.
Instructions for sewing zippers using the special zipper foot.
Explains how to use the darning plate for repairing fabric or creating decorative stitching.
Instructions on how to sew applique designs onto fabric.
Guides on performing monograms and basic embroidery using the machine.
Step-by-step guide on safely removing and inserting needles for proper sewing.
Instructions for replacing the sewing machine's light bulb.
Details procedures for cleaning the shuttle hook, race, and feed dog area.
Explains where and how to oil the sewing machine for smooth operation.
| Brand | Brother |
|---|---|
| Model | X L 2010 |
| Category | Sewing Machine |
| Language | English |