Operation
20
Before hitching cutter to your tractor, make sure all safety devices are installed on both the cutter and
the tractor.
Please follow all safety instructions and procedures.
Attach Equipment to Tractor.
Be sure the tractor is equipped with the correct category hitch pins, top link, etc. Be
extremely careful when positioning tractor to hitch to the equipment.
Caution! Never allow anyone between the tractor and the equipment during the hitching
process.
Be certain that the cutter has been lubricated properly and check oil level in gear box prior to con-
necting driveline to tractor (See Page 24). Also, do not tighten the top link such that the ex-link
toggle is fully extended toward the tractor. The ex-link should be in a relaxed position when on
level ground.
Attach the driveline to the tractor. When attaching driveline to PTO shaft, be certain that the
TRACTOR ENGINE AND PTO SHAFT HAVE STOPPED - PARK BRAKES ARE SET
BEFORE DRIVE SHAFT IS MOUNTED. Make sure quick-disconnect pin is properly
seated in the groove of the tractor’s PTO shaft.
Warning! A loose driveline can disconnect and cause personal injury property damage or
death.
Adjust Cutting Height.
Warning! Be certain that tractor engine is stopped, park brakes are set, key is removed, and all
rotation of the cutter has ceased before dismounting to making adjustments.
Caution! Avoid very low cutting heights. Striking the ground with blades causes a damaging
shock that can damage all the cutter components and the tractor.
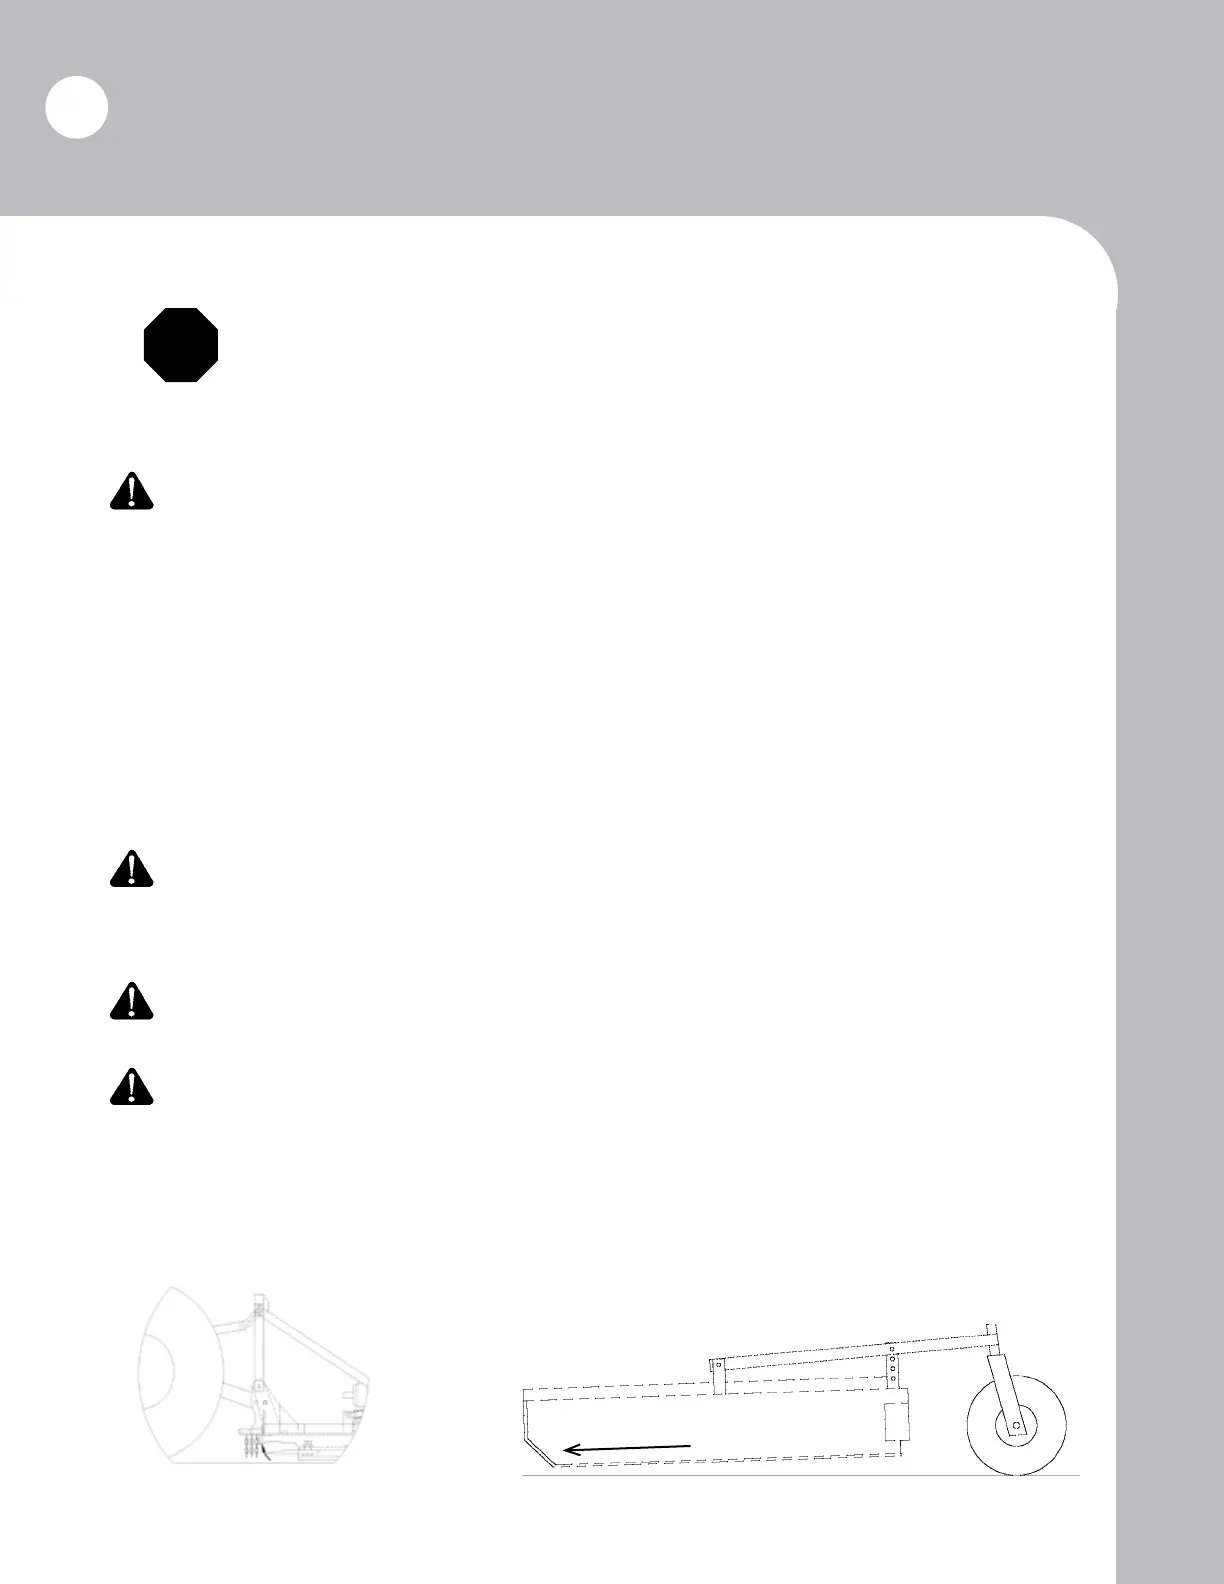
Using the tailwheel adjustment and the tractor’s lift arms, set the cutter to the desired height; the cutter is
designed to operate with a cutting height range between 2” and 12”. Note that, on level ground,
the front of the cutter should be 1” below the rear (see illustration). Set the tractor’s lift stop at
the required position to maintain a uniform cut. The exible toggle should be in a relaxed posi-
tion, note Figure “A”.
STOP
1” above front
Front
Figure “A”