VERTEX 70v User Manual 11
. . . . .
INSTALLATION
Connecting VERTEX 70v to the Power Supply
CONNECTING VERTEX 70V TO THE POWER
. . . . . . . . . . . . . . . . . . . . . . . . . . . . . . . . . . . . . . . . . . . . . . . . . . . . . . . . . .
SUPPLY
Power Cord
Before connecting the power cord, make sure that the spectrometer is switched off, i.e.
the mains switch (B in figure 2) is in the “O” position. Connect the supplied power cord
to the primary power receptacle (C in figure 2) as well as to the mains socket outlet.
The power cord length should not exceed 3m. Depending on the local conditions, the
original power cord may need to be exchanged for a power cord that complies with the
standards of the country in question. The power cord must have approbation of at least
your local authority, UL for US, CSA for Canada or VDE for Europe. The spectrometer
power supply unit automatically adapts to the local voltage and frequency range. (See
section Site Requirements.)
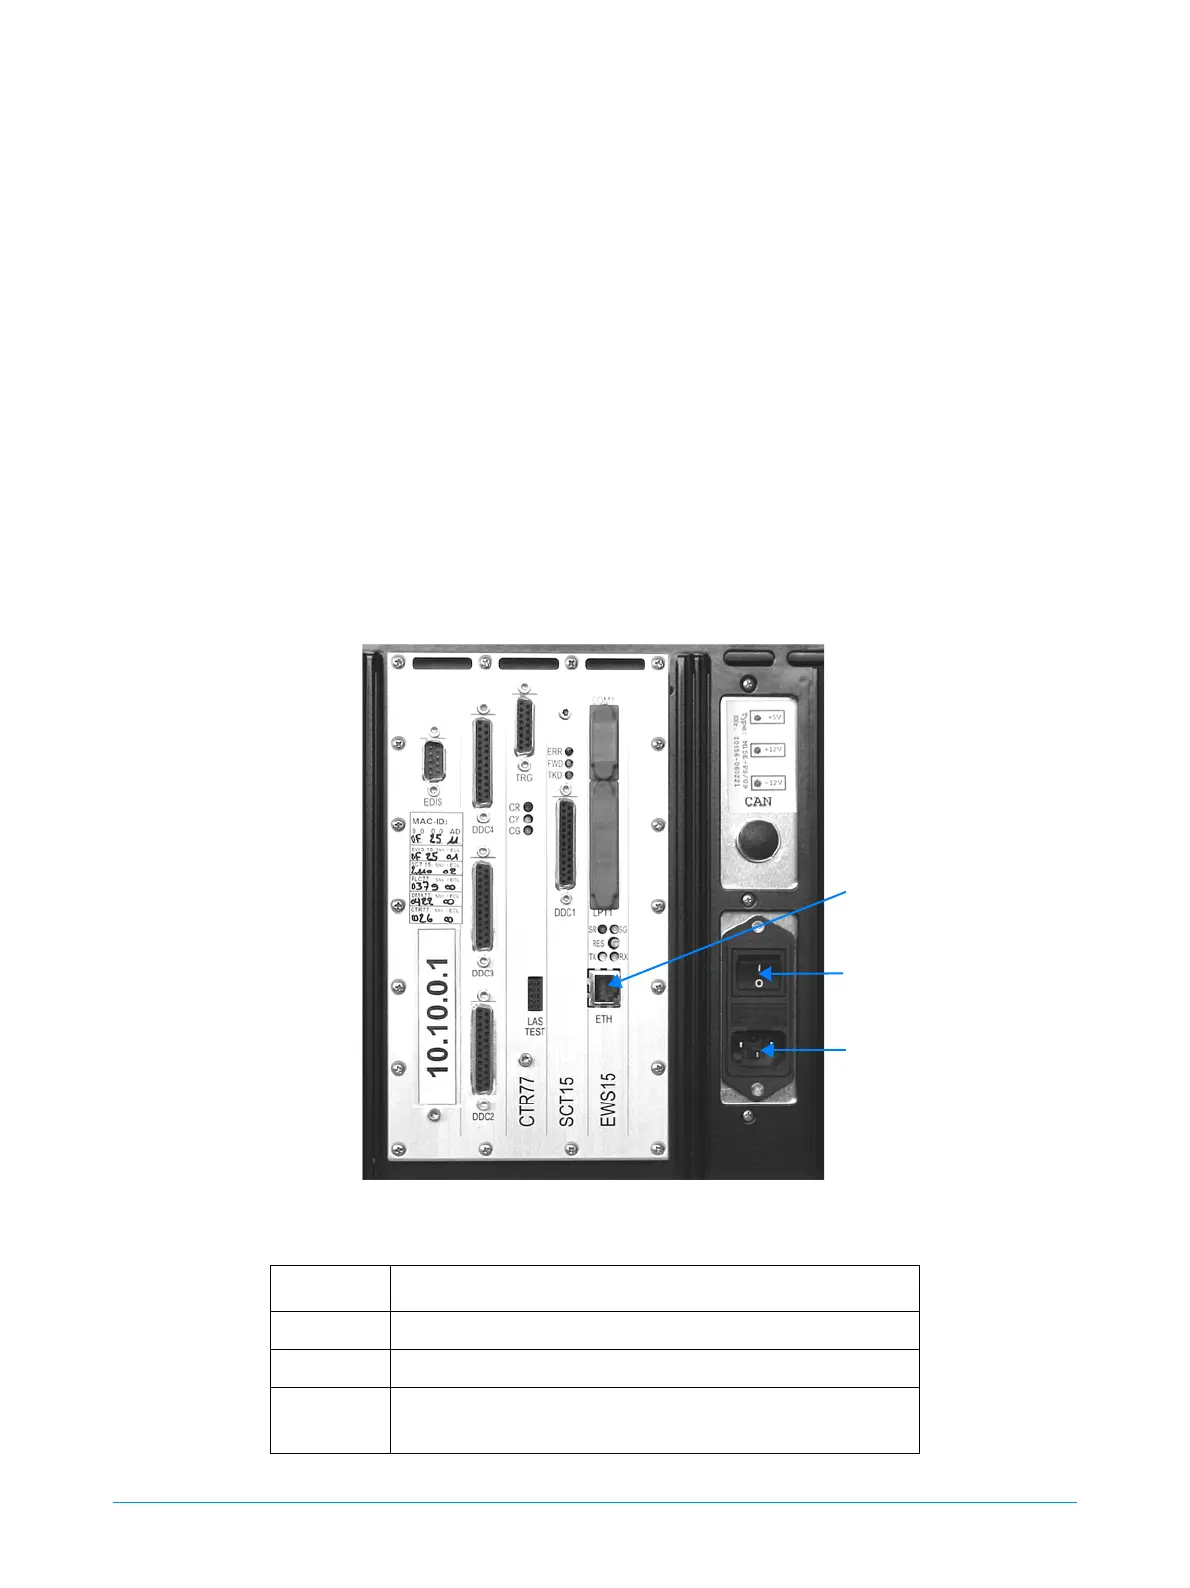
Component
A Ethernet port
BMains switch
C
Primary power receptacle (for connecting the
power cord)
Figure 2: Spectrometer Rear Side - Connections for Power Supply and PC
A
B
C
 Loading...