●How to Use The Rice Cooker
Please ensure no foreign objects and water between the main body and inner pot.
○In the initial few times of use, it would be some smoke and smell during use and it is normal. The smell and smoke
will be gone after repeated use.
○It is normal to hear the sound of “Ka-cha” when cooking.
○After taking out the inner pot, it will enter the keep warm mode automatically without disconnecting the power supply.
○Staying in the pot for 5-10 mins after cooking enhances the texture of the rice.
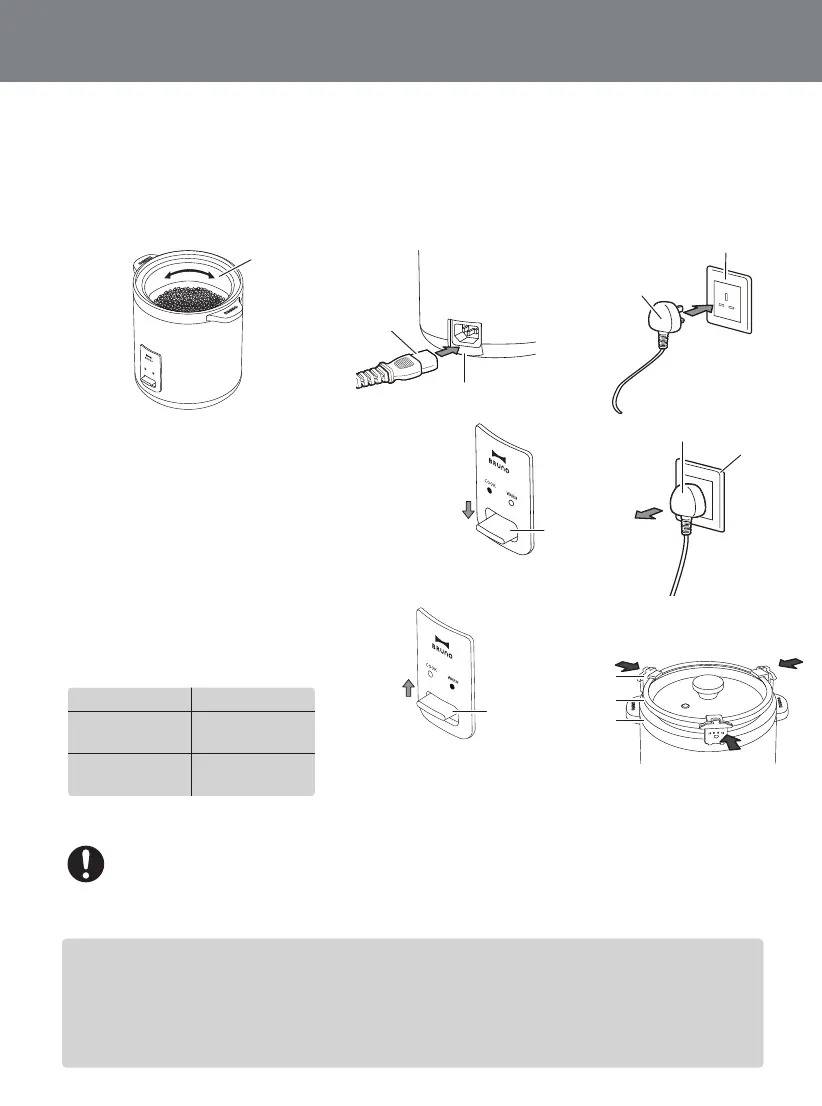
After placing the inner pot in the main body, turn it 2-3 times as indicated by the arrow.
Connect to the power supply by plugging in the connector to the connecting socket on
the main unit and plug into the wall socket as indicated in the pictures.
Main body enters the “WARM” mode and the
“WARM” light will be on (ORANGE) once
connected to the power supply.
Start the cooking by pressing the button and
the “COOK” light will be on (RED).
After usage, please remove the plug from the
wall socket.
Once cooking is completed, it will turn to keep
warm mode automatically. The “COOK” light
will be off (RED) and the “WARM” light will be
on (ORANGE).
For some food other than rice that takes a long time to cook, such
as porridge, please turn the button from “COOK” to “WARM”
manually after boiling and unplug it after cooking.
The amount of water needs to be adjusted according to the cooking
situation. Do not exceed the maximum water level indicated. (2 cups)
To prevent the porridge from spilling over, it is suggested to place the
cover stands on the inner pot before cooking.
Plug
Wall Socket
Cooking Time
Amount of Rice Estimated Time
1 Cup of Rice
2 Cup of Rice
Approx. 28 mins
Approx. 30 mins
Button
Press the button and the
“COOK” light will be on (RED)
Plug
Wall Socket
Push the button up manually
and the “WARM” light will be
on (ORANGE)
Button
Connector
Connector Socket
Inner Pot