BRUNSWICK INSTALLATION MANUAL PAGE 9
EDINBURGH
ATTACHING BED CLOTH TO FRAMED
SLATE
Before attaching the billiard cloth, clean slate thoroughly.
FIGURES ONE AND TWO
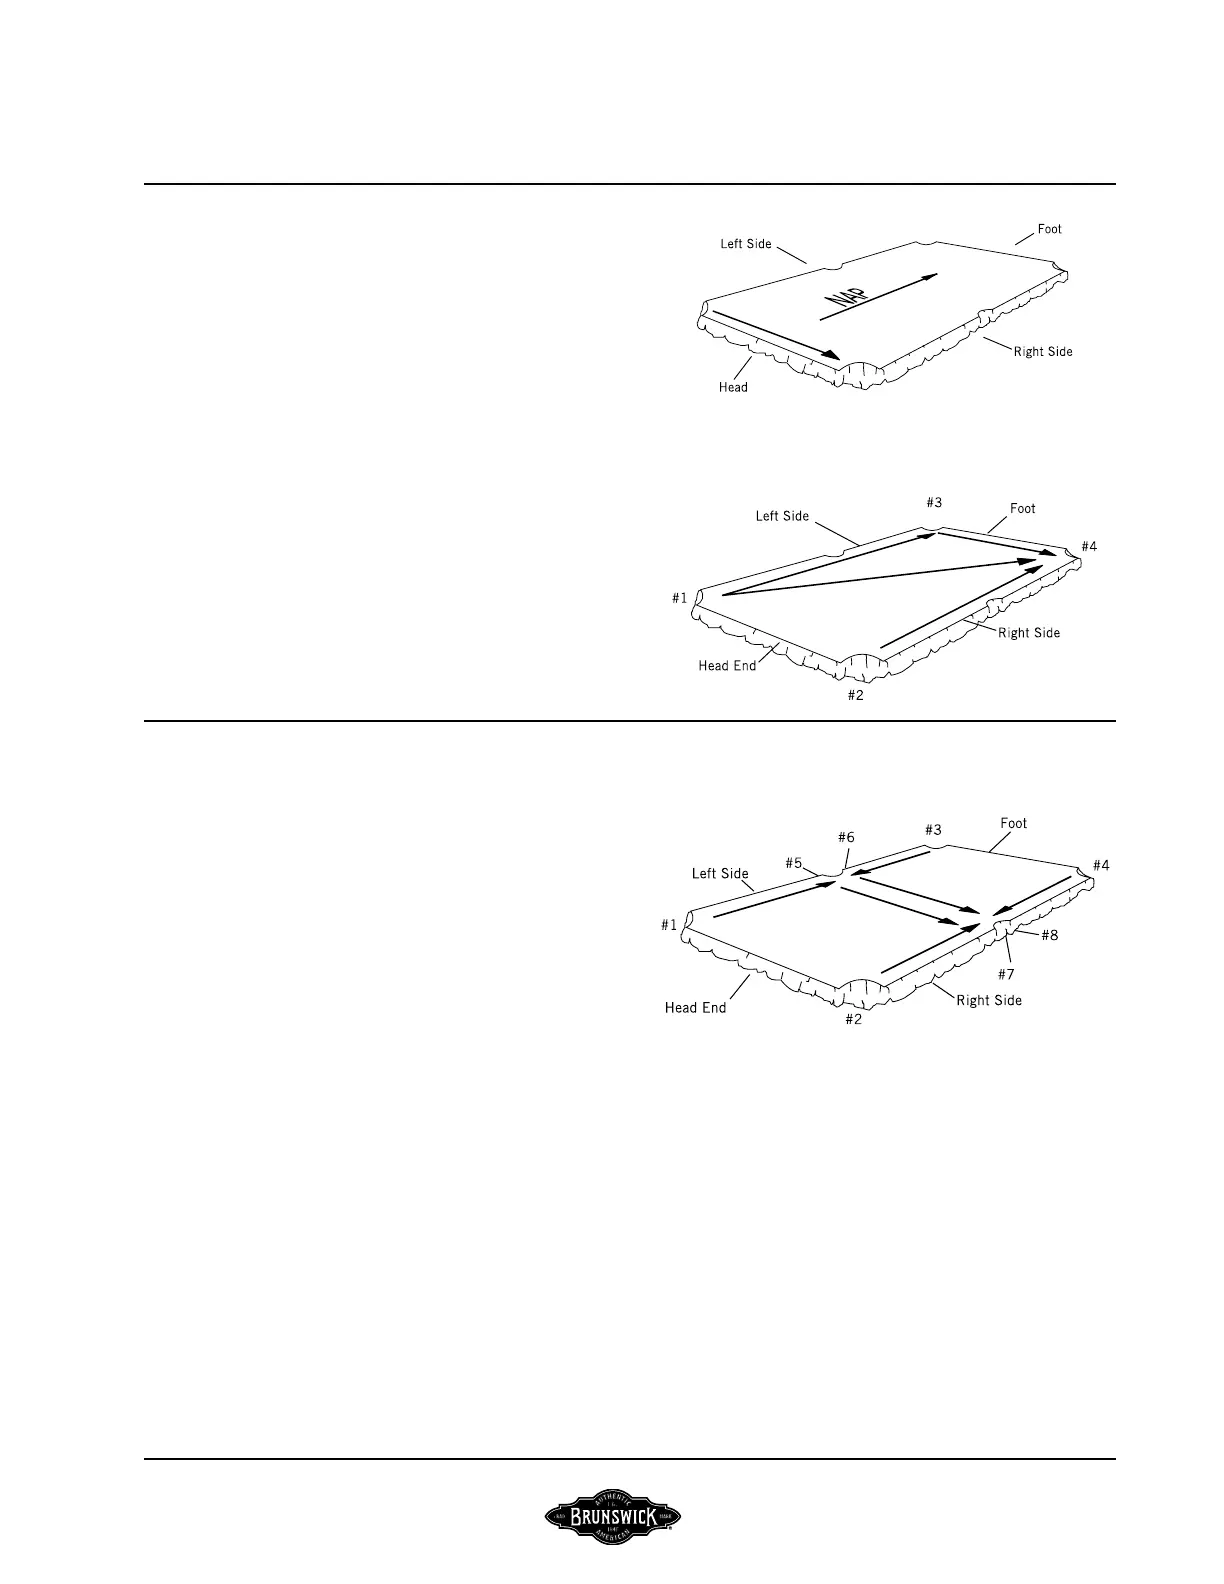
Step #1: Lay the bed cloth over the top of the slate, nap side up,
with the nap running from the head end to the foot end of the table.
NOTE: In determining the direction of the nap, run
your hand lightly over the surface of the cloth. If it
meets resistance, it is going against the nap.
FIGURE ONE
Step #2: Leave only enough cloth overhang at the head end and
left side to permit tacking into the wood slate frame. Leave the bal-
ance of cloth overhang at the foot end and right side.
NOTE: Do not spread tacks on the bed cloth. Keep them
in a container that slides over the cloth.
Step #3: Tack or staple the cloth securely to the wood frame at
#1 with two tacks or staples approximately 2” apart.
Step #4: Stretch the cloth across the table and tack or staple
securely at #2 with two tacks or staples 2” apart.
FIGURE TWO
FIGURE THREE
Step #5: Stretch the cloth from #1 to #3 and tack or staple
securely into the wood frame at the left side of the table. See Figure
B.
Step #6: Stretching the cloth across the table from #3 and pull-
ing from #2, tack or staple the cloth at #4.
Step #7: On the left side, stretch the cloth tightly from #1 toward
the side pocket opening and tack or staple securely at #5.
Step #8: Repeat Step 5, stretching the cloth from #3 and tacking
or stapling at #6.
Step #9: On the right side of the table, grasp the cloth rmly and
stretch across the table from #5 and toward the side pocket from
#2 and tack or staple at #7.
Step #10: Repeat Step 7, stretching from #6 and toward the side
pocket from #4 and tack or staple at #8.
FIGURE THREE
 Loading...