3
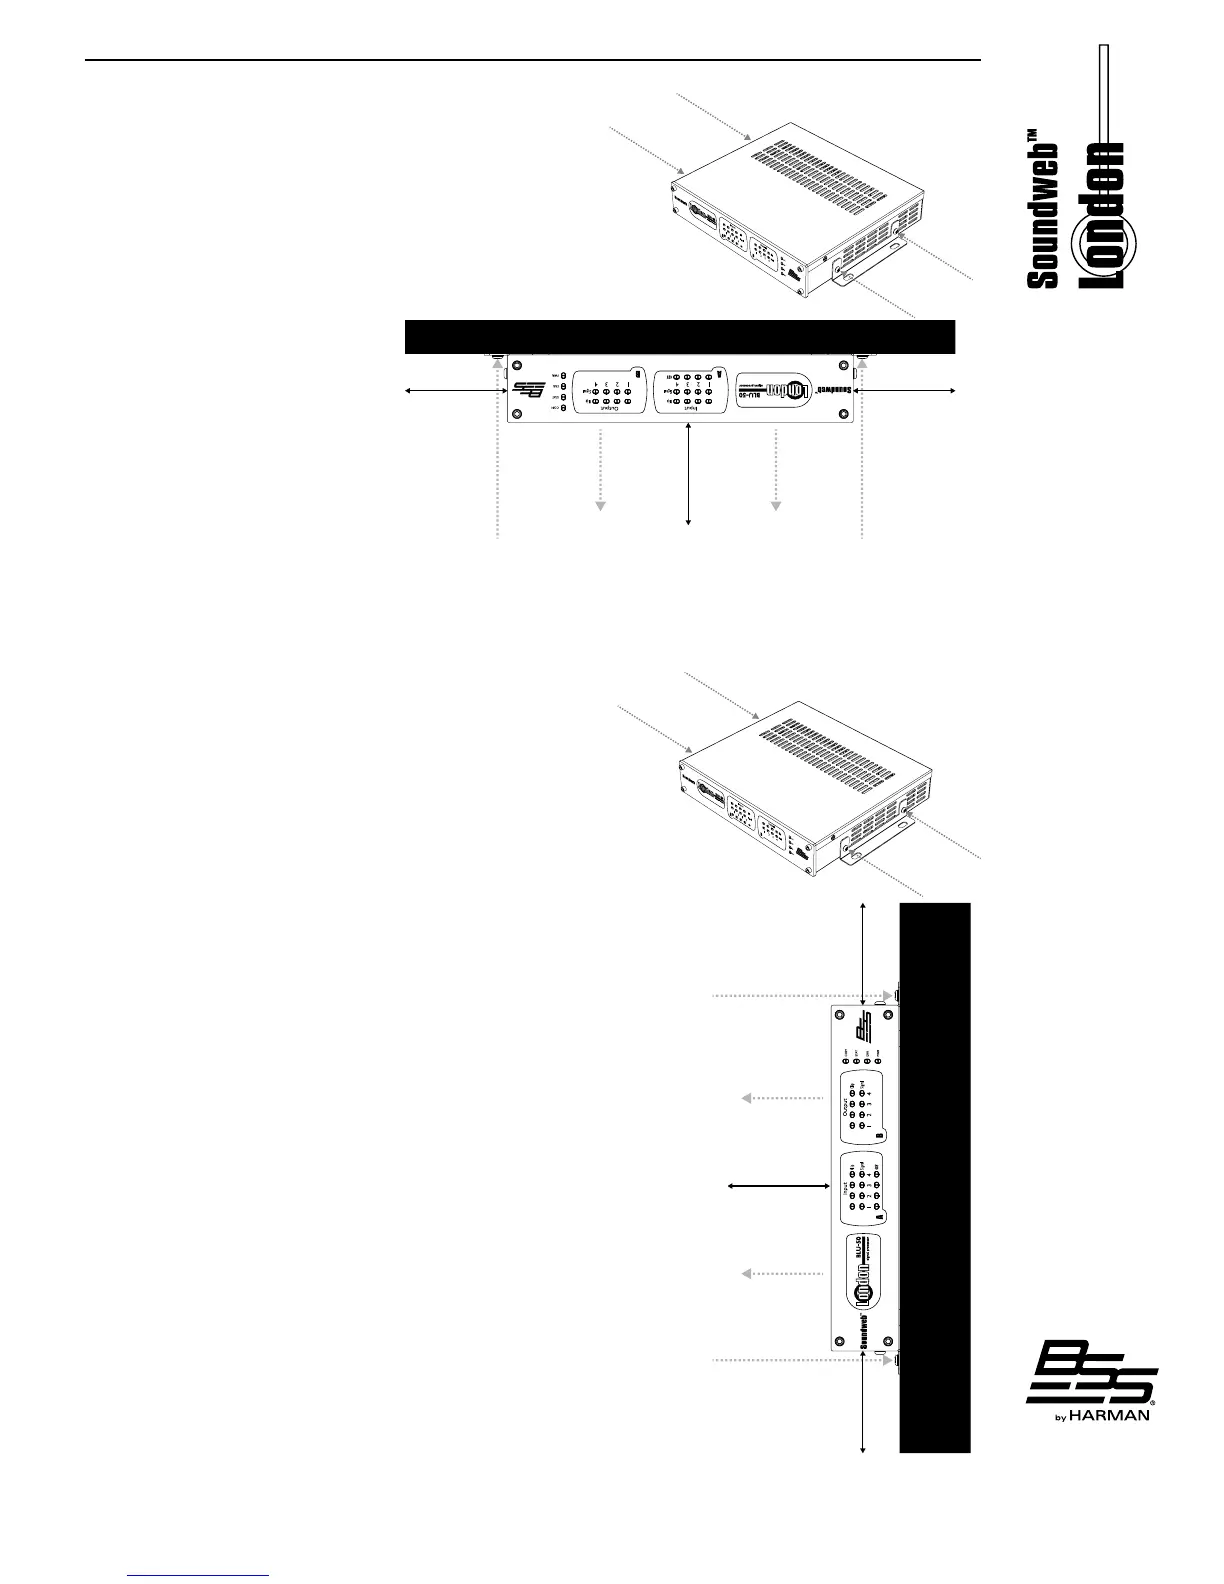
Under-Table Mounting
Additional Tools & Supplies Required
• Phillips screwdriver
• ½" minimum length #8 Phillips screws (quantity 4)
Step 1: Afx the mounting brackets (included) to both sides of
the BLU-50 using two screws (included) per side�
Included Screws
Included Screws
Step 2: Install the BLU-50 under the
table upside down as shown, using four
#8 screws with a minimum length of
½" (not included)� When under-table
mounting the BLU-50, you must:
• Mount the device so that the lid
vents face away from the table�
1/2”
(Not Included)
#8 Screws, Minimum
1/2”
Table
Lid Vents
Lid Vents
6" Clearance 6" Clearance
• Leave at least 6" of clearance on each side and the top of the device to allow for proper ventilation�
• Use four #8 wall-mounting screws of at least ½" in length�
Wall Mounting
Additional Tools & Supplies Required
• Phillips screwdriver
• 1½" minimum length #8 Phillips screws (quantity 4)
• Hollow wall anchors (quantity 2)
Step 1: Afx the mounting brackets (included) to both sides of
the BLU-50 using two screws (included) per side�
Included Screws
Included Screws
Step 2: Install the BLU-50 to the wall using four additional #8 screws with a
minimum length of 1½" (not included)� When wall mounting the BLU-50, you
must:
• Mount the device so that the sides face up and down and the lid vents face
away from the wall�
• Leave at least 6" of clearance on each side and the top of the device to
allow for proper ventilation�
• Use four #8 wall-mounting screws of at least 1½" in length�
• Mount 2 of the wall-mounting screws into the wall studs�
• Use hollow wall anchors of suitable size and length for the two remaining
wall-mounting screws�
#8 Screws, Minimum 1/”
(Not Included)
#8 Screws, Minimum 1/”
(Not Included)
Wall
6" Clearance 6" Clearance
Lid Vents
Lid Vents
6" Clearance