SHOW / OK
SHOW / OK
NEXT
BT Home Monitor ~ 8th Edition ~ 26th March ’03 ~ 5296
Add / Delete / Change Sensor
You can add up to 28 wireless sensors to the
BT Home Monitor VP1000 system. Provided with
the package are 3 wireless sensors, and these
are pre-programmed to function as soon as the
battery is activated. If you would like to add
another sensor to your security system, or
amend or delete a sensor already installed in
your home, use the following instructions. For
more details on specific types of sensors please
go to Section 5.
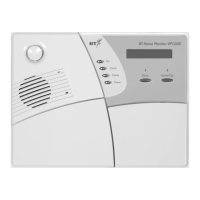
At the Control Panel, follow these instructions:
PRESS DISPLAY
Until the display shows
SYSTEM PROFILE.
Enter your MASTER CODE –
if you have not selected a
personal PIN number, this will
be the default setting – 2580.
Until display shows
ADD / DEL SENSOR.
Display shows SENSOR NO:--
Enter the Sensor number you want
e.g. 4, or press NEXT to find the
next available Sensor location.
As the BT Home Monitor has three
Sensors supplied, numbers 1, 2
and 3 are already taken and a black
box ■ will appear next to the
number signifying that the slot has
been taken. You can add additional
Sensors from the number 4 slot
onwards.
Display shows
ADD / DEL SENSOR.
Display shows ACTIVATE NOW.
Switch the Sensor on. This depends
on the sensor, but usually involves
activating the battery or triggering
an alert.
Display shows S (number): and a
black box is displayed. The sensor
is now registered.
To select the Response Type, which is the way
your sensor will react when triggered, follow
these instructions:
PRESS DISPLAY
Display shows S (number):
RESPONSE.
Choose by scrolling through the
following options. For more detail
on how these options work, please
refer to Section 3.
1. Home 6. Help Silent
2. Home & 7. Alarm
House 8. Fire
3. Walk-Thru 9. Non-Alarm
4. Entry 1 10. Emergency
5. Entry 2
To confirm the change.
NEXT
SHOW / OK
NEXT
SHOW / OK
SHOW / OK
SHOW / OK
27
SECTION 4
 Loading...