Do you have a question about the Bulls SIX50 EVO AM 4 and is the answer not in the manual?
Details about the manufacturer, BULLS Bikes USA, including contact information.
Information on compliance with ISO 4210, Cycles – Safety requirements for bicycles.
Lists Charger operating instructions as a related document.
States that information reflects technical specifications at the time of printing.
Confirms original instructions are in English and translations are not valid without it.
Outlines the bicycle's safety concept comprising four elements.
Details the role of the specialist dealer in customer service and rider instruction.
References Chapter 2 for general safety notes, distinguished by a grey background.
Explains how hazardous situations are marked with signal words like DANGER, WARNING, CAUTION, NOTICE.
Describes safety markings used on the bicycle's type plates, including general warning and instructions for use.
Explains the pattern for instructions: requirements, instruction, and result.
Mentions type plates contain important information alongside warnings.
Defines terms and conventions used in the operating instructions for clarity.
Details the information found on the bicycle's type plate, including identification and classification.
Explains how to find the identification number of the operating instructions.
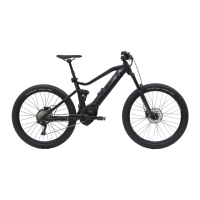
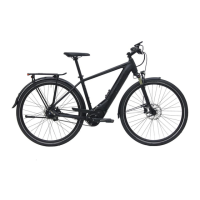
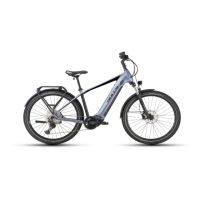
Lists the bicycles for which these operating instructions are a component part.
Recommends a minimum age of 14 and experience for riders of electric cycles.
Warns to keep batteries and chargers out of reach of children and advises supervised use for minors.
Recommends wearing a safety helmet, close-fitting cycling clothing, and sturdy footwear.
States the bicycle is designed for specific speeds and must be in perfect, functional condition.
Describes city and trekking bicycles as suitable for daily, comfortable use on public roads.
Describes mountain bikes for sporting use, requiring adaptation, fitness, and training.
Lists uses that pose risks of injury or material damage, such as manipulating the drive system or exceeding load weight.
Notes that city/trekking bikes are not sports bikes; using them for sports reduces stability and comfort.
States mountain bikes may need retrofitting with lighting/guards for public street traffic.
Outlines rider responsibilities: receiving instruction, wearing PPE, and assuming obligations.
Details operator duties: providing instructions, familiarizing riders, and ensuring proper use and maintenance.
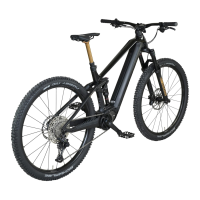
Provides a labeled diagram of the bicycle viewed from the right, identifying key components.
Explains the components of a wheel, showing a front wheel example.
Describes the function of valves (Dunlop, Presta, Schrader) used to fill tires with air.
Explains suspension and damping functions in forks, improving floor contact and comfort.
Details the structure of a Suntour fork, identifying components like the fork shaft, axle, and compression setting.
Illustrates the Yari fork, showing air suspension, compression damper, and rebound damper controls.
Describes the FOX rear frame damper, noting its air suspension, compression, and rebound dampers.
Details the Suntour rear frame damper, including its air suspension, compression, and rebound dampers.
States the bicycle is equipped with a disc brake and shows rim brake components as an example.
Explains the mechanical drive system of the bicycle, driven by muscle power via the chain.
Details the lithium-ion battery's internal protection circuit, temperature monitoring, and auto-shutoff features.
Explains the five green LEDs indicating battery charge status and how it's shown on the display.
States that activating the driving light turns on both the headlight and rear light.
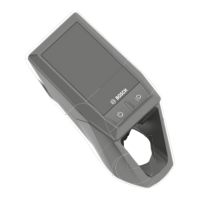
Illustrates the control panel with six buttons and lists their functions.
Describes the display's two buttons and how it operates using bicycle battery energy.
Locates the USB port under the display's rubber cover and explains its use for charging devices.
Details the start screen indicators like speed unit, clock, battery charge status, and motor power.
Provides CAUTIONary advice on transporting the bicycle to prevent activation or damage.
Instructs to insert transport securing devices between brake linings.
Warns about fire/explosion risk from high temperatures and advises on proper storage.
Explains how to prepare the bicycle for periods of non-use, including battery charging and cleaning.
Provides CAUTIONary advice on assembly and lists required tools.
Lists the specific tools needed for assembling the bicycle.
Warns about hand injuries from cardboard packaging and advises on proper disposal.
Details the components included in the bicycle's delivery, stating it is 95-98% pre-assembled.
States that initial commissioning requires trained specialist staff due to special tools and knowledge.
Provides a comprehensive checklist for the initial setup and functional checks of the bicycle.
Details how to check the battery before the first charge, including using the On-Off button and checking LEDs.
Explains how to insert and charge the Kiox display, noting it is delivered partially charged.
Guides on adjusting system settings like brightness, time, date, and units via the display's menu.
Provides instructions for mounting a wheel using a screw-on axle (15 mm), including tightening torque.
Details inserting and tightening the securing screw for the wheel's axle with a 5 mm hex key.
Explains mounting the wheel with a 20 mm screw-on axle, including tightening the inserted axle and securing clip.
Warns about crashes due to loose or incorrectly set quick release axles and provides instructions for safe installation.
Details mounting wheels with a quick release, warning about unfastened or faulty installations causing crashes.
Explains mounting the front wheel in the FOX fork using a quick release (15 mm) and adjusting the axle lever.
Provides steps for pushing the quick release into the fork, opening the lever, and tensioning the axle.
Guides on adjusting the FOX quick release by recording axle settings and adjusting the axle nut securing screw.
Details mounting wheels with Kabolt axles, including tightening the axle screw with a 6 mm hex key.
Explains how to check connections and firm hold of the stem and handlebars, and how to increase quick release tension.
Explains how to adjust the saddle tilt for an optimum fit, recommending initial horizontal placement.
Details placing the saddle tilt in a horizontal position for initial adjustment.
Guides on safely determining the optimal seat height by placing your heel on the pedal at the lowest crank rotation point.
Instructs on adjusting seat height using the quick release lever on the seat post.
Explains the initial firm push needed for height-adjustable seat posts due to seal lubrication.
Provides steps to lower the saddle by pressing down on it or sitting on it and holding the activation lever.
Guides on raising the saddle by pulling the seat post activation lever and removing pressure from the saddle.
Explains how to adjust the saddle position horizontally for optimal leg leverage, preventing knee pain.
Details how to adjust handlebars while stationary, unfastening screws, and clamping with maximum torque.
Warns about crashes due to loose stems from incorrectly fastened screws and advises checking handlebars and quick release.
Guides on adjusting handlebar height by opening the clamping lever, pulling the locking lever, and pivoting handlebars.
Explains how to turn handlebars to the side, similar to height adjustment, warning about clamping force issues.
Explains how to check quick release clamping force on the stem or seat post for proper function.
Guides on adjusting quick release clamping force by screwing out or tightening the knurled nut.
Details adjusting the pressure point on a Magura brake lever using a twist knob.
Explains turning the twist knob towards the plus symbol to adjust the brake lever's pressure point.
Warns about brake failure due to incorrectly set grip distance and advises checking brake cylinder position.
Guides on adjusting grip distance using a T25 TORX wrench on the setting screw.
Lists Suntour forks that can be installed and provides a basic setting for suspension adjustment.
Explains negative deflection (SAG) as fork compression due to rider weight and gear, recommending 15-30% deflection.
Details adjusting air suspension fork SAG by pumping air to desired pressure, using a high-pressure pump.
Explains adjusting steel suspension fork SAG by tensioning the spring via a setting wheel.
Describes adjusting rebound speed for the fork, noting higher SAG requires lower rebound settings.
Explains adjusting FOX fork SAG, recommending 15-20% deflection, and notes basic settings may need rider preference adjustments.
Details adjusting FOX fork SAG, providing a filling pressure table for different rider weights.
Guides on adjusting the rebound for the FOX fork, ensuring it rebounds quickly without bottoming out.
Explains adjusting Suntour rear damper SAG, warning about permanent damage from incorrect air pressure.
Details adjusting Suntour rear damper SAG, advising to set compression adjuster to OPEN and use a pump.
Explains adjusting Suntour rear damper rebound, noting higher SAG requires lower rebound settings.
Guides on setting Suntour rear damper compression based on ground conditions, specifying OPEN and LOCK positions.
Explains adjusting FOX rear damper SAG, warning about permanent damage from incorrect air pressure.
Details adjusting FOX rear damper SAG, advising to set compression adjuster to OPEN and use a pump.
Guides on adjusting FOX rear damper rebound, providing a table for recommended settings based on air pressure.
Explains the process of breaking in new brake linings and discs for optimal braking power.
Warns about crashes from difficult-to-spot damage or material fatigue and advises regular inspections.
Provides a checklist for pre-ride checks, including bicycle completeness, lights, brakes, wheels, and suspension.
Explains how to raise and lower the kickstand, and warns about crashes from a lowered kickstand or unstable parking.
Warns about crashes due to loaded or unsecured luggage on the pannier rack, and crushing fingers in the spring flap.
Warns about fire and explosion risks from defective batteries or high temperatures, and chemical burns from leaks.
Provides instructions for removing the down tube/seat tube battery, warning about water penetration and key usage.
Details opening the battery lock, tipping out the battery, and pulling it from the mount.
Guides on inserting the battery by placing it on contacts, tilting it, and pushing until it clicks.
Instructs on removing the integrated battery by opening the lock, releasing it, and pulling it out.
Details opening the battery lock, releasing the integrated battery, and holding it while it falls into the retainer guard.
Guides on inserting the integrated battery by placing contacts first, tilting, pushing until it clicks, and locking with the key.
Warns about fire/explosion from faulty batteries or overheated chargers, and electric shock from water penetration or damage.
Provides warnings for charging dual batteries, similar to single battery charging, and details charging processes.
Explains charging two batteries alternately via the accessible socket, doubling the charging time.
Describes charging single batteries individually or on the bicycle if an accessible socket is present.
Instructs on waking the battery from sleep mode by pressing the On-Off button to activate the indicator.
Details the three options for switching on the drive system: battery button, display button, or automatic with display insertion.
Details the three options for switching on the drive system: battery button, display button, or automatic with display insertion.
Explains how the drive system switches off automatically or manually, listing three options for manual shutdown.
Warns about distraction from the display while riding and advises stationary input, also notes display battery discharge.
Explains how to charge the display battery on the bicycle or via USB port, noting it charges only when switched on.
Explains how to charge the display battery on the bicycle or via USB port, noting it charges only when switched on.
Explains how to charge the display battery on the bicycle or via USB port, noting it charges only when switched on.
Describes the display's power-saving storage mode, which minimizes battery discharge and eliminates date/time.
Guides on activating storage mode by pressing and holding the on-off button for at least 8 seconds.
Explains how to deactivate storage mode by pressing the on-off button for at least 2 seconds.
Advises removing the display when the bicycle is parked to prevent theft or unauthorized access.
Details how to remove the display from its mount by pulling it away from the contacts.
Guides on inserting the display by placing the lower section onto the mount and folding it until it clicks.
Explains how to fasten the display with a blocking screw, warning it doesn't protect against theft.
Warns about moisture triggering short circuits in the USB port and advises closing the protective flap.
Instructs to press the On-Off button to switch on the display and activate the electric drive system.
Explains how to switch off the display and the electric drive system by pressing the On-Off button.
Describes using the push assist system for pushing the bicycle, warning about injuries from pedals or wheels.
Explains how to turn the driving light on and off by pressing the driving light button on the display.
Guides on adjusting the electric drive's assistance level using the control panel buttons.
States that user interface screens and texts may vary slightly due to software updates.
Instructs to insert the display into its mount to open the START SCREEN.
Guides on opening the STATUS SCREEN by first opening the START SCREEN and pressing the browse backwards button.
Explains how to open the SETTINGS menu by accessing the STATUS SCREEN and selecting SETTINGS.
Refers to online instructions for detailed descriptions of individual parameters in the settings.
Explains how to access the QUICK MENU to display and adjust selected settings while riding.
Guides on resetting journey data by opening the QUICK MENU, selecting Rest, confirming, and entering the date.
Explains how to adjust pedalling frequency or start gear in the SETTINGS menu under MY EBIKE → ESHIFT.
Emphasizes the importance of selecting appropriate gears for comfortable riding and proper drive system function.
Provides instructions on using down and up shifters for gear changes, recommending brief cessation of pedalling.
Warns that hydraulic fluid can be fatal if swallowed or inhaled, detailing first aid treatment and environmental measures.
Explains how to use the front (left) and rear (right) brake levers to achieve the desired speed.
Explains how the compression adjuster on the Suntour fork allows quick adjustments for terrain changes.
Explains how the compression adjuster on the Suntour fork allows quick adjustments for terrain changes.
Details how the compression adjuster on the Fox fork allows quick adjustments for terrain changes.
Guides on adjusting the Suntour damper compression for terrain changes, recommending OPEN for descents and LOCK for climbing.
Explains how the Fox damper compression adjuster allows quick adjustments for terrain changes.
Lists cleaning tasks for pedals, suspension fork, battery, chain, charger, and seat post with their frequencies.
Provides a checklist for regular maintenance, including tire wear, pressure, brakes, cables, chain tension, and spokes.
Outlines service tasks for suspension fork, rear frame damper, and drive unit, with recommended intervals.
Explains general servicing measures that can be performed by the operator/rider, advising specialist dealer consultation for doubts.
Details cleaning suspension fork stanchions, checking for damage, and lubricating dust seals.
Details cleaning suspension fork stanchions, checking for damage, and lubricating dust seals.
Guides on cleaning the rear frame damper body and checking for dents, scratches, or oil leaks.
Instructs on cleaning pedals with soapy water after riding through dirt or rain, and servicing them afterward.
Warns about poor braking effect after cleaning/servicing and advises against steam jets or grease on clamping sections.
Details cleaning the frame by soaking dirt stains, removing mud, rinsing, and servicing the frame.
Guides on cleaning the stem with a cloth and washing water, and servicing it afterward.
Instructs on cleaning the rear frame damper with a cloth and washing water.
Explains cleaning the wheel, checking tires, rims, and spokes for damage, and cleaning the rim.
Details cleaning drive elements like cassette and chain wheels with degreasing agent and detergent.
Provides instructions for cleaning the chain, warning against aggressive cleaners and advising proper lubrication.
Guides on cleaning the battery's electrical connections and decorative sides, warning about water penetration.
Instructs on carefully cleaning the drive unit with a damp cloth, warning against water immersion.
Guides on cleaning the display with a damp cloth, warning about permanent damage from water.
Details cleaning brakes and discs with brushes, water, and detergent, warning about brake failure due to water penetration.
Guides on drying the frame after cleaning and applying care oil.
Guides on drying the frame after cleaning and applying care oil.
Explains applying silicone/Teflon oil to stem parts and lubricant grease to the quick release lever.
Instructs to treat the dust seals with fork oil.
Details servicing drive elements by spraying with degreasing agent and cleaning parts.
Guides on treating pedals with spray oil after cleaning.
Instructs to grease the chain thoroughly with chain oil after cleaning.
Guides on servicing front and rear derailleur shafts and jockey wheels with Teflon spray.
Covers checking tire wear, pressure, rims, and spoke tension, warning about braking hard on rims.
Covers checking tire wear, pressure, rims, and spoke tension, warning about braking hard on rims.
Advises replacing brake linings on disc brakes when pad thickness reaches 0.5 mm, warning about brake failure.
Guides on checking electrical and brake cables for damage and ensuring their full functionality.
Instructs on checking and adjusting gear shift and shifter settings.
Recommends inspecting the stem and quick release system regularly and checking for wear and corrosion.
Explains how to check chain/belt tension, warning about excessive tension increasing wear or low tension causing slippage.
Warns about moisture in the USB port causing short circuits in the display and advises checking the cover position.
States specialist dealer checks suspension fork function, attachment screw torques, and for wear/damage.
Emphasizes the need for specialist dealer inspections every six months for safety and functionality.
Stresses using only original parts and lubricants for maintenance and repair, with approved lists available from dealers.
Stresses using only original parts and lubricants for maintenance and repair, with approved lists available from dealers.
Warns about crashes from unfastened, faulty, or incorrectly set quick release axles due to damage or insufficient clamping force.
Explains how to clamp the quick release lever, identifying OPEN/CLOSE markings and proper lever position.
Guides on clamping version I quick release, holding the lever, screwing the setting nut, and achieving a right-angle final position.
Details clamping version II quick release, aligning the lever, and achieving a forward, parallel final position.
Guides on clamping version III quick release, pushing the axle, screwing the quick release, and clamping until resistance is felt.
Explains clamping version IV quick release, including setting the clamping force using a twist knob.
Details clamping version V quick release, pushing the axle, flipping the lever, and warning about unfastened releases causing crashes.
Explains adjusting tire pressure for Dunlop valves, recommending a pump with a gauge and proper valve cap tightening.
Explains adjusting tire pressure for Dunlop valves, recommending a pump with a gauge and proper valve cap tightening.
Guides on adjusting tire pressure for Presta valves, noting the need for a narrower rim hole and careful pump application.
Explains adjusting tire pressure for Schrader valves, noting ease of filling at petrol stations.
Guides on adjusting gear shift cable tension if gears are not selected effortlessly.
Details adjusting single-cable gear shifts using adjusting sleeves on the shifter housing for smooth shifting.
Explains adjusting dual-cable gear shifts by setting sleeves under the chain stay, noting 1mm play in the shift cable.
Guides on adjusting dual-cable twist grip gear shifts by setting sleeves on the shifter housing for smooth shifting.
Explains using the setting bolt on the brake lever to offset rim brake lining wear.
Explains using the setting bolt on the brake lever to offset rim brake lining wear.
States that brake pad wear on disc brakes does not require readjustment.
Suggests installing 3-watt or 1.5-watt lighting systems and using components of the respective power class.
Instructs on setting the headlight beam to meet the road 10 meters in front of the bicycle.
Lists repairs requiring specialist knowledge, such as replacing tires, brake pads, and chain.
Suggests installing 3-watt or 1.5-watt lighting systems and using components of the respective power class.
Instructs on setting the headlight beam to meet the road 10 meters in front of the bicycle.
Lists repairs requiring specialist knowledge, such as replacing tires, brake pads, and chain.
Provides first aid instructions for battery-related fire/explosion risks and warns about drive system error detection.
Offers troubleshooting steps if the display or drive system fails to start up, including checking battery and contacts.
Guides on actions to take when an error message is displayed, involving noting the message and restarting the system.
Provides a list of system error codes and their remedies, such as checking buttons or recharging batteries.
Warns about crashes due to improper child seat installation on unsuitable parts like the saddle or handlebars.
Warns about brake failure with excessive trailer load and advises observing trailer system notes and regulations.
Advises consulting a specialist dealer for choosing and mounting pannier racks, ensuring proper fit and total weight compliance.
Lists system error codes and their causes, with recommended remedies like restarting the system or contacting a specialist dealer.
States that the Kiox radio system complies with Directive 2014/53/EU, with the full declaration available online.
Provides a list of bicycle parts for the Six50 Evo AM4 model, including motor, display, battery, and brakes.
Lists all figures referenced in the manual with their corresponding page numbers.
Provides an alphabetical index of topics covered in the manual for easy reference.
| Frame Material | Aluminum |
|---|---|
| Motor | Bosch Performance Line CX |
| Battery | Bosch PowerTube 625Wh |
| Display | Bosch Purion |
| Handlebar | Bulls |
| Stem | Bulls |
| Weight | 24.5 kg |
| Fork | FOX Float 36 Rhythm, 150mm |
| Brakes | Shimano MT520, 4-piston |
| Drivetrain | Shimano XT 12-speed |
| Wheel Size | 27.5" |
| Travel | 150mm |
| Rear Derailleur | Shimano Deore XT RD-M8100-SGS |
| Shifters | Shimano XT SL-M8100 |
| Crankset | FSA CK-745 |
| Cassette | Shimano SLX CS-M7100, 10-51T |
| Wheels | Bulls AS-35 |
| Tires | Schwalbe Nobby Nic, 2.6" |
| Saddle | Selle Royal |
| Seatpost | Bulls |