Hose Strap
A/C Hose
1
2
4
3
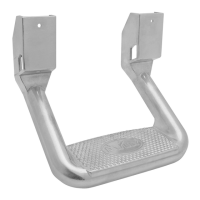
Metal Body
Step Casting
"C" Bracket
"C" Bracket
A/C Lines
Figure E-3
Figure E-4
Plastic Cover
Door Entry
Rocker Panel
Wire Harness underneath
Floor Carpet
Figure E-5
8 9
11. Install the “C” brackets back into the mounting position. Insert sheet metal screws
through the top holes and tighten, insert the 5/16" bolts through the bottom holes
to hold on t the brackets to the vehicle. Add washers and nuts, do not tighten down
yet. (see Fig. E-2, E-4).
12. Attach the step to the brackets. Insert the sheet metal screws through the upper
holes on the “C” brackets, and tighten, install 5/16" bolts, washers and nuts through
the lower holes to secure the step to the brackets. Now tighten all the screws, bolts
and Nuts firmly (see Fig. E-2 & E-4).
13. To complete the installation, install the plastic door entry cover, making sure the
screws will not pierce any wires when putting harness back in place.
English English
1 1/8" Bolt
1
2
4
3
1 1/8" Bolt
Sheet Metal Screw
"C" Bracket
Metal Body
Figure E-1
Figure E-2
Metal Body
Step Casting
"C" Bracket