15
SERVICE (cont,)
DC MOTOR AND GRIND CHAMBER - G1MD ONLY
(cont.)
1. Select the desired grind.
2. Lift the lid and pour coffee beans into the hopper.
3. Slip bag under the chute. Rest the bag on the tray.
4. Press the start switch.
5. Flip the cleaning lever a few times as dispensing slows.
6. Remove the bag. The grinder will stop automatically.
S
TOP
CLEANING LEVERCLEANING LEVER
GROUND
COFFEE
T
U
R
K
IS
H
S
P
E
C
I
A
L
R
E
G
P
E
R
C
E
L
E
C
P
E
R
C
A
U
T
O
M
A
T
I
C
D
R
I
P
F
I
N
E
E
S
P
R
E
S
S
O
T
U
R
K
IS
H
S
P
E
C
I
A
L
R
E
G
P
E
R
C
E
L
E
C
P
E
R
C
A
U
T
O
M
A
T
I
C
D
R
I
P
F
I
N
E
E
S
P
R
E
S
S
O
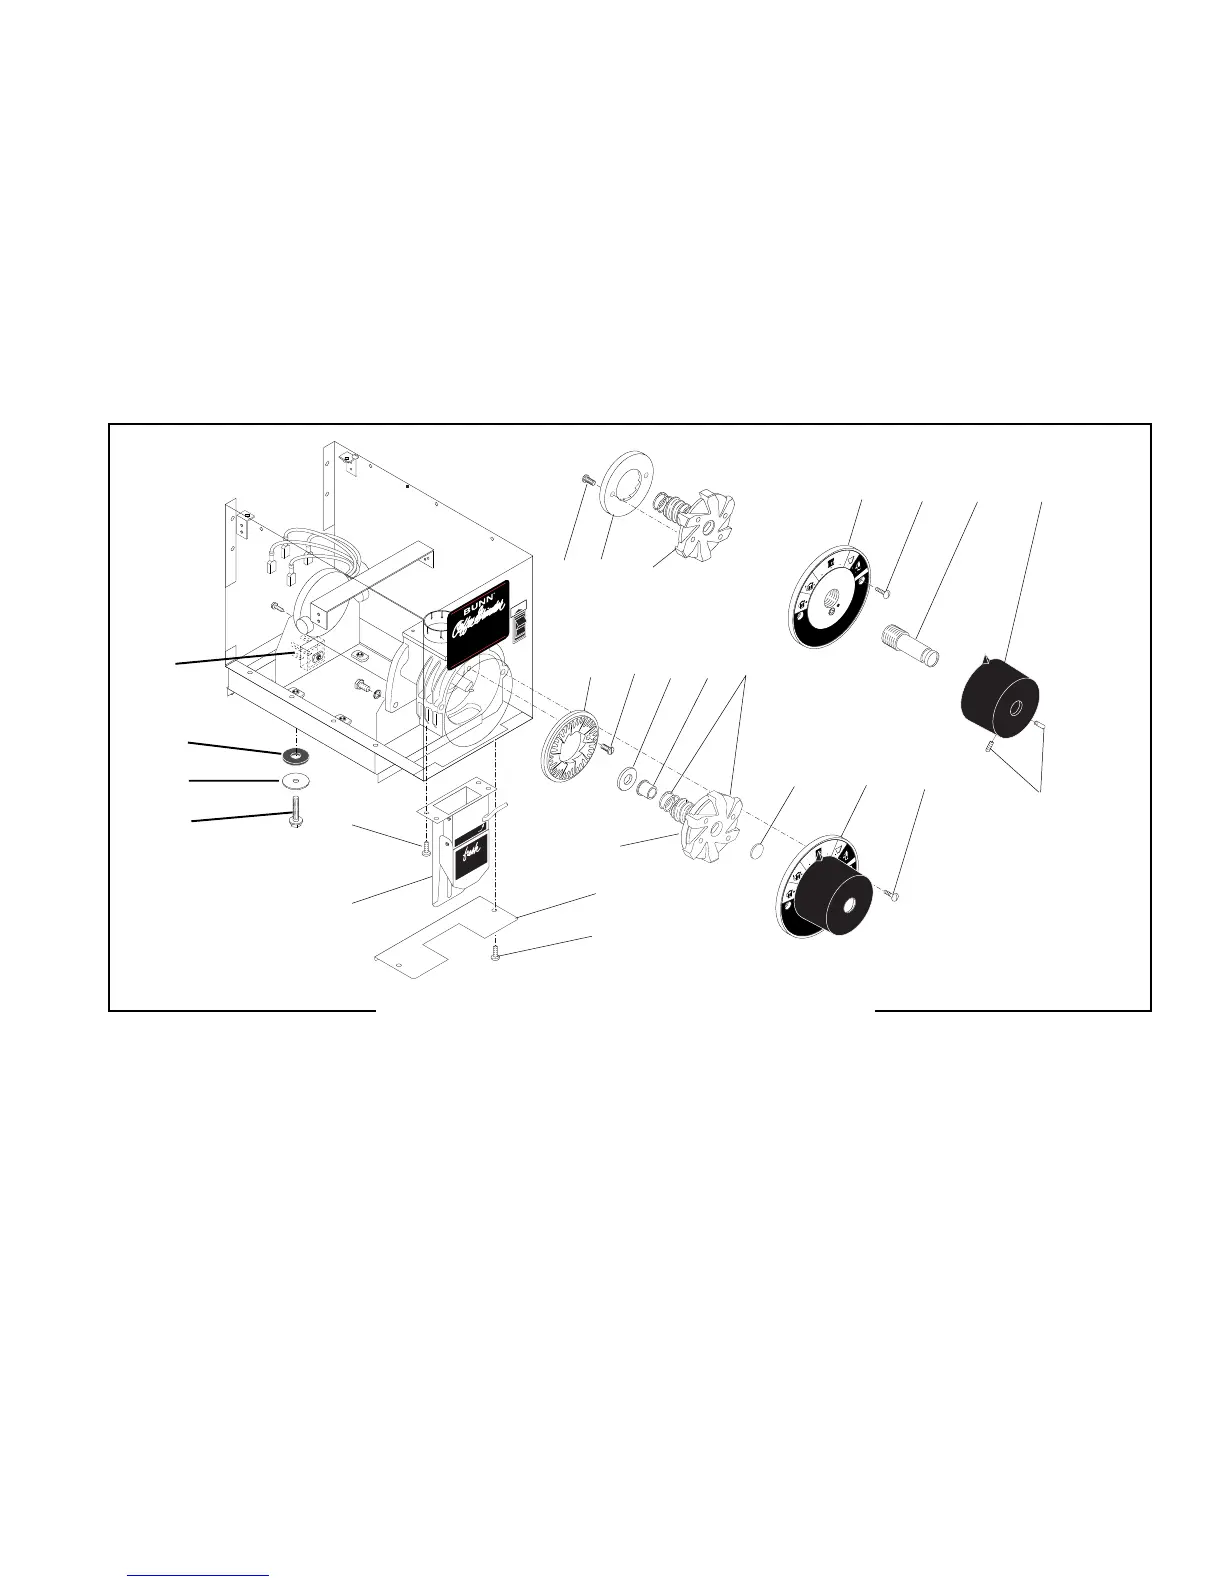
FIG. 9 MOTOR AND GRIND CHAMBER REMOVAL
P1711
5 7 6
16
18 1 19 17
9 8 11 10 3
4 2 1
7
13
12
14
15
22
21
20
23
11. Install burr (7) on burr auger rotor/spring assem-
bly (6) securing with two .250"-20 screws (5).
12. Slide burr auger rotor/spring assembly and burr
(3) onto the motor shaft.
13. Install burr rotor disc (4).
14. Install the adjusting screw w/bearing (19) into
the grind selector dial plate (18).
15. Install grind selector dial plate (18) with adjust-
ing screw w/bearing (19) onto the grind cham-
ber housing and secure with two .250"-20 screws
(1).
16. Install grind selector knob (17) onto the grind
selector dial plate (18).
NOTE: Refer to
ADJUSTMENTS
and reset the burrs.