Combipad | 03-2020 Rev. 01 | English | 6
Assembly Instructions
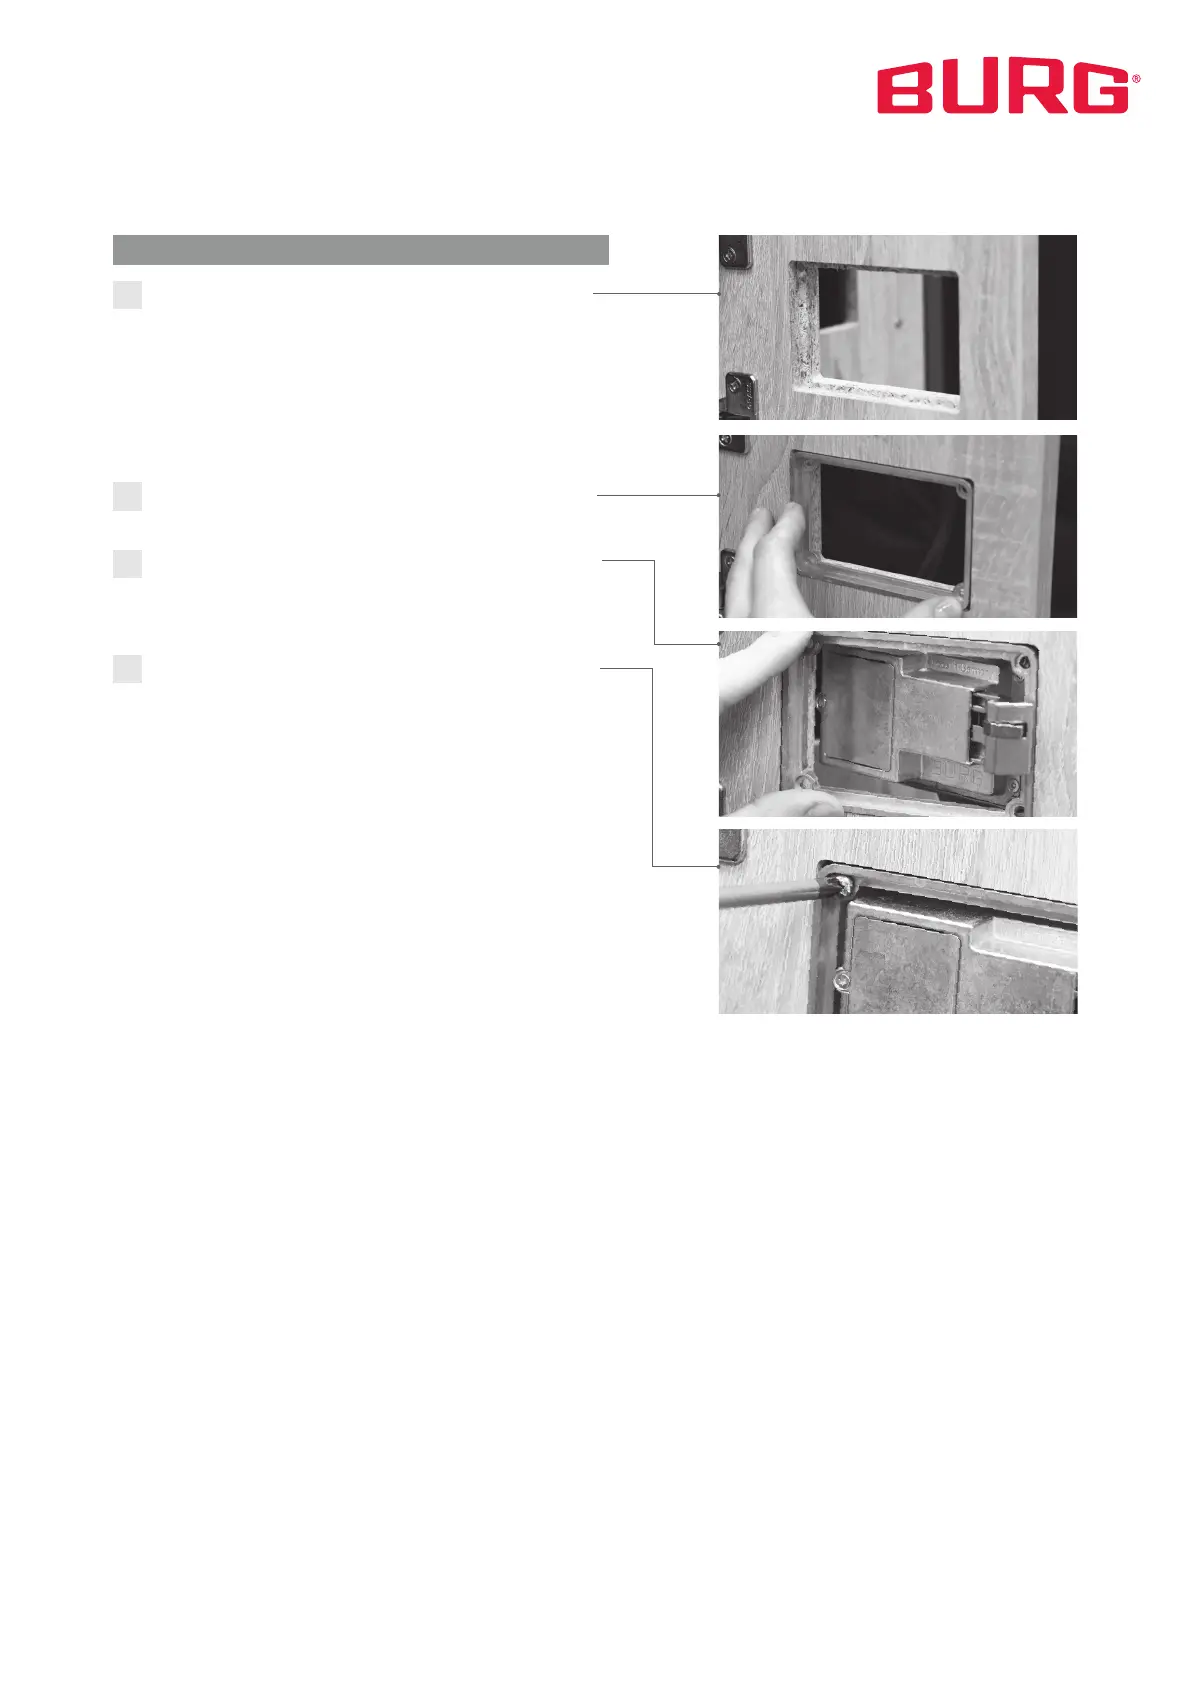
Prepare the appropriate mounting hole on your furniture
according to the installation drawing (page 4). Note the
adapted two-step recess for the fixing frame for fronts
made of wood and HPL. This recess is not required for
metal fronts or acrylic glass.
Note: If you need a template (step file) for CNC milling,
punching or laser cutting, please contact your contact
person at BURG.
Place the fixing frame in the mounting hole on the inside
of the door and hold it in place.
Insert the lock body into the mounting hole from the out-
side of the door, bolt first. Check that the lock lies flush
and tight on the outside of the door.
Screw the fixing frame to the lock body via the four screw
holes (hand-tight, max. 2 Nm). Please note the required
screw length. This depends on the door thickness in which
the lock is installed.
Make sure that the bolt is sufficiently secured (approx. 5
mm) to a strike plate or rebate when closed. When closing
the locking system, the bolt should fall easily into its end
position without pressure.
Tip: An adaptable strike plate can be used to set an opti-
mal closing position. Please contact your contact person at
BURG.
1
2
3
4