8
III. Piping
A. Drain domestic water system.
1. Shut off cold water supply at main shut-off valve.
2. Open one or more system faucets to relieve
pressure. Open system drain valve, leaving faucets
open to relieve vacuum.
3. Disconnect existing domestic water heating system
(if applicable).
B. Position Alliance™ in final location.
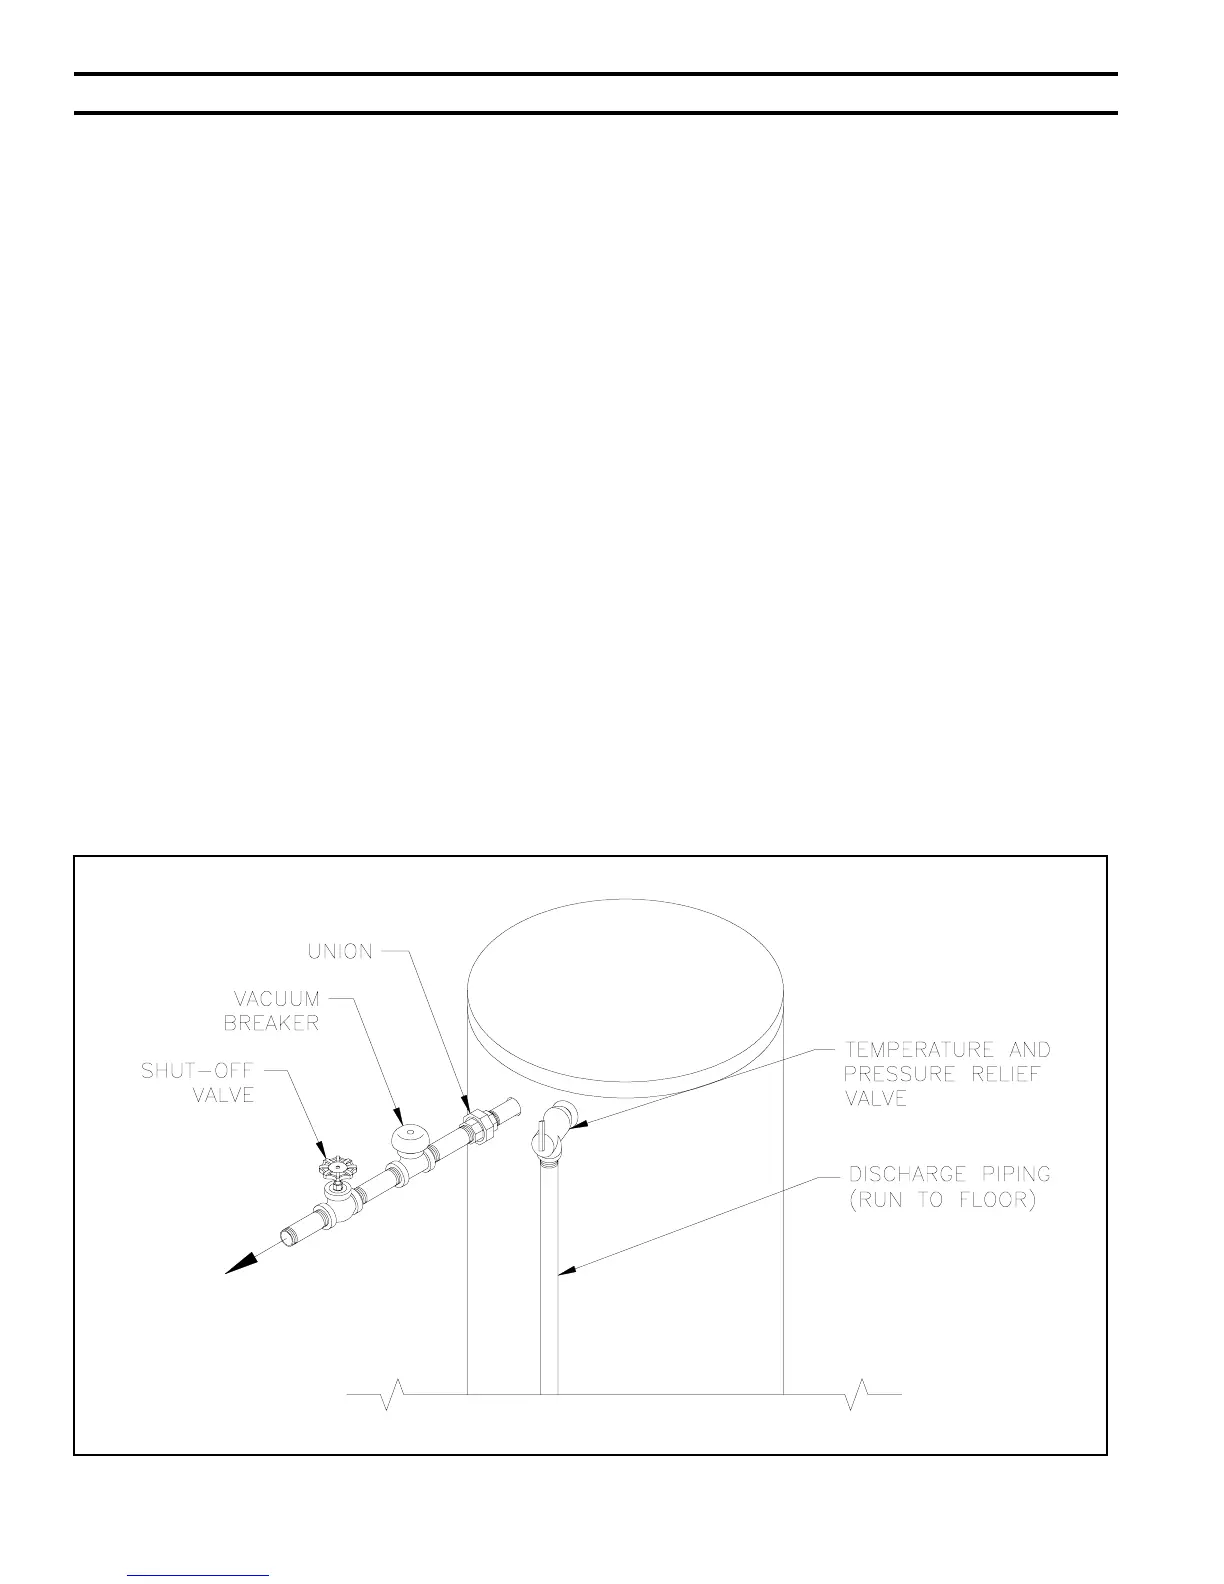
C. Connect domestic hot water piping (see Figure 1).
1. Install piping and union out of indicated supply
connection.
2. Install Temperature-Pressure Relief Valve (installer
supplied) in the indicated location. Do not place
shut-off valve between the tank and relief valve.
Figure 1: Hot Water and Relief Valve Piping
3. Pipe relief valve discharge to floor.
4. Connect from supply union to hot water supply
system using vacuum breaker, shut-off valve, and
heat trap (to prevent thermal siphoning during non-
draw periods).
D. Connect cold water supply piping (see Figure 2).
1. Install piping into connection on bottom of tank as
indicated.
2. Connect to cold water supply system using union,
shut-off valves, expansion tank (where required),
back flow preventer (where required), and filter
(recommended to prevent sediment buildup in
tank).
E. Fill Alliance™ tank.
1. Open all faucets to allow air to purge from tank and
piping. Remove screens on faucet.
2. Open domestic hot water shut-off valve.
3. Open cold water inlet shut-off valve.