The device described in this manual is a BUSH HOG® Model RTS Rotary Tiller.
Function Description:
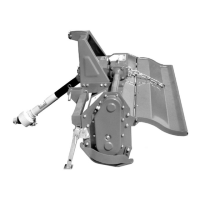
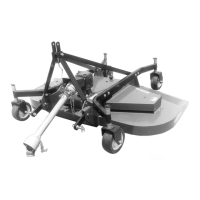
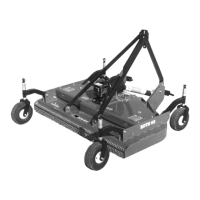
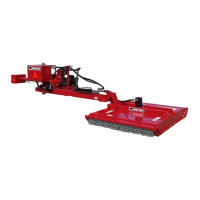
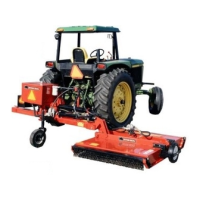
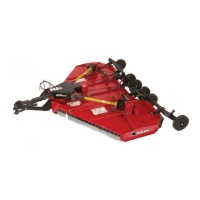
The BUSH HOG® Model RTS Rotary Tiller is an agricultural implement designed for light-duty soil cultivation. Its primary function is to prepare soil for planting by breaking up and mixing the earth, creating a fine tilth. This is achieved through a rotor equipped with blades that rotate to till the soil. The tiller is designed for use in environments relatively free of large foreign objects like rocks and roots. It attaches to a tractor via a 3-point hitch and is powered by the tractor's PTO (Power Take-Off) shaft. Key features include adjustable skid shoes and a rear deflector shield, which allow the operator to control the tilling depth and the fineness of the soil finish. The tiller also offers an offsetting capability, allowing it to be positioned to cover tire tracks or work close to fences. The movable gearbox ensures that the driveline angle remains constant even when the tiller is offset.
Important Technical Specifications:
The RTS series includes four models: RTS40, RTS50, RTS62, and RTS74, each with varying tilling and overall widths.
- Tilling Width:
- RTS40: 38 inches
- RTS50: 50 inches
- RTS62: 62 inches
- RTS74: 74 inches
- Overall Width:
- RTS40: 44 inches
- RTS50: 56 inches
- RTS62: 68 inches
- RTS74: 80 inches
- Maximum Offset:
- RTS40: 6 inches
- RTS50: 12 inches
- RTS62: 12 inches
- RTS74: 18-1/4 inches
- An additional 4-1/2 inches of offset can be obtained on RTS40 and RTS50 by reversing hitch lugs.
- Blades per Flange: 4 for all models.
- Number of Flanges:
- RTS40: 6
- RTS50: 8
- RTS62: 10
- RTS74: 12
- Hitch Type: 3-point Cat I only.
- PTO Speed: 540 rpm.
- Rotor Speed: 246 rpm.
- Maximum Recommended HP: 50.
- Maximum Till Depth: 4 inches (one pass), with a maximum of 7 inches achievable with multiple passes.
- Gearbox Oil Capacity: 27 ounces.
- Weight (lbs.):
- RTS40: 366
- RTS50: 418
- RTS62: 470
- RTS74: 525
- Driveline Protection: Shear bolt or slip clutch.
The drivetrain consists of a triangular, telescoping input driveshaft, a 90-degree transfer gearbox, a hexagon cross-shaft, and a chain-driven rotor. The chain is self-adjusted by a spring tension device.
Usage Features:
- Attachment: The tiller attaches to a tractor's 3-point hitch. The driveline length may need to be adjusted (shortened) based on the specific tractor/implement hitch points to ensure proper overlap and prevent damage.
- Offsetting: The tiller can be offset to the right by loosening U-bolts, sliding hitch lugs and the gearbox to the desired position, and then retightening the U-bolts. This allows for working close to fences or covering tire tracks.
- Tilling Depth Adjustment: The depth of till is regulated by moving an adjusting bolt and skid shoes up or down. Holes in the adjusting plate provide 1-inch increments, with the bottom hole corresponding to a 4-inch tilling depth.
- Soil Tilth Control: Tractor forward speed and rear shield adjustment regulate the finished soil results. Slower forward speed with the rear shield fully lowered produces the finest finish, suitable for mulching, mixing, and burying weeds. Increasing forward speed and raising the shield results in coarser soil. For extremely rocky soil, raising the shield is recommended.
- Operation: After attaching and adjusting, the operator starts the tractor, raises the tiller, engages the PTO at idle speed, then places the tractor in gear and proceeds forward, increasing speed and lowering the tiller into the soil. It's crucial not to turn with the tiller in the ground or use reverse gear while lowered, as this can damage the tiller and tractor linkage. Operating in the raised position should also be avoided.
- Transporting: The PTO drive must be disengaged when transporting the tiller. All state and local laws regarding transport on public roads, including the use of flashing warning lights, must be observed.
Maintenance Features:
The manual outlines a comprehensive maintenance schedule to ensure optimal performance and longevity.
- Before Each Use:
- Check tractor tire air pressure.
- Inspect blades and rotor for foreign objects and remove any found.
- Check blade bolts for tightness (tighten to 73 ft./lbs.).
- Inspect blades for wear and replace if necessary (replace when approximately 1/4" of wear is left on the blade tip).
- Ensure driveline shields are in place and in good repair.
- Clean safety decals and replace any missing or illegible ones.
- Perform lubrication as specified.
- Listen for abnormal sounds during operation.
- After Each Use:
- Clean all debris from the machine, especially the underside of the deck and decals. Replace any missing or illegible decals.
- Inspect the tiller for worn or damaged components and repair/replace before the next use.
- Store in a dry place.
- Lubrication (NLGI Grade 2 multi-purpose grease and EP80W-90 gear oil):
- Before Each Use: Lubricate driveline universal joints and driveline guard. Disconnect driveline sections, apply a thin coat of multi-purpose grease to the outer surface of the inner (male) section, and reassemble.
- Every 40 Hours: Check and fill the input gearbox with EP80W-90 gear oil to the check plug level (capacity is 27 ozs.).
- Every 100 Hours: Lubricate the shearbolt yoke grease fitting. Remove the chain drive shield, clean out old grease, check chain slack (if one link or more of slack, have an authorized Bush Hog dealer resize the chain), pack the bottom of the shield with multi-purpose grease to the fill line, and reinstall the shield with a new gasket.
- Bolt Replacement: Shear bolts should be replaced with genuine Bush Hog replacement shear bolts.
- Slip Clutch Operational Check: After extended storage, loosen the eight nuts retaining clutch springs by one full turn. With the tiller blades firmly on the ground, engage the tractor PTO at idle speed for 2-3 seconds; the clutch should slip without turning the blades. If it doesn't slip, contact a dealer. Retighten nuts to within 1/64" of their original position.
- Slip Clutch Adjustment: The slip clutch is factory preset. Periodic adjustment is recommended. Check all spring lengths for uniformity. Adjust nuts in 2/3 turn increments (2 flats) or 1/3 turn increments if further adjustment is needed, consulting a dealer. Adjust only to prevent slippage under normal conditions; occasional slippage is normal for drivetrain protection in rocky or root-filled environments.
Safety Precautions:
The manual emphasizes numerous safety precautions, including:
- Reading the Operator's Manual thoroughly.
- Familiarizing oneself with controls and decals.
- Performing pre-operation inspections.
- Not allowing children or untrained adults to operate the implement.
- Keeping the area of operation clear of persons and objects.
- Never operating without all guards and shields in place.
- Lowering the implement, stopping the tractor, and applying the parking brake before dismounting.
- Keeping hands and feet away from the implement.
- Wearing personal protective equipment.
- Securely supporting the tiller when performing adjustments or maintenance underneath.
- Never standing between the tractor and tiller while backing up.
- Reducing speed when transporting.
- Using tractor flashing warning lights on roads.
- Using a ROPS and seat belt equipped tractor.
- Staying clear of rotating drivelines and never operating without driveline shields in good condition.
- Never turning with the tiller in the ground or using reverse gear while lowered.
- Ensuring additional tractor front ballast is used for stable operation and transport.