Customer Service HELPLINE 1-888-774-5840 www.bushnelltents.com
BEFORE YOU BEGIN:
• Before camping, unpack tent and ensure all parts are accounted for.
• Select a level site clear of rocks, branches, and other hard or sharp
objects to setup your tent.
• Always secure the tent using all stakes and tie-downs provided to
prevent property damage or personal injury.
• Keep tent clear of power lines!
• Do not set up your tent under trees because of potential lighting strikes
or falling tree limbs in inclement weather.
WANT
MORE
?
See page 6 and 7 for frequently asked questions
and parts diagram. Visit www.bushnelltents.com
for additional camping tips and information!
1
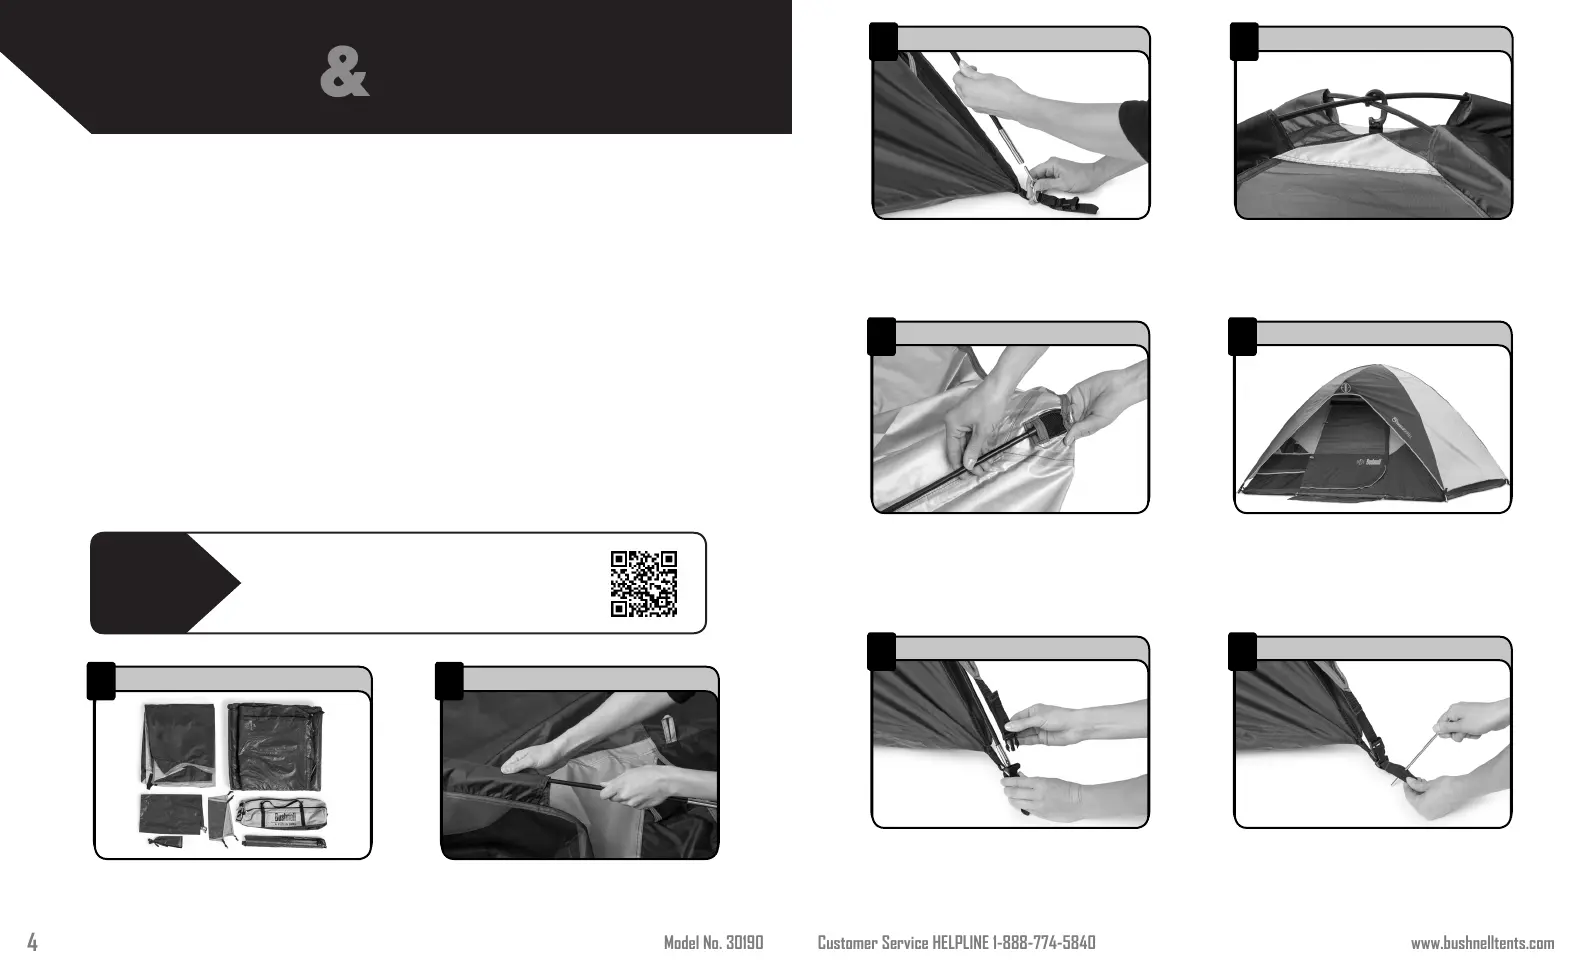
PREPARE FOR SETUP
1
Remove all contents from bag.
2
Lay tent fabric out flat.
SETUP TAKE DOWN
2
INSERT POLES
3
ATTACH POLES
4
LINK POLES
5
PREPARE RAINFLY
6
PLACE RAINFLY
7
ATTACH RAINFLY & FLOOR MAT
8
SECURE TENT
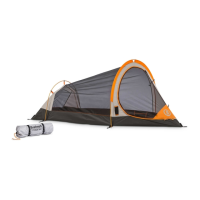
TENT CONTENTS:
• Tent
• Rainfly
• Poles (3)
• Metal Stakes (12)
1
Using the remaining small pole, set
both pole ends into webbing pockets in
the middle of the silver side of rainfly.
² Tie the pole to the rainfly with the ties
located at the center of the rainfly.
1
Flip the rainfly right-side-up.
2
Drape the rainfly over tent, placing
the “B” logo above the door.
¹ Attach (4) rainfly buckles and hook-and-
loop tabs to secure the rainfly to the tent.
² Attach Floor Mat to loops at front of tent,
below door with (2) black hooks on the mat.
• Gear Loft
• Floor Mat
1
Secure the tent by staking down the (4)
corners with included stakes.
2
Stake out the (4) orange corner tie-
downs, and the (2) side vents.
1
Connect the sections of each of the (3) poles.
² Insert the two large poles into sleeves. Poles
will create an “X” across the tent.
Link poles together at the top of the
tent where they intersect with black
hook.
1
Insert the silver pins into the ends of
the poles at each corner of the tent.
2
Secure tent fabric to poles using
black clips.
• Carry Bag

 Loading...