EasyManua.ls Logo

Buyers Products Company LT20 User Manual

Buyers Products Company LT20
2 pages
To Next Page IconTo Next Page
Page #1 background imageLoading...
Page #1 background image
Quality since 1946
9049 Tyler Blvd. • Mentor, Ohio 44060
Phone (440) 974-8888 • Fax (440) 974-0165
Toll-Free Fax 800-841-8003 • buyersproducts.com
Installation Instructions
LT20 Backpack Blower Rack
for Utility Landscape Trailers
—continued on other side
Holds most backpack blowers. Locks with a long
shackle padlock.
STIHL
®
BR-340 and BR-420 owners must use rack part no. LT22.
Important!
Before you begin installing:
1. Read and understand these instructions
completely.
2. Verify that you have received all the parts
listed in the bill of materials.
CAUTION:
Always wear safety glasses when using power tools.
Utility Trailer Installation Instructions
Tools Required:
•Two 9/16" Wrenches and/or Sockets
•Electric Drill
•13/32" Drill Bit
•Carpenters Square
1. Clamp the blower rack to the trailer side rail with
the base of the upright on the trailer floor. Verify the
rack is square to the trailer deck in both directions
with a carpenter’s square.
2. After determining the position of the rack, mark
center of the two holes in the base on the trailer deck.
WARNING! Check for locations of brake lines and
electrical wiring etc., before drilling any holes.
Any damage to trailer during installation is the
installer’s sole responsibility.
3. Remove the rack from the trailer and use a 13/32"
drill bit to drill two holes in your trailer deck as marked.
4. Assemble the rack to the trailer with two 3/8-16
x 2-1/2" cap screws, four 3/8" flat washers and two
3/8-16 nylock nuts. Do not tighten screws at this time!
5. Clamp the blower rack to the rail of the trailer.
Make sure the rack is square to the rail and the deck
of the trailer with a square.
6. With the rack clamped into position drill a 13/32"
hole through the center of 1" tube and the trailer rail.
7. Fasten rack to the trailer rail with a 3/8-16 x 2" cap
screw, two 3/8" flat washers, and a 3/8-16 nylock nut.
Tighten all three screws at this time.
1 3000065 1 Weldment, Blower Rack
2 TS31 1 Strap, Rubber Tarp 31"
3 9225 2 S-Hook, 2-1/2" Zn, Tarp Strap
4 - 2 Washer, Flat 3/8 USS Zn
5 - 2 Screw, Hex Head Lag, 3/8 x 2, Zn
ITEM PART NO. QTY. DESCRIPTION
Bill of Materials
Question and Answer IconNeed help?

Do you have a question about the Buyers Products Company LT20 and is the answer not in the manual?

Buyers Products Company LT20 Specifications

General IconGeneral
BrandBuyers Products Company
ModelLT20
CategoryOther
LanguageEnglish

Summary

Utility Trailer Installation Instructions

Step 1: Clamp Blower Rack to Trailer Side Rail

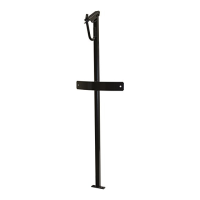
Clamp the blower rack to the trailer side rail and verify squareness to the deck in both directions.

Step 2: Mark Holes on Trailer Deck

After positioning, mark the center of the two holes in the rack base on the trailer deck.

Step 3: Drill Holes in Trailer Deck

Remove the rack and use a 13/32" drill bit to drill two holes in your trailer deck as marked.

Step 4: Assemble Rack to Trailer Deck

Assemble the rack to the trailer with cap screws, washers, and nylock nuts. Do not tighten screws yet.

Step 5: Clamp Blower Rack to Trailer Rail

Clamp the rack to the trailer rail, ensuring it is square to the rail and the deck.

Step 6: Drill Hole Through Trailer Rail

Drill a 13/32" hole through the center of the 1" tube and the trailer rail.

Step 7: Fasten Rack to Trailer Rail

Fasten the rack to the trailer rail with a cap screw, washers, and a nylock nut. Tighten all screws.

Enclosed Trailer Installation Instructions

Step 1: Cut Blower Rack Bottom

Cut 18" off the bottom of the blower rack with a hack saw to maximize floor space.

Step 2: Drill Holes in Blower Rack Tube

Drill two 13/32" holes through the center of the 1" square tube, at least 12" apart.

Step 3: Add Plywood Shim Strips

Attach 3/4" plywood shim strips to the walls, secured to wall support studs.

Step 4: Mark Holes Against Shims

Hold the blower rack vertically against the shims and mark the positions for the two 13/32" holes.

Step 5: Drill Pilot Holes for Lag Screws

Drill two 1/4" pilot holes for 3/8" lag screws, being careful not to drill through the outside wall.

Step 6: Fasten Rack to Trailer Wall

Fasten the blower rack to the trailer wall with two 3/8" x 2" lag screws and two 3/8" flat washers.

Related product manuals