Do you have a question about the Buyers SaltDogg TGS07 and is the answer not in the manual?
| Model | TGS07 |
|---|---|
| Hopper Material | Polyethylene |
| Mounting | Tailgate |
| Power Source | 12V DC |
| Spreading Rate | Adjustable |
| Spreading Width | Up to 20 feet |
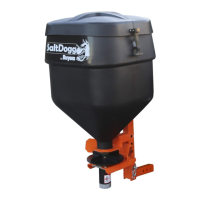
| Product Type | Tailgate Salt Spreader |
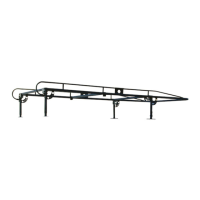
Disconnect the frame from the hopper, saving specific screws and discarding nuts, then slide the frame into the hitch receiver.
Slide the hopper assembly between the frame uprights, resting the front portion on the truck's bumper.
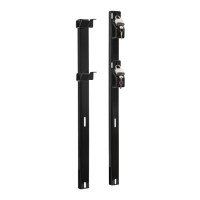
Align hopper holes with frame slots, use slots for horizontal or slight upward tilt, and secure with screws, washers, and nuts loosely.
Slide hopper and frame towards the tailgate, align hitch receiver holes with frame holes, and secure with hitch pin and cotter pin.
Use specific screws with washers and flanged nuts between hopper side brackets and frame, ensuring correct positioning without contact.
Evenly tighten frame nuts, then bolts in frame uprights, and finally nuts between hopper side brackets and frame to secure the spreader.
Attach the shield to the trough bracket using specified screws, washers, and nuts as illustrated.
Attach the spinner protector to the spreader frame using specified screws, washers, and nuts.
Attach the spinner disk to the gear motor shaft using the upper hole, securing with a clevis pin and cotter pin.
Place the lid on the hopper, bend hinges outward, slide openings onto protrusions, and secure with a lynch pin.
Install the discharge door on trough tabs and secure with a lock pin and cotter pin to prevent material loss during transport.
Route wire harnesses, connect connectors to the control box, attach fuse connector, and route power and wire harnesses to battery and motor.
Notes on material absorption, filling hopper, and avoiding extended periods of material storage in the hopper.
Regular inspection for loose fasteners, broken wires, and lubrication of bearings every 10-15 hours.
Diagram illustrating the main components of the tailgate auger system with numbered parts.
List of parts for the tailgate auger, including item number, part number, quantity, and description.
Detailed diagram of the TGS07 hopper assembly, showing numbered components.
Bill of materials for the TGS07 hopper assembly, listing parts and quantities.
Diagram and bill of materials for the TGS07 trough assembly, including motor, auger, and trough components.
Diagram and bill of materials for the TGS07 hardware box, listing controller, wiring, and various fasteners.
Essential safety guidelines to follow before, during, and after operating the spreader to prevent injury or damage.
Instructions for checking box contents against the parts list and referring to part numbers for replacement.
Details of the spreader warranty, covering defects in material and workmanship for one year.