EasyManua.ls Logo

Buyers SaltDogg TGSUV1B User Manual

Buyers SaltDogg TGSUV1B
4 pages
To Next Page IconTo Next Page
Page #1 background imageLoading...
Page #1 background image
1
TM
Installation Instructions
continued inside
SPREADER ASSEMBLY
Check contents of box against parts list to make
sure all components are included. When ordering
replacement or spare parts refer to parts list for
part numbers.
TOOLS NEEDED FOR ASSEMBLY
• 3/8 or 1/2 drives ratchet with 3/8, 7/16, 1/2, 9/16
& 15/16 sockets.
• 7/16, 1/2, 9/16 & 15/16 wrench.
• 1/8" Allen wrench
SPINNER SHIELD AND RECEIVER MOUNT
See Fig.1
Install the 2" or 1¼" receiver mount (5 or 6) into
your truck or SUV receiver hitch. Secure receiver
mount using hitch pin (7). Attach the motor/frame
assembly (1) to the receiver mount by inserting the
5/8 bolt and nut (8, 9) in the bottom hole and the
hitch pin (7) in the top hole. It is recommended to
mount the frame at the highest possible
position for assembly purposes. Install the spin-
ner shield (10) with 3/8-16 x 1 hex head cap screws,
flat washers and hex nuts (11, 12, and 13). Position
the shield about a 1/2" away from the spinner and
center it to the spinner. The shield position can be
changed later to alter the salt pattern if needed.
TGSUV1B
SUV Salt Spreader
9049 Tyler Blvd. • Mentor, Ohio 44060
Phone (440) 974-8888 • Fax (440) 974-0165
Toll-Free Fax 800-841-8003 • saltdogg.com
Question and Answer IconNeed help?

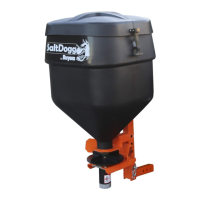
Do you have a question about the Buyers SaltDogg TGSUV1B and is the answer not in the manual?

Buyers SaltDogg TGSUV1B Specifications

General IconGeneral
ModelTGSUV1B
Hopper MaterialPolyethylene
Frame MaterialSteel
Mounting TypeReceiver Hitch
Power Source12V DC
Product TypeTailgate Spreader
Vehicle ApplicationSUV
Spread WidthUp to 20 feet
Compatibility2 in. receiver hitch

Summary

Spreader Assembly and Initial Mounting

Spreader Assembly Check

Verify all components are present by checking against the parts list.

Receiver Mount and Spinner Shield Installation

Install receiver mount, attach motor/frame, and position spinner shield for optimal salt pattern.

Hopper Assembly

Hopper and Frame Assembly Details

Slide hopper into frame, attach retainer, and secure cover latching components.

Operation and Maintenance

Vehicle Installation and Power Connection

Install unit into receiver hitch, plug in harness, and verify vehicle's aux. power outlet rating.

Material Usage and Flow Gate Adjustment

Adjust flow gate for desired material flow and fill hopper appropriately.

Regular Maintenance Checks

Periodically inspect and retighten fasteners, check electrical components, and clean spreader.

Related product manuals