4
Setting up your Burner
—————————————————————————————————
A. Burner Assembly
All Models
• Check for damage. Do not use damaged compo-
nents.
• The hose assembly must be replaced prior to the
appliance being put into operaon if there is evi-
dence of excessive abrasion or wear, or if the hose
is damaged use a recplacement hose assembly
• The replacement hose assembly specied by
the manufacturer.
• The burner must be replaced prior to the appliance
being put into operation if it is evident that the burner is
damaged. Use a replacement burner assembly specified
by the manufacturer.
• Posion the assembly in the desired locaon.
This locaon must be adjacent to the gas supply
line. You must have easy access to the gas valve
control knob aer it is installed and connected to
the gas supply because the ON/OFF gas valve is
used to turn the burner on and o.
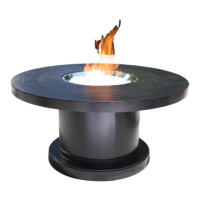
B. Glass Installation
Spread glass out evenly over burner area. Use all
glass provided for best eect. Keep glass clear
of igniton electrode to avoid accidental blockage.
Note:
A percentage of glass beads may arrive split in
half. This is normal. Addional beads may split
aer use. This is also normal due to the physical
properes of glass.
LP Gas Models
• Make sure the
tank valve is turned completely
o (clockwise).
• Ensure the tank valve has the proper external
• Small mang threads (tank valve marked “USE WITH
TYPE 1”).
• Inspect the hose shipped with the appliance for
any damage. Do not use if there is evidence of
damage.
• Connect the end of the hose onto the ON/OFF
gas valve of the appliance. Make sure it is secured
ghtly.
• Connect the regulator assembly to the tank
valve. Hand-ghten only (clockwise). Do not use a
wrench to ghten! Use of a wrench may damage
the quick closing nut and result in a hazardous
condion.
• Posion the hose out of pathways where people
might trip over it or in areas where the hose might
be subject to accidental damage.
DO NOT BURN WITHOUT GLASS OR
OTHER SUBSTRATE SUCH AS LAVA
ROCK IN BURNER.
8