Page 6 of 7
CV-550SPK V3 WATERPROOF KEYPAD
INSTALLATION INSTRUCTIONS
5. INSTALLATION
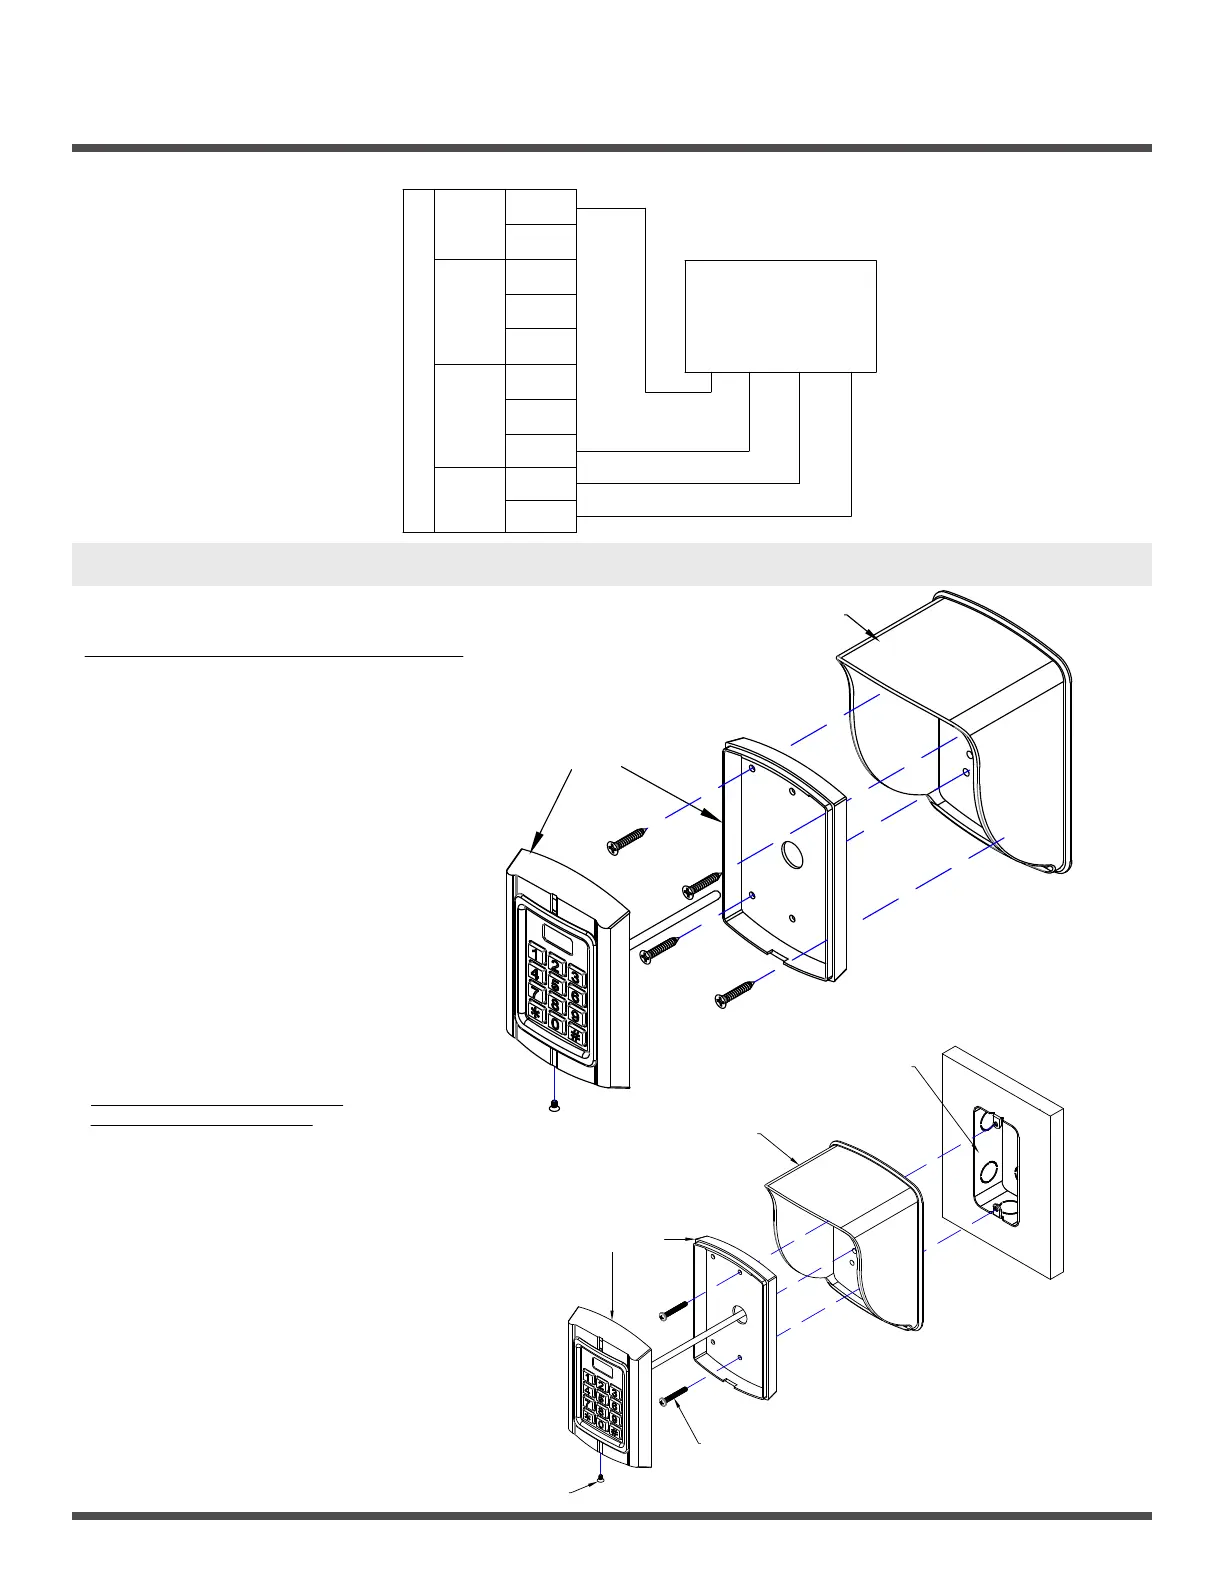
CV-550SPK V3 Wall Flush Mounng with Rain/Privacy Shield:
Note: Make necessary arrangements for wiring before
Mounng the Keypad to the wall.
1. Remove the mang screw located at the boom of the
keypad, allowing you to mount the keypad with the Rain/Privacy
Shield to the wall.
2. Spot drill hole on the wall and take the supplied Self
threading screws to ghten back of the Keypad to the
Rain/Privacy Shield.
3. Place the front of the keypad onto the back of the
keypad then ghten with the mang screw to keep keypad
in place.
Rain/Privacy Shield
CV-550SPK V3
Thread screws
through these
four holes
Rain/Privacy Shield
3"
[76mm]
2"
[50mm]
CV-550SPK V3 Inwall Electrical Box Flush
Mounng with Rain/Privacy Shield:
Note: Thread the Keypad wire through the rain
hood to make necessary arrangements for wiring
before Mounng the Keypad.
1. Remove the mang screw located at the
boom of the keypad, allowing you to mount the
keypad with the Rain/Privacy Shield to the Electrical Box.
2. Take the supplied #6-32 screws and place it
through the center top and boom holes on the
Keypad back plate, through the Rain/Privacy Shield then
ghten screws to keep the plate and Rain/Privacy Shield
onto the electrical box.
3. Place the front of the keypad onto the back
of the keypad then ghten with the mang screw
to keep keypad in place.
Inwall SingleGang
Electrical Box
Rain/Privacy Shield
CV-550SPK V3
6-32 Mounting
Screw
Mating Screw
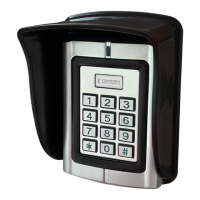
Wiring the CV-550SPK V3 to an Access Controller (Wiegand Out)
Single-Door Standalone Access Controller
+12V
ALARM
NC
NO
COM
D_IN
OPEN
GND
Red
Grey
Orange
Blue
Purple
Brown
Yellow
Black
+ -
D0 D1
Access Controller
Reader Terminal
D0
D1
White
Green
 Loading...