6 7
WARNING
Appliance must be leak checked outdoors in well-ventilated
area, away from ignition sources such as gas fired or electrical
appliances. During leak test, keep appliance away from open
flames or sparks.
HOSE CHECK
• Before each use, check to see if hoses are cut or worn.
Replace damaged hose assembly before using appliance.
Use only valve/hose/regulator specified by manufacturer. See
product sheet for hose & regulator information.
WARNING
• Do not use appliance until leak checked.
• If you cannot stop a gas leak, immediately close LP tank
valve and call LP gas supplier or your fire department!
CHECKING FOR LEAKS
1. After all connections are completed, check all connections
and fittings for leaks with a soap solution.
2. With all valves closed, apply the leak check solution (50/50
mix of dish washing soap detergent and water) to all gas
carrying connections and fittings.
3. Open tank valve. Presence of bubbles at areas of wet
solution indicates a gas leak. If leaks are detected or you
smell or hear gas, shut off the valve and repair the leak or
replace the defective part.
Do not use the fire pit until all leaks are corrected.
Care should be taken to protect the fuel supply hose from
damage from either foot or vehicle traffic. If the fire pit is not
in use, the gas must be turned off at the supply cylinder and
the cylinder should be disconnected from the fire pit. Storage
of the fire pit indoors is only permissible if the cylinder is
disconnected and removed from the fire pit.
CAUTION
The burner must be inspected before each use of the appliance.
If it is evident that the burner is damaged it must be replaced
before the appliance is put into use. The burner must be replaced
only by factory authorized parts as specified by the manufacturer.
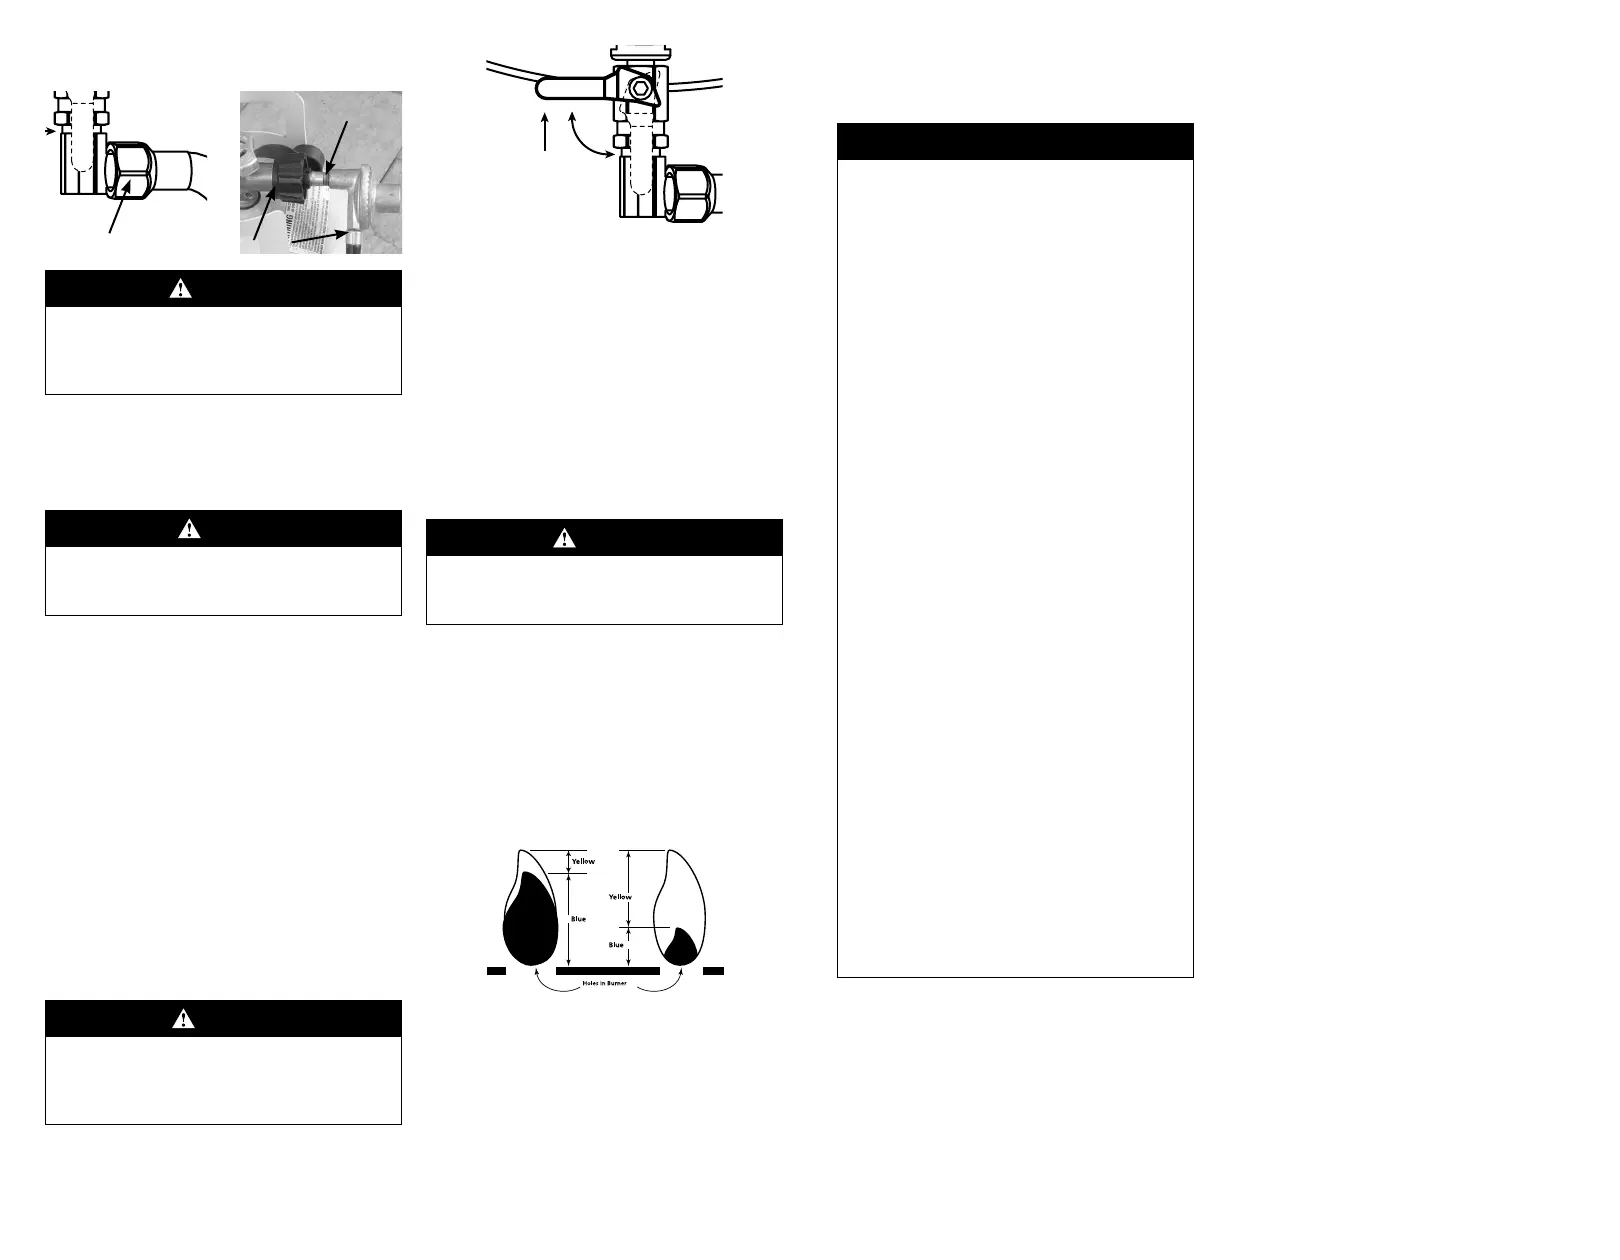
OPERATING INSTRUCTIONS
Lighting Procedures
Warning: Do not lean over the fire pit while lighting.
1. Check all connections for leaks using the “soapy water” test.
2. Check for any blockage to the venturi tube or burner. Remove
any foreign objects or matter.
3. Be sure the burner control knob is “OFF”.
4. Open the LP cylinder valve ONLY
1-1/2 turns by turning counterclockwise.
5. Insert a long-nose gas lighter next to the burner, making
sure it sits over the burner. Open the valve next to the burner
by turning the lever to the ON position. If the burner does not
light within 4 or 5 seconds, turn the control knob off, wait 5
minutes, and repeat the process.
CAUTION
The fire pit can become very hot while in use. Do not touch
any portion of the fire pit except for the control knob next to
the regulator. It may be necessary to use protective gloves.
SHUTTING THE FIRE PIT OFF
Turn the control knob off and the burner flame should then go
out. Turn off the LP cylinder valve by turning the knob clockwise
until it stops. Follow instructions in this manual for proper
storage procedures and the important warnings and safe
guides. When an LP tank is not connected, and to help prevent
dirt or other foreign particles from clogging the HVR, hang the
end of the HVR hose from the outer ring.
Inspect the flame at the burner to ensure a proper flame.
To protect your fire pit from weather, always keep your fire pit
covered while not in use. The cover must be removed and stored
safely away from the fire pit when the fire pit is in use.
CLEANING
Clean the stand of the fire pit using hot soapy water. High
temperature spray paint can be used to touch up any scratches
in the paint. Use a wire brush to remove any loose paint before
touching up. Make sure to dry thoroughly before use. The rocks
can be removed from the fire pit and cleaned using soapy water
ON
OFF
ON
Control Valve
or sprayed off using a hose sprayer. The outside of the burner
may be wiped clean using soapy water. A pipe cleaner can be
used to remove any spider webs from the venturi tube.
LIMITED WARRANTY
To activate warranty, register on-line at: www.CampChef.com
The manufacturer warrants stove components (except
paint and finish) to be free from defect in materials and
workmanship for 1 year from the date of purchase. All
accessories (included with stove or purchased separately)
are warranted from defect in materials and workmanship
for 90 days from the original purchasing date. Within these
periods, the manufacturer will replace or repair defective
parts deemed unusable from its original intent by making
available the parts thereof FOB Hyde Park, UT 84318
Product paint and finish is not warranted. The exterior finish
of the product will wear down over time.
Clean the unit after each use to maintain the finish and
prolong the life of your product. Wipe away all grease and
ashes. Keep metal products free of moisture, salts, acids
and harsh fluctuations in temperatures.
Warranty does not cover normal wear of parts or damage
caused by misuse, abuse, overheating and alteration.
Repairs or alterations made by anyone other than Camp
Chef are not covered in this Warranty. Manufacturer will not
be held liable for any losses due to neglectful operation.
Furthermore, this Warranty does not cover damaged caused
by natural disasters such as earthquakes, hurricanes,
tornadoes, floods, lightning, fires, etc.
Upon the expiration of this warranty all such liability will
terminate. No other warranties are expressed or implied.
Keep all original sales receipts. Proof of purchase is
required to obtain Warranty services. Prior written approval
and a Return Authorization Number must be obtained and
accepted for repair or replacement only. Returns must be
shipped prepaid. Collect shipment or shipments without a
Return Authorization Number will not be accepted.
To obtain Warranty services call 1.800.650.2433.
*Warranty applies to the contiguous US states only.
 Loading...